garden salad with pesto dressing
Posted: August 16, 2020 Filed under: salads, sides | Tags: basil, chicken, green beans, green bell pepper, lettuce, olive oil, parsley, pepper, red bell pepper, salt, spinach, tarragon, tomatoes, vegetable oil, zucchini Leave a comment
Fresh ‘n Tasty
The scan of the Mom’s original recipe clipping (below) hails from a Family Circle Magazine recipe from 1978. I don’t remember eating many salads in my younger years (hooray!) so I definitely dodged a bullet, as a lover of carbs.
Family Circle was one of my Mom’s go-to reads and I thought it was still in circulation. Sadly, it is no more but it had a good run of it from 1932 – 2019. You can read more about Family Circle Magazine here.
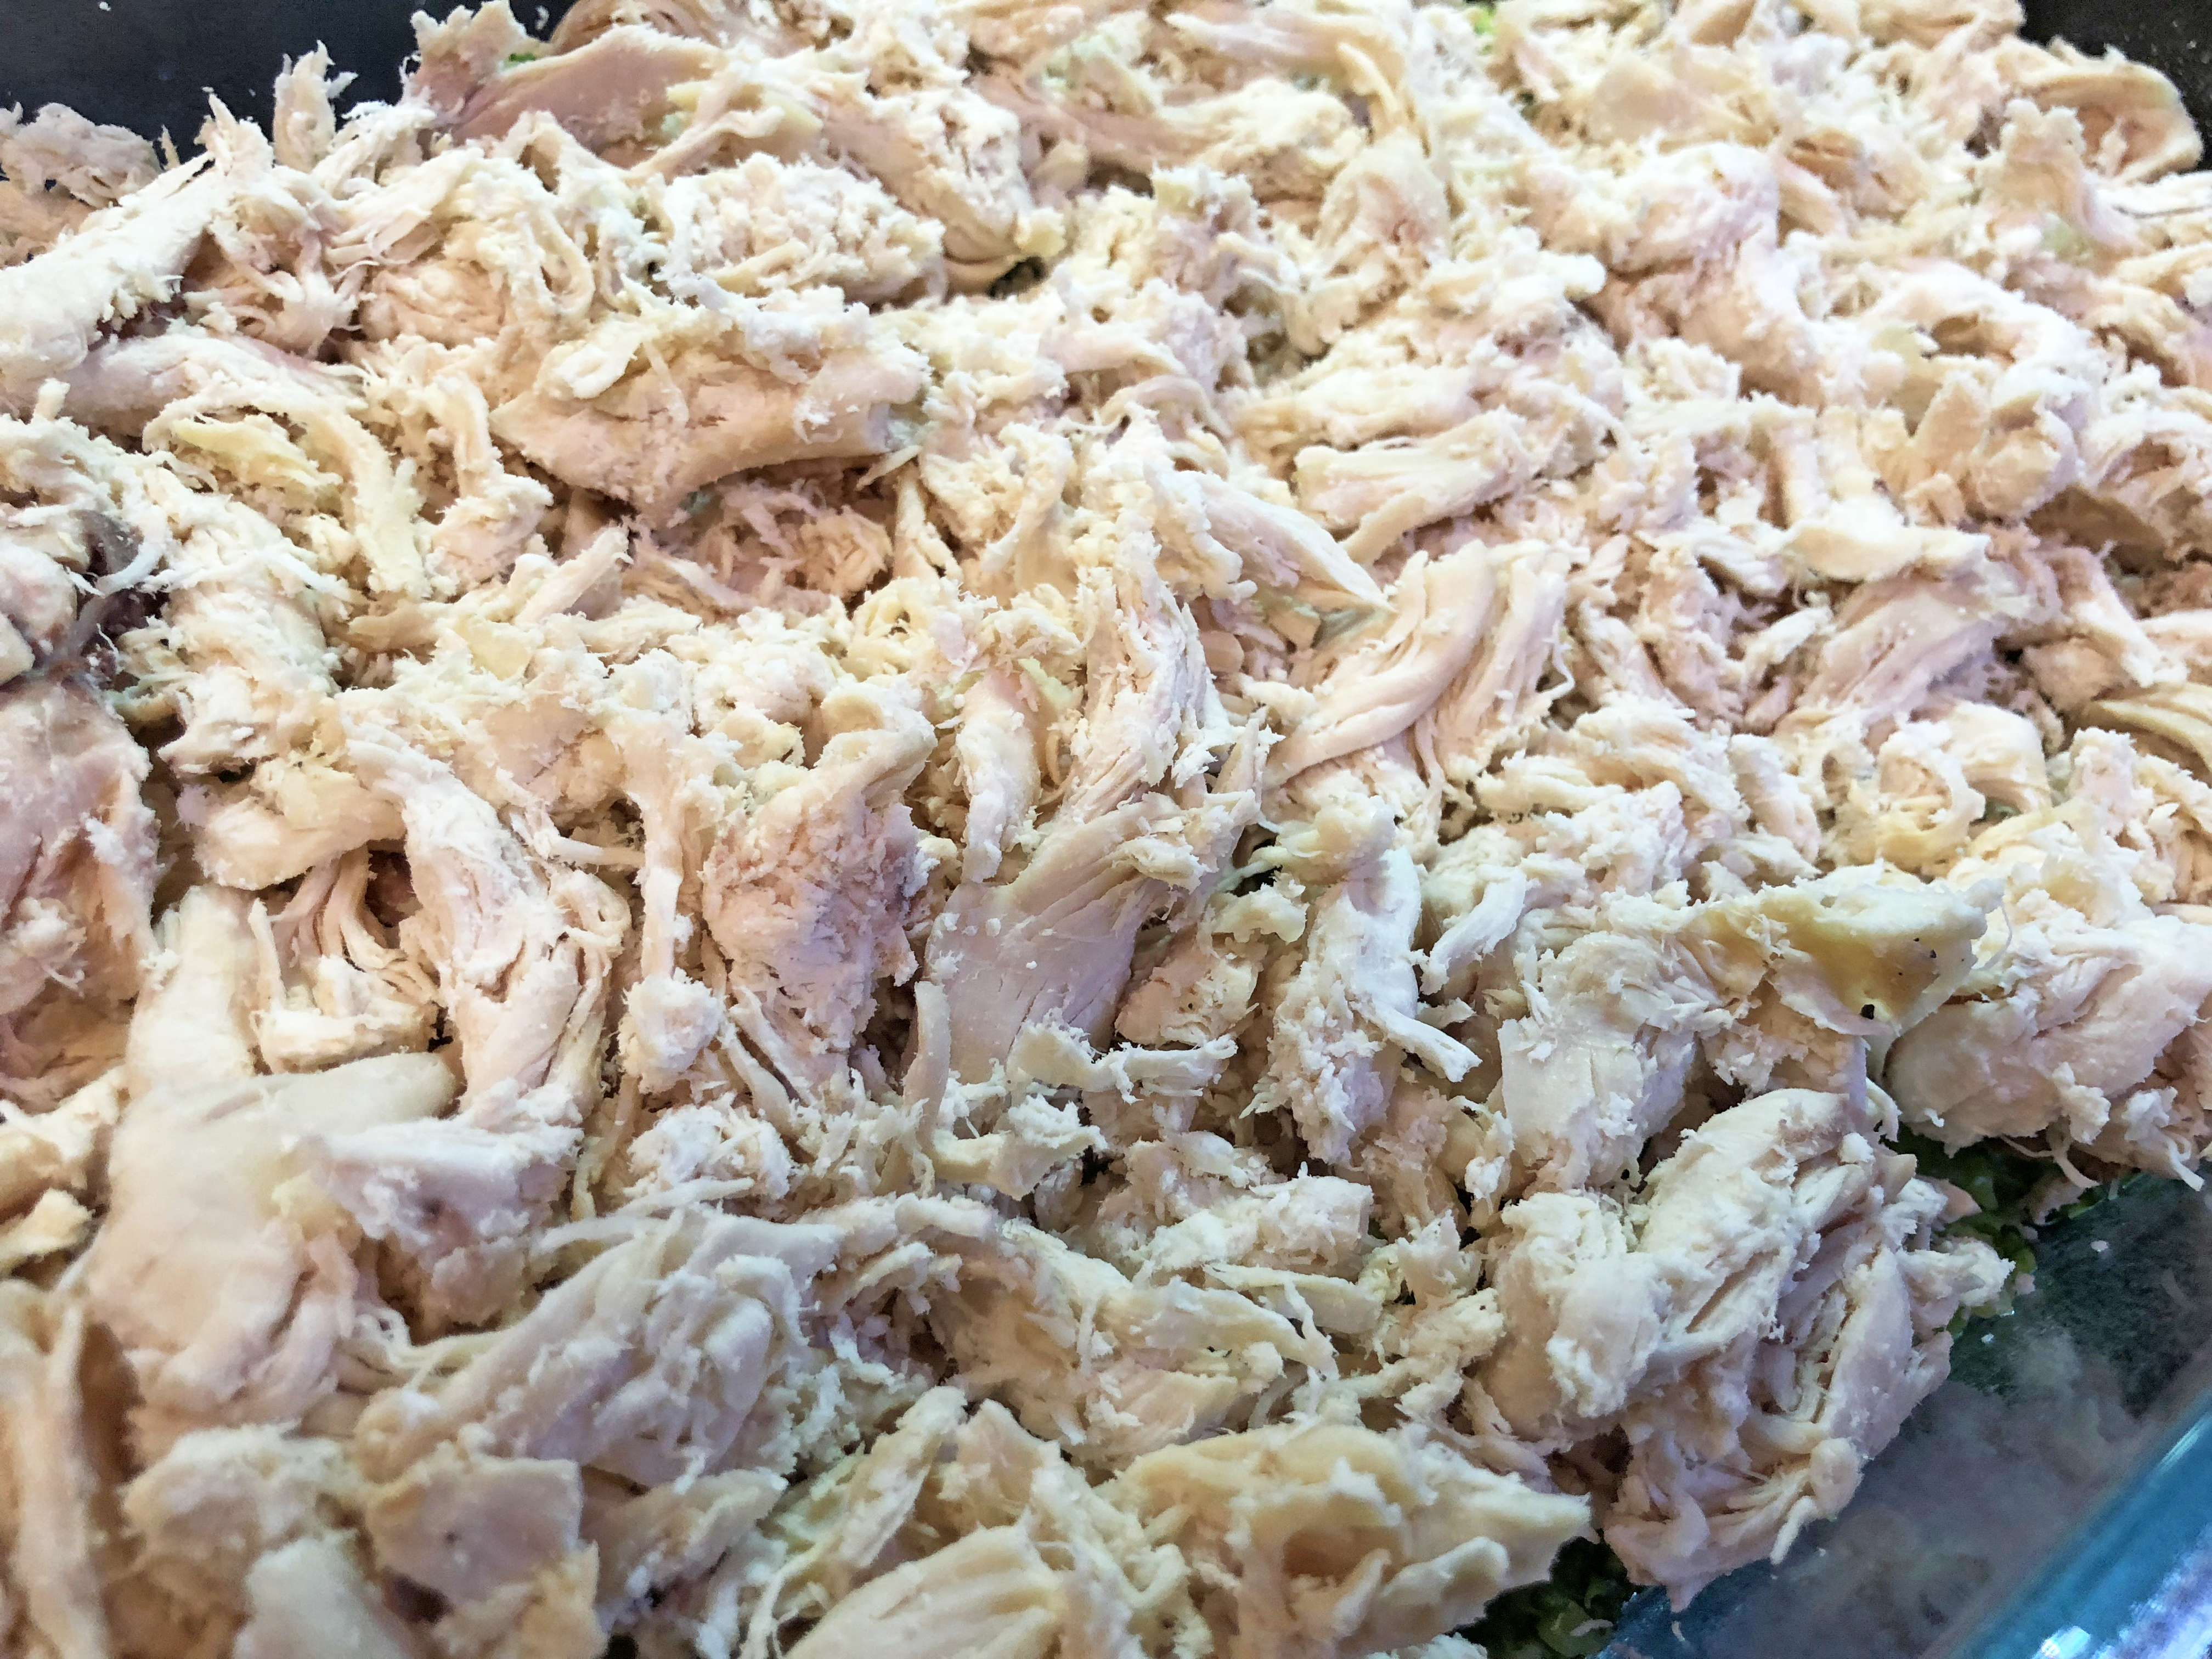
This salad is super versatile. You can add veggies or a protein and make it a mouth-watering meal. We added some grilled chicken to the salad and it was delicious!
We made the salad and pesto just a few days before departing on our 2020 Covid getaway to Colorado.
Foodie Tips
❤ For just two people we cut the salad and pesto recipes in half. If you are OK with leftovers for another meal, go all the way.
❤ A little pesto goes a long way. You don’t have to glob it on like a pasta sauce. If you love pesto you should try our family favorite that is a 100% legit basil pesto.
❤ I saw no evidence for what the asterisks were pointing to in the original recipe for parsley and basil. I can only presume the author meant to include “USE FRESH HERBS ONLY” because using dried parsley and basil sounds like a culinary disaster.
❤ We seasoned our chicken with a gift from a friend who makes it by hand – JB’s Special Blend is a staple in our home!

i. Time
Total prep: About 90 minutes (includes chilling time).
ii. Ingredients
for the dressing:
½ cup | olive oil or vegetable oil
¼ cup | tarragon vinegar
1 cup | parsley clusters
1 ½ teaspoons | fresh basil leaves
1 clove | garlic
½ teaspoon | salt
⅛ teaspoon | pepper
2 tablespoons | fresh parmesan cheese, grated
for the salad:
3 cups | lettuce, hand torn
3 cups | spinach, hand torn
1 | red pepper, seeded and cut into strips
1 | green pepper, seeded and cut into strips
2 cups | zucchini, thinly sliced
1 cup | raw green beans, slivered
3 | tomatoes, cut into wedges
 iii. What To Do
1. For the pesto: Combine all of the ingredients (except the cheese) using an electric blender or immersion blender until smooth. Hand-stir in the cheese. Chill 1 hour to let the flavors mingle.

2. For the salad: Line a serving bowl with the lettuce and spinach. Arrange your chosen vegetables on top and chill until serving time. Serve tossed with the pesto dressing.
Betty’s Son
Founder and “Nostalgic Food Blogger” of Betty’s Cook Nook

A Scan Of Mom’s Original Clipping From 1978
I included the back of the recipe pointing to the origin of this recipe plus a surprise for a tempura batter recipe.
nanny’s green beans
Posted: July 5, 2020 Filed under: sides | Tags: bacon, garlic, onion soup mix, pepper, salt, sugar, tarragon, tomatoes, white onion Leave a comment  The Taste Of Yesteryear
Sometimes it can be difficult to get excited about green beans. But when your taste buds are delightfully reunited with the taste of your childhood – something you may have forgotten about but when you reconnect with it you remember instantly – it can be a great thing.
Such is the case with this green bean recipe! I can remember my Grandmother “Nanny” making green beans just like these when I was a mini me.
The Power Of A Grandmother
Of my grandparents I was closest to my maternal grandmother, who we affectionately called “Nanny.” You can find pictures of her on the old photos tab here on Betty’s Cook Nook.

Mere days before 1900 Nanny was born in Dime Box, Texas – a tiny unincorporated community in the southeast central Texas prairie. Nanny saw a lot during her 91 years and one thing we’ll always remember her for is her good-time food. Nanny’s green beans were one of her signature creations right up there with her chicken noodle soup, her prized waffles, and the coconut ambrosia she’d bring over on Easter Sunday.
This recipe comes to Betty’s Cook Nook from my fellow foodie Cousin Jennifer who scored it from our awesome Julie, who was the matriarch of our family for many years. Jennifer said she and Julie would enjoy these beans most Sundays for lunch. I hope you enjoy them! Who knows – whether it’s this recipe or another – maybe you’ll create a new tradition of your own shared through the art and love of food!
Foodie Tip
❤ Paired with bacon, onions, tomatoes and garlic it’s really easy to like these green beans. I realized while eating these that the canned beans tend to be a little soft for my preference. You may feel quite the opposite! Then I did a little research and realized I actually prefer what I knew as a kid as plain green beans (aka haricot verts) vs. the canned Italian cut. The next time I try these beans I’ll try substituting the Italian cut with fresh sautéed green beans with a little more bite (firm to the tooth) to it and see what happens.

i. Time
Total prep: About 35 minutes.
ii. Ingredients
4 slices | bacon, cut into pieces
1 | white onion, thinly sliced
14 ½ can | diced tomatoes, with the liquid
1 envelope | Lipton’s dry onion soup mix
½ teaspoon | dried tarragon
½ teaspoon | fresh garlic, minced
½ teaspoon | sugar
2 cans (28 ounces each) | Allen’s Italian-cut Kentucky wonder beans, with the liquid
to taste | salt
to taste | fresh cracked black pepper
iii. What To Do
 1. Fry the bacon in a skillet until crisp. Add the onion slices and cook until tender and translucent.
2. Add the diced tomatoes with the liquid, the onion soup mix, tarragon, garlic and sugar. Cook over low heat for 5 minutes, stirring occasionally.

3. Add the green beans, salt and pepper. Simmer for 15-20 minutes and voilà!
Betty’s Son
Founder and “Nostalgic Food Blogger” of Betty’s Cook Nook
A scan of the original green bean recipe is below. Sorry, Mary A. Peterson. I renamed your recipe to honor my Grandmother “Nanny.” Plus, I don’t have an Aunt Mary. But props to you for sharing this forward – that’s exactly what an awesome foodie does!

pork chop limas
Posted: June 23, 2020 Filed under: meats poultry and fish | Tags: butter beans, caraway seeds, cream of mushroom soup, lima beans, milk, pepper, pork chops, salt, water, white onion Leave a comment  A Lima Good Tima
When I least expect it I’m surprisingly rocked by one of my Mom “Betty’s” recipes. This one totally changed how ima gonna feel about limas from today going forward.
In my former me, I thought limas were right up there with split pea soup – green, gross … grody to the max! Had my Mom called them by their other given name – the butter bean – I would have dove mouth first into a large bowl of ’em. Superfan of butter here! #Bombdiggity
Decades later I decided to revisit my mental block for limas by making this recipe and you know what? It wasn’t all gag me with a spoon. If fact, I wanted a bigger spoon – I actually loved limas! Totally gnarly! Are you channeling some 80s lingo yet? If not, best saddle up to this vintage classic for a refresher, if you wanna be a cool kid again:
I’ve also included The Periodic Table Of 80s Slang down below to help you on your way!
Foodie Tips
❤ During the 2020 COVID-19 pandemic we couldn’t easily find dry limas. Lame. But we could source frozen and they worked just fine. In fact they seriously reduced the prep time in a rad way by 2 hours. Legit!
❤ Mom noted the caraway seeds as optional but I totally included them – their earthy unique taste makes dishes extra fresh and special.
❤ Wanna profess your love for limas beyond mealtime? I just ordered a lima bean T-shirt and sticker to keep things legit!
❤ While your chops ‘n limas are baking why not enjoy some vintage lima bean art?! I’ve peppered a few examples below for you to peruse and enjoy.
i. Time
Total prep: About 90 minutes (includes 60 minutes for baking)
ii. Ingredients
1 ½ cups | dry california limas (or frozen if dry is hard to find)
1 quart (4 cups) | water
½ teaspoon | salt
4 | pork chops
to taste | salt
to taste | fresh cracked black pepper
1 | white onion, sliced
1 can | cream of mushroom soup, undiluted
½ cup | milk
1 teaspoon | caraway seeds (optional)

iii. What To Do
1. Prep the limas!
- If using dry limas: Rinse the limas with cold water. Put into pan with water and salt and bring things to a boil. Simmer about 2 hours, stirring occasionally, until tender.
- If using frozen limas: Bring 2 cups of salted water to boil over high heat. Add the frozen lima beans and return to a boil. Cook uncovered 20 to 25 minutes or to desired tenderness. Drain the limas and set aside.
 2. Prep the chops ‘n onions!
- Our pork chops are usually from Costco and they are hella thick. So we usually trim them in half; they usually end up more tender.
- Season the chops with salt and pepper. Brown them quickly in a skillet with a little fat/oil/butter (we used olive oil). Remove the chops.
- In the same skillet brown the onion slices in a little fat/oil/butter.
 3. Bake those chops ‘n limas!
- Turn (pour) the drained limas into a baking/casserole dish.
- Arrange the chops and onions over the lima beans.
- In a medium-sized bowl mix together the soup, milk, and caraway seeds then pour over the whole shebang.
- You can refrigerate this dish until you’re ready to bake or roll forward by covering the casserole with foil and baking at 350°F for 45 minutes… then remove the foil and bake for 15 additional minutes. Plate up and enjoy!
Limas: Bad To The Bone
Betty’s Son
Founder and “Nostalgic Food Blogger” of Betty’s Cook Nook

Pork Chop Limas Fresh From The Oven
Enjoy this vintage lima bean art!

“Ah” Inspiring? Or “AAaaacckkk!” Inspiring?!? LOL #SPAM


A Scan Of Mom’s Original Recipe Card

picadillo, part ii
Posted: May 24, 2020 Filed under: appetizers, breakfast, meats poultry and fish, sides | Tags: cooking oil, cumin, egg, eggs, garlic, green bell pepper, ground beef, oil, onion, pepper, potato, russet potato, salt, taco seasoning, tomato sauce, tomatoes, vegetable oil, white onion Leave a comment The Big Deal About Picadillo
In 2014 I posted this original picadillo recipe which remains a family favorite. This recipe makes a welcomed “second spin” on the original via my main squeeze: the puffy taco.
I routinely obsess about eating my favorite puffy tacos from my childhood chomping grounds of San Antonio’s Teka Molino where my Mom “Betty” grew up eating bean rolls for a nickel. She was barely 3 years old when “Tekas” opened in 1937!
This week while I was catching up with my Cousin Jennifer about newsworthy topics like puffy tacos she confirmed that the usual beef mixture inside the Teka puffy taco is in fact picadillo, which is anything but “just” ground beef! The flavors are unmistakably from south of the border and make a signature part of the best puffy tacos you’re likely to encounter.
My favorite part about picadillo are the small potatoes that are married with green bell peppers and the seasoned meat. Some describe picadillo as a ground beef hash and I’ve been known to eat it straight from the skillet with a spoon and a smile.
Give this dish a whirl and I think you’ll love it!
Foodie Tips
❤ Picadillo is one of those rare finds that makes exceptional leftovers. Enjoy it atop: 1) Nachos; 2) Warm, crusty bread; 3) Chalupas; 4) White or corn taco shells; 5) A baked potato; 6) Feeling adventurous? Make picadillo and baked eggs! To do so just reheat the picadillo in a skillet or microwave. Transfer the picadillo to a skillet and make a small well (indentation) for each cracked egg to rest in. Bake everything at 350°F for 13-15 minutes. You’ll want the egg yolks to finish a tad “runny,” – not hard boiled. This makes it a delicious way to start the day!
❤ In case you missed it don’t forget to enjoy this picadillo inside a puffy taco. Puffies aren’t necessarily easy to make the first time but after our second attempt I declared Joe a pro.
❤ Never heard of a puffy taco? Learn more about its history here!
i. Time
Total prep: About 30 minutes.

Picadillo and Baked Eggs. 100% delicious!
ii. Ingredients
1 tablespoon | oil (we prefer vegetable, canola or avocado)
1 pound | ground beef
½ | onion, diced
½ | green bell pepper, diced
1 medium | russet potato, chopped into ¼ – ½ inch squares
10-ounce can | diced tomatoes and chilies (a.k.a. RO*TEL), with the juice
8-ounce can | tomato sauce
2 tablespoons | taco seasoning
1 teaspoon | cumin
2 tablespoons | minced garlic
to taste | salt and pepper

My Birthday Picadillo, July 26, 2020
iii. What To Do
1. In a medium-sized skillet over medium heat, add the oil and ground beef, break-up the beef with a spoon or spatula for a couple of minutes while sautéing.
2. Add the chopped onions and bell pepper and sauté another minute or two.
3. Add the potatoes and give things a stir.
4. Add the rest of the picadillo ingredients (diced tomatoes, tomato sauce, taco seasoning, cumin, tomatoes and minced garlic).
5. Add salt and pepper to taste.
6. Cover and simmer, stirring occasionally, for about 25 minutes. While things are simmering you can move to making your puffy tacos with this recipe or… when the picadillo is done, remove from heat, leaving covered to keep warm. You’ll know it’s done when the potatoes are soft, but not mushy.
I hope you enjoy this dish as much as we do!
Betty’s Son
Founder and “Nostalgic Food Blogger” of Betty’s Cook Nook

If you’re reading this you must be interested in puffy tacos, pictured here with picadillo!
fried rice
Posted: April 27, 2020 Filed under: appetizers, breakfast, meats poultry and fish, sides | Tags: carrots, chicken, cooking oil, cumin, egg, eggs, garlic, ginger, green bell pepper, ground beef, hoisin sauce, oil, onion, peas, pepper, pork, potato, rice, russet potato, salt, sesame seeds, soy sauce, taco seasoning, tomato sauce, tomatoes, vegetable oil, water, white onion Leave a comment A Rice Surprise
This fried rice recipe didn’t seem much of a recipe at all.
There were just a few ingredients listed on Mom’s recipe card (below) and there were no measurements. Seriously?
Well I was shocked when Joe made the fried rice seemingly out of nowhere. It was absolutely the best fried rice I’ve ever had and he made it at home using my Mom “Betty’s” recipe as a guidepost!
After all these years… I’m glad there looks to be what is a dash of a soy sauce stain on Mom’s recipe card.
Foodie Tips
❤ This dish loves seemingly day old, dry seemingly unusable rice. This recipe will bring the rice back to life in a delicious way! Joe will make a fresh batch of rice in our Zojirushi rice maker then refrigerate it so it gets nice and dry.
❤ A bit about peas and carrots. We keep the frozen bagged stuff on hand at all times and these are super easy to add to the fried rice. Plus these add a nice pop of color!
❤ If you haven’t heard the term “soft scrambled eggs,” they’re just a little under cooked or taken “just to the shiny” and a bit wet look. To some, soft scrambled is the preferred way to eat them. In this recipe they’ll finish cooking in the rice.
❤ Winner Winner! Joe’s extra spin on this recipe included 3 cage free eggs and 1 tablespoon each of fresh minced ginger, garlic, soy sauce and hoisin sauce. OMG.
i. Time
Total prep: About 20 minutes.
ii. Ingredients
2 | cage free eggs
1 pound | meat (pork, chicken, beef)
2-3 tablespoons | vegetable oil
at least 2-3 cups | cooked, cold rice (we prefer white, basmati and jasmine rices) follow the package instructions
2-4 tablespoons | soy sauce
1-2 cups | peas and carrots (frozen or fresh), optional
lots o’ | green onions, sliced
to taste | kosher salt
to taste | fresh cracked black pepper
optional | sesame seeds, toasted

iii. What To Do
1. In a large pan over medium-low heat soft scramble the eggs and set them aside to rest.
2. In the same pan sauté the meat in oil. Joe used some thinly sliced pork and it was tender and delicious!
3. Add the the cooked rice. Stir/sauté everything until nice and brown.
4. Season with the soy sauce and continue stirring. Hungry yet?
5. Add the peas and carrots then the green onions.
6. Toss on some salt and a few fresh cracks of black pepper. Sprinkle with some sesame seeds and you’re done!
Betty’s Son
Founder and “Nostalgic Food Blogger” of Betty’s Cook Nook


hondo corn casserole
Posted: November 17, 2019 Filed under: sides | Tags: butter, cheddar cheese, corn, cream style corn, egg, green chilies, onion, pepper, ritz crackers, salt, sugar, unsweetened condensed milk Leave a comment
Thanksgiving Spectacular
In uncommon fashion I’m pre-posting some recipes that are on deck and ready for the upcoming foodie festival!
Scroll down below and you’ll find three recipes that hail to my kitchen from my Cousin Julie – Hondo Corn Casserole (thank you, carbs), Madeira Turkey, and Wild Mushroom and Pecan Stuffing! These are on deck and coming out of the oven soon!
For you new-comers out there if you missed it make sure and check out the latest posts perfect for Thanksgiving – Pumpkin Bread, Sour Cream Apple Pie plus Brandied Pumpkin Flan which is a family Thanksgiving staple. On our sister site Home Style Austin you can score our newest recipe Honey+Rosemary Roasted Cashews which are great for gift giving. Enjoy our 2019 fall “flavorites” from us to you!
This is surely going to be a Thanksgiving to remember. Photos and my usual rambling on about the good ol’ days to follow!
HONDO CORN CASSEROLE
This recipe sat in my cookbook likely since the 1990s. This year I was searching for the best sides to make for Thanksgiving and dived in. I couldn’t remember the origin of the recipe but when I read the ending of the recipe “If guests arrive, give them a drink and regale with stories of Texas Gulf Coast wonders” I knew this recipe hailed from someone special.
One phone conversation with Cousin Jennifer and it was confirmed – this recipe was from my dear Cousin Julie Sutton Mueller. Jennifer said this was one of Julie’s long-standing recipes at the holidays and as the recipe indicates – it’s a crowd favorite and people always ask for this recipe. That certainly proved true this Thanksgiving when I made it for our annual gathering at Canyon Lake!
Foodie Tips
❤ All about the corn: You can use a box of frozen corn – the instructions below presume you’ll use canned corn. If you’d like to increase the serving sizes to 8-10 you can add a can of the whole kernel corn.
❤ “Unsweetened condensed milk” – you’ll likely not find this in your store… but never fear – it’s the same thing as evaporated milk. Who knew?!? I didn’t until I researched it!
i. Time
Total prep: About 75 minutes
ii. Ingredients
16 ounce can | cream style corn
16 ounce can | whole kernel corn
1 cup | cheddar cheese, grated
1 cup | Ritz crackers, crushed
1 small | onion, chopped (or several green onions, chopped)
1 | cage free egg
3 tablespoons (or less) | sugar
⅔ cup | unsweetened condensed milk (see foodie tip above)
1 stick | unsalted butter, melted (tip: my Grandmother “Nanny” insisted on Falfurrias brand butter)
1 small can (4.5 ounces) | chopped green chilis
to taste | salt and fresh cracked pepper
iii. What to do
0. Preheat your oven to 350°F. Meanwhile…
1. In a medium-sized mixing bowl combine all the ingredients together and set aside.
2. Grease or spray an oven casserole dish and fill it with your casserole mixture. You can either refrigerate this overnight until ready to bake or you can simply jump to step 3!
3. Bake for 50-60 minutes until the top is golden brown. Recommended step: If you’d like to make a pretty top crust, 10 minutes before the casserole is done baking sprinkle more cheese or crushed Ritz crackers on top. Deeeee-licious!
Serves: 6-10 (see recipe expansion tip above)
Betty’s Son
Founder and “Nostalgic Food Blogger” of Betty’s Cook Nook

A Scan Of Cousin Julie’s Hondo Corn Casserole
 Enjoy your preview of what’s to come for Thanksgiving 2019!

caesar salad
Posted: June 30, 2019 Filed under: salads, sides | Tags: anchovies, croutons, egg, garlic oil, lemon juice, lettuce, parmesan cheese, pepper, red wine vinegar, salt, worcestershire sauce Leave a comment Seize The Caesar
More than 44 years after the original surprise party I received a surprise text from my cherished Cousin Alison.

Click Image For A Close-Up View
Sadly Alison’s not near my front door to whisk me to Dime Box, Texas to visit family, but she’s texting because she’s found an old article from yesteryear about something I don’t even remember as a young tot – one special feast honoring my Grandmother’s 75th birthday!
I’ll spare you my many fabulously fond stories about my dear Nanny but I hope you’ve enjoyed one of the greatest gifts life has to offer – Grandparents!
What’s special about this ol’ newspaper post is that it honored my Grandmother at one of the fanciest restaurants in San Antonio – La Louisiane. Sadly “La Lou” closed its doors in 1992 but trust me when I say it gifted memorable meals to thousands of folks who graced passed its front doors.
How remarkable that this birthday party appeared in the San Antonio Express-News. I’m crediting my Mom, Betty, for what’s probably the only time my name has been in *real* newspaper print. Hooray!
While Cousin Alison’s name didn’t make 1974 print, just the week before Nanny’s great dinner my Cousins Billy and Debbie found out they were blessed with her arrival, coming in 1975. What a great gift in our lives!
My Cousin Lorin texted me this caesar salad recipe proving that food can last beyond the best of times. Thank you, Lorin!
Enjoy food, salad, and family to the fullest!

Homemade Breadcrumbs Are Easy To Make… And Eat
Foodie Tips
❤ Two heads of lettuce? Yikes – where’s room for dessert!? We cut this recipe in half. Even for two ambitious Texans.
❤ To coddle and egg: Don’t hug it near and dear. :) Drop it in hot water for about 40 seconds to make it nice and toasty!
❤ Hangry? Add sliced grilled chicken breast for a more bountiful meal.
❤ Love salads? Don’t forget to click here (and scroll down) for more salad ideas here at Betty’s Cook Nook!
❤ Thanks to Joe! I bought a head of CABBAGE at the store, thinking it was Romaine lettuce. He fixed my wrong. #Guh
i. Time
Total prep: About 15 minutes (sans the grilled chicken)
ii. Ingredients
2 heads | romaine lettuce, cold, dry, and crisp
¼ teaspoon | salt
¼ teaspoon | fresh cracked black pepper
½ cup | croutons
2 ounces | garlic oil
½ ounce | worcestershire sauce
½ ounce | red wine vinegar
½ ounce | lemon juice
1 | cage free egg, coddled
1 tablespoon | anchovies, chopped
2 tablespoons | parmesan cheese, shredded
iii. What to do
1. Pull apart the Romaine lettuce into 2-inch pieces.
2. Mix the lettuce with salt and pepper.
3. Form a bed of croutons in the center of the lettuce,.
4. Mix the next 4 ingredients and pour over the crouton-lettuce mixture.

Here Goes The Egg + The Anchovies
5. Add the egg and anchovies.
6. Toss well and sprinkle with the parmesan cheese.

Let’s Give This A Good Toss
Serves: 4
Betty’s Son
Founder and “Nostalgic Food Blogger” of Betty’s Cook Nook
chicken divan
Posted: September 30, 2018 Filed under: casseroles and one-dish meals, meats poultry and fish | Tags: bread crumbs, broccoli, butter, cheddar cheese, chicken, cream of mushroom soup, curry powder, gruyere cheese, lemon juice, mayonnaise, parmesan cheese, pepper, salt, sour cream, white wine Leave a comment Divine Divan
This delicious recipe comes to my kitchen via my awesome Cousin Julie’s kitchen. Julie had the best taste in many things – art, decorating, food, and Cousins!
My Cousin Jennifer said Chicken Divan was a Sunday staple that they enjoyed quite regularly. So if you want to help create a few cherished family memories, chicken divan may be a wonderfully tasty starting place!
While the original recipe is not vintage per se it comes to our bellies via Paula Dean, so you know it’s gotta be good.
I hope you try this dish that’s been known as a classic American casserole since the 1960s. In fact, the dish has origins back much earlier to its birthplace as the signature dish of New York City’s Chatham Hotel.
“In English, the word “divan” came to mean sofa, from the council chamber’s benches. In France it meant a meeting place or great hall. It was this meaning that attracted the notice of the owners of the New York restaurant as they searched for a name that would imply continental elegance.” ~ GlutenSugarDairyFree.com
Foodie Tips
❤ Pull up a chair and let’s talk cheese. I try to refrain from buying bagged shredded cheese. For years I used it but as my hunger for knowing more about food intensified I realized I preferred freshly grated cheese vs. bagged cheese. I found it melted better and on closer inspection discovered bagged cheese has a coating on it that prevents clumping. Some posts I read said this dusty white coating was actually cellulose, which is made from wood pulp. I’m out.

❤ Is Parmesan Cheese the same thing as Parmigiano-Reggiano Cheese? You might be surprised after reading this article! And this one, too. Hint: No shaker cheese for this recipe!
❤ In a flurry to get this dish made? We used shredded chicken from our grocery and it shaved some serious time time off of the food prep clock.
i. Time
Total prep: About an hour.
ii. Ingredients
2 10-ounce packages | frozen broccoli, chopped
6 cups | shredded chicken, cooked
2 10¾-ounce cans | condensed cream of mushroom soup
1 cup | mayonnaise
1 cup | sour cream
1 cup | sharp cheddar cheese, grated
1 tablespoon | fresh lemon juice
1 teaspoon | curry powder
to taste | kosher salt
to taste | fresh cracked black pepper
½ cup | dry white wine
½ cup | parmesan cheese, freshly grated
½ cup | soft bread crumbs
2 tablespoons | unsalted butter, melted (my Grandmother “Nanny” insisted on Falfurrias)
1-2 handfuls | gruyere or more sharp cheddar cheese, grated (optional and highly suggested)
iii. What to do
0. Preheat your oven to 350°F.
1. Remove the outer wrappers from the boxes of broccoli. Open one end of each box and microwave on full power for 2 minutes, or until thawed. Drain the broccoli into a strainer and add the shredded chicken and let rest.
2. In a medium-sized bowl, add the soup, mayonnaise, sour cream, cheddar, lemon juice, curry powder, salt and pepper to taste, and the wine. Whisk everything together to make a sauce. Transfer the broccoli-chicken mixture to the bowl with the sauce and gently mix things well using a spatula.

3. Place the mixture into an 11-inch x 7-inch casserole dish that’s been sprayed with vegetable oil cooking spray. Pat the Divan mixture down evenly and smooth with a spatula.
4. In a small bowl combine the parmesan, bread crumbs and butter and sprinkle this over the top of the Divan mixture.

5. Bake for about 30 to 45 minutes until bubbly. If desired, about halfway through baking remove from oven, top with cheese, and return to bake until toasty. Remove from oven let rest and serve!
Pairs well with a salad – enjoy!
Betty’s Son
Founder and “Nostalgic Food Blogger” of Betty’s Cook Nook

shrimp victoria
Posted: August 20, 2018 Filed under: appetizers, seafood | Tags: butter, flour, lemon juice, mushrooms, onion, parsley, pepper, rice, seasoned salt, shrimp, sour cream, toast, worcestershire sauce 3 Comments Tales From The Sea
I found this recipe folded in my Mom “Betty’s” index card holder. I recognized her handwriting immediately.
There’s no doubting Mom’s love for seafood as this recipe is one of several shrimp recipes I’ve discovered in her cookbook (surf the shrimp recipe archive).
While I tell a few funny stories on this food blog about my dislike for most types of seafood, this recipe is delicious, proving once again that my distaste for seafood is waning. Mom would be proud.
The Write Stuff
I look closer at the paper containing the recipe and notice the phone number “CA6-4141”. I was time-warped back to an era when phone numbers began with exchange names. Exchanges were phased out in the 1960s and 70s, so this would date the origin of this recipe back about 50 years ago. The number CA6-4141? “CA” stood for “Capitol” which translated to “22” so the full phone number would have been 226-4141. Confusing short-code, huh? Today San Antonio has 10-digit dialing like most large cities. The city’s newest area code 726 went into effect in 2017 and made me smile because 726 is my birthdate, July 26th.
Also on the paper recipe (below) I see The Clegg Company. A quick Google and this San Antonio Business Journal article popped-up in sight. I was surprised to learn that the then 104-year-old retailer was purchased by Herman Miller – the maker of the iconic Herman Miller Aeron chair. This very chair was one I sat on during my days working for a large internet consultancy that went belly up after the dot-com bust. That’s another long twisty, turbulent story for another day!
While stories like these likely don’t mean much to folks outside my family I include them here as an example of the amazing ways we are connected to the past if we’re open to it. All this from a Shrimp Victoria recipe scribbled on a notepad… and tucked away for more than 50 years!
Foodie Tips
❤ The rice was good but believe it or not I’m trying buttered toast on the next go (we were out of bread)!
❤ Not sure how to clean and devein your shrimp? I’ve included a couple of YouTube videos below that will show you how easy it is!
❤ I thought I was being fancy by letting my shrimp marinate overnight in the fridge. Turns out that it’s not really necessary! My online sleuthing showed that a 30-minute marinade should be fine but with an acid-based marinade (this recipe has lemon juice) the shrimp can turn “mushy” as the acid can start to break down the shrimp. I didn’t experience this with my dish, however!
❤ While stores may not be consistent in how they classify shrimp, when you’re at the seafood counter there’s a method to the madness for how many shrimp typically come per pound (this is indicative of their size). Resources that will be helpful include the Certi-Fresh Shrimp Sizing Guide you can print, and keep with your cookbooks (score!)… and the Farm to Table guide that provides some detail on larger-sized shrimp. Now you’ll be able to decipher shrimp-like code like PUD, P&D, U/15, and 61/70!
i. Time
Total prep: About 30 minutes.
ii. Ingredients
½ cup | unsalted butter (my grandmother “Nanny” insisted on Falfurrias)
1 ½ pounds | cleaned, raw shrimp
½ cup | onion, chopped
1 cup | fresh mushrooms, sliced
2 tablespoons | lemon juice
1 tablespoon | worcestershire sauce
2 tablespoons | flour
1 ½ teaspoons | seasoned salt
dash | fresh cracked black pepper
1 ½ cups | sour cream
1 tablespoon | fresh parsley, chopped
to serve | rice or buttered toast (optional)

iii. What to do
1. In a large skillet over medium-high heat melt the butter. Cook shrimp and onion, stirring until the shrimp is almost tender, about 5 minutes.


A Mound Of Sour Cream? Texans “Yee Haw” About This!
2. Add the mushrooms, lemon juice and the Worcestershire sauce. Cook, stirring occasionally, for 5 more minutes. Remove from heat.
3. Stir in the flour, seasoned salt and black pepper. Then the sour cream. Return the skillet to the heat and cook over low heat stirring until hot, but not boiling.

4. Sprinkle with parsley. Serve at once over rice or buttered toast.
Yields 6 servings
Betty’s Son
Founder and “Nostalgic Food Blogger” of Betty’s Cook Nook

A Scan Of Mom’s Shrimp Victoria Recipe ~ Note The Suggested Pairings
For The Perfect Meal (see bottom of recipe)
lemon herb dressing
Posted: June 24, 2018 Filed under: salads, sauces | Tags: basil, garlic, lemon juice, oregano, pepper, safflower oil, salt, tarragon, thyme Leave a comment Simple Yet Sophisticated
This salad dressing recipe hails from my Cousin Julie’s kitchen and it’s a little slice of history from a speciality retailer that is no more – Frost Brothers. It graced cities including San Antonio, Austin, Houston, Laredo, Corpus Christi… and I saw something about a Dallas opening in my second hometown – Dallas – at the iconic North Park Center.
With San Antonio roots dating back to 1917, Frost Brothers is a Texas original considered one of this country’s finest retailers… until it met its demise in the late 80s. 70 years is a long haul and Frost Bros. will be forever missed by those who experienced it.

Frost Bros. At San Antonio’s North Star Mall
My Aunt Delores would have racks of the season’s finest clothes delivered to her Terrell Hills home so she could try them on and decide the chosen ones… this was about as “froufrou” a thing I could imagine! But then again my Aunt and Uncle also got in-home haircuts back in the 70s and 80s so my relatives were definitely a beat ahead of the tempo before the days of Amazon or the monthly box subscription.
![]() I remember when I was a kid I always referred to the fancy store as “Fross Bross” because I didn’t know “Bros.” was the abbreviation for brothers. Who knew?! Apparently my Mom, “Betty,” did because she’d laugh at me when I butchered the pronunciation of the store’s name.
I remember when I was a kid I always referred to the fancy store as “Fross Bross” because I didn’t know “Bros.” was the abbreviation for brothers. Who knew?! Apparently my Mom, “Betty,” did because she’d laugh at me when I butchered the pronunciation of the store’s name.
For those who remember Frost you’ll likely enjoy this lemon-herb dressing recipe that’s a treasured treat that comes to us via their “Tastesetter” Restaurant… and my Cousin’s kitchen!
Foodie Tips
❤ We served this dressing on top of this family favorite – Jackson Salad. These two creations make a remarkable and tasty pairing, so try them if you can! Especially if you like a salad with artichoke, hearts of palm, bacon, and gorgonzola graced by the touch of fresh lemon and herbs!

❤ While my gut said to use fresh herbs we mostly used dried. Either way you’ll eat your way home a hero.
❤ I noticed on the original recipe (below) Cousin Julie pumped up the jam with MORE basil, oregano, and tarragon (or thyme). We used thyme from the garden (sorry, tarragon).
i. Time
Total prep: About 10 minutes.
ii. Ingredients
1 cup | safflower oil
⅓ cup | fresh lemon juice
1 teaspoon | salt
¼ teaspoon (or more) | fresh cracked pepper
¼ teaspoon (or more) | sweet basil
¼ teaspoon (or more) | oregano
¼ teaspoon (or more) | tarragon or thyme
1 clove | garlic, minced
iii. What to do
1. In a medium-sized bowl blend all ingredients together with a wire whisk until things are nice and smooth.
2. Serve immediately or you can let it rest in the fridge before serving.
Yield: 1 ⅓ cups, prepared.
Betty’s Son
Founder and “Nostalgic Food Blogger” of Betty’s Cook Nook

A Scan Of The Original Tastesetter Lemon-Herb Dressing Recipe From Frost Bros.
While you whip up this dressing why not get your kitchen a rockin’ with this 1980s favorite from Technotronic!? Crank it!

