pumpkin cheesecake
Posted: October 30, 2021 Filed under: desserts | Tags: butter, cinnamon, cloves, cream cheese, eggs, ginger, graham crackers, pumpkin, sour cream, sugar, vanilla Leave a comment Let’s Break For Cheesecake
With all the pumpkin proliferation that erupts at the tail end of summer this is a recipe that might stand out from the orangey crowd.
I was a little leery about baking a sour cream topping but I was reminded that folks in these parts don’t mess around with sour cream. Go on – feel the force – the sour cream worked and made a nice topping for the cheesecake.
I don’t recall eating cheesecake until the 80s, when I dove fork first into a Sara Lee cheesecake. With origins to the 1940s Sara Lee cheesecake had been my north star for what a cheesecake should be. Nowadays baking a homemade cheesecake is simply worth the extra love.
Foodie Tips
❤ The amount of graham crackers caused some intense discussion in our household. We netted out that “18 double graham crackers” actually meant 18 sheets of 4-up crackers, which is 72 total crackers not 36. I guess in the golden days a single cracker was assumed to be a 2-up cracker whereas today it would likely be considered 2 separate crackers.
❤ Make sure your spring form pan is well seated and sealed. Mine leaked a little bit in the oven which I solved by placing a pan underneath to catch any drips. After a few minutes baking the cake had set and all was good!
❤ You definitely do not want to over bake your cheesecake. Over baking will likely form cracks through and on the top resulting in a dry vs. moist end result. I’m reminded that the creamiest cheesecake I ever had was the one we water bathed in our oven. To do so we just wrapped the bottom of the springform pan with foil and placed it in a small pan of water while it cooked. The extra moisture will treat you to an amazingly moist cheesecake. I’ll try this method on the next go of this recipe!
i. Time
Prep: About 1.5 hours, including 30 minutes for prep and 1 hour for baking. Most people prefer their cheesecake chilled, so cooling it in the fridge for a few hours or overnight is recommended!
ii. Ingredients
18 sheets (72 total) | graham crackers, crushed and divided
1 cup (2 sticks) | butter, melted (my Grandmother “Nanny” insisted on Falfurrias)
3 (8 ounce) packages | cream cheese
1 ½ cups | sugar
4 | cage free eggs, separated and beaten
15 ounce can | pumpkin
2 teaspoons | ground cinnamon
1 teaspoon | ground ginger
½ teaspoon | ground cloves
for the topping:
1 pint (16 ounces) | sour cream
4 tablespoons | sugar
1 teaspoon | vanilla
iii. What To Do
1. Preheat your oven to 375°F.
 2. Crush the graham crackers in a bowl by hand or you can place them in a Ziploc bag, seal, and crush with a rolling pin or simply by hand. Mix the butter into the crumbs and press it into the bottom of a spring form pan. Reserve enough of the crumbs to cover the top in step 8 below.
 3. Cream together the cream cheese, sugar, beaten egg yolks (not the whites yet!), the pumpkin and the 3 spices.
4. Hand fold-in the egg whites.
5. Pour everything into the spring form pan and bake for ~25 minutes at 375°F. I was using my gas oven and needed to add an additional 10-15 minutes for the cake to set.
 6. When done remove the cheesecake from the oven and let it cool a bit. We’re not done with the oven yet – increase the temperature to 475°F.
 7. While the cake is cooling lets make our topping by hand-stirring together the sour cream, sugar and vanilla. Pour this mixture on top of the cheese cake and return it to the oven to bake for 5 minutes at 475°F.
 8. Remove the cheesecake from the oven, sprinkle on the remaining (reserved) buttery graham cracker crumbs from above and let it cool. I let my cheesecake rest on the bottom of the springform pan insert and chilled it in the fridge for a few hours until we were ready to cut it into slices and enjoy it!

Yield: About 8-16 slices, depending on how hungry you are.
Betty’s Son
Founder and “Nostalgic Food Blogger” of Betty’s Cook Nook

A Scan Of Mom’s Pumpkin Cheesecake Recipe
11/30/21
mrs. copple’s banana bread
Posted: April 20, 2020 Filed under: breakfast, desserts | Tags: baking powder, baking soda, banana, butter, cream cheese, eggs, flour, lemon juice, salt, sugar 6 Comments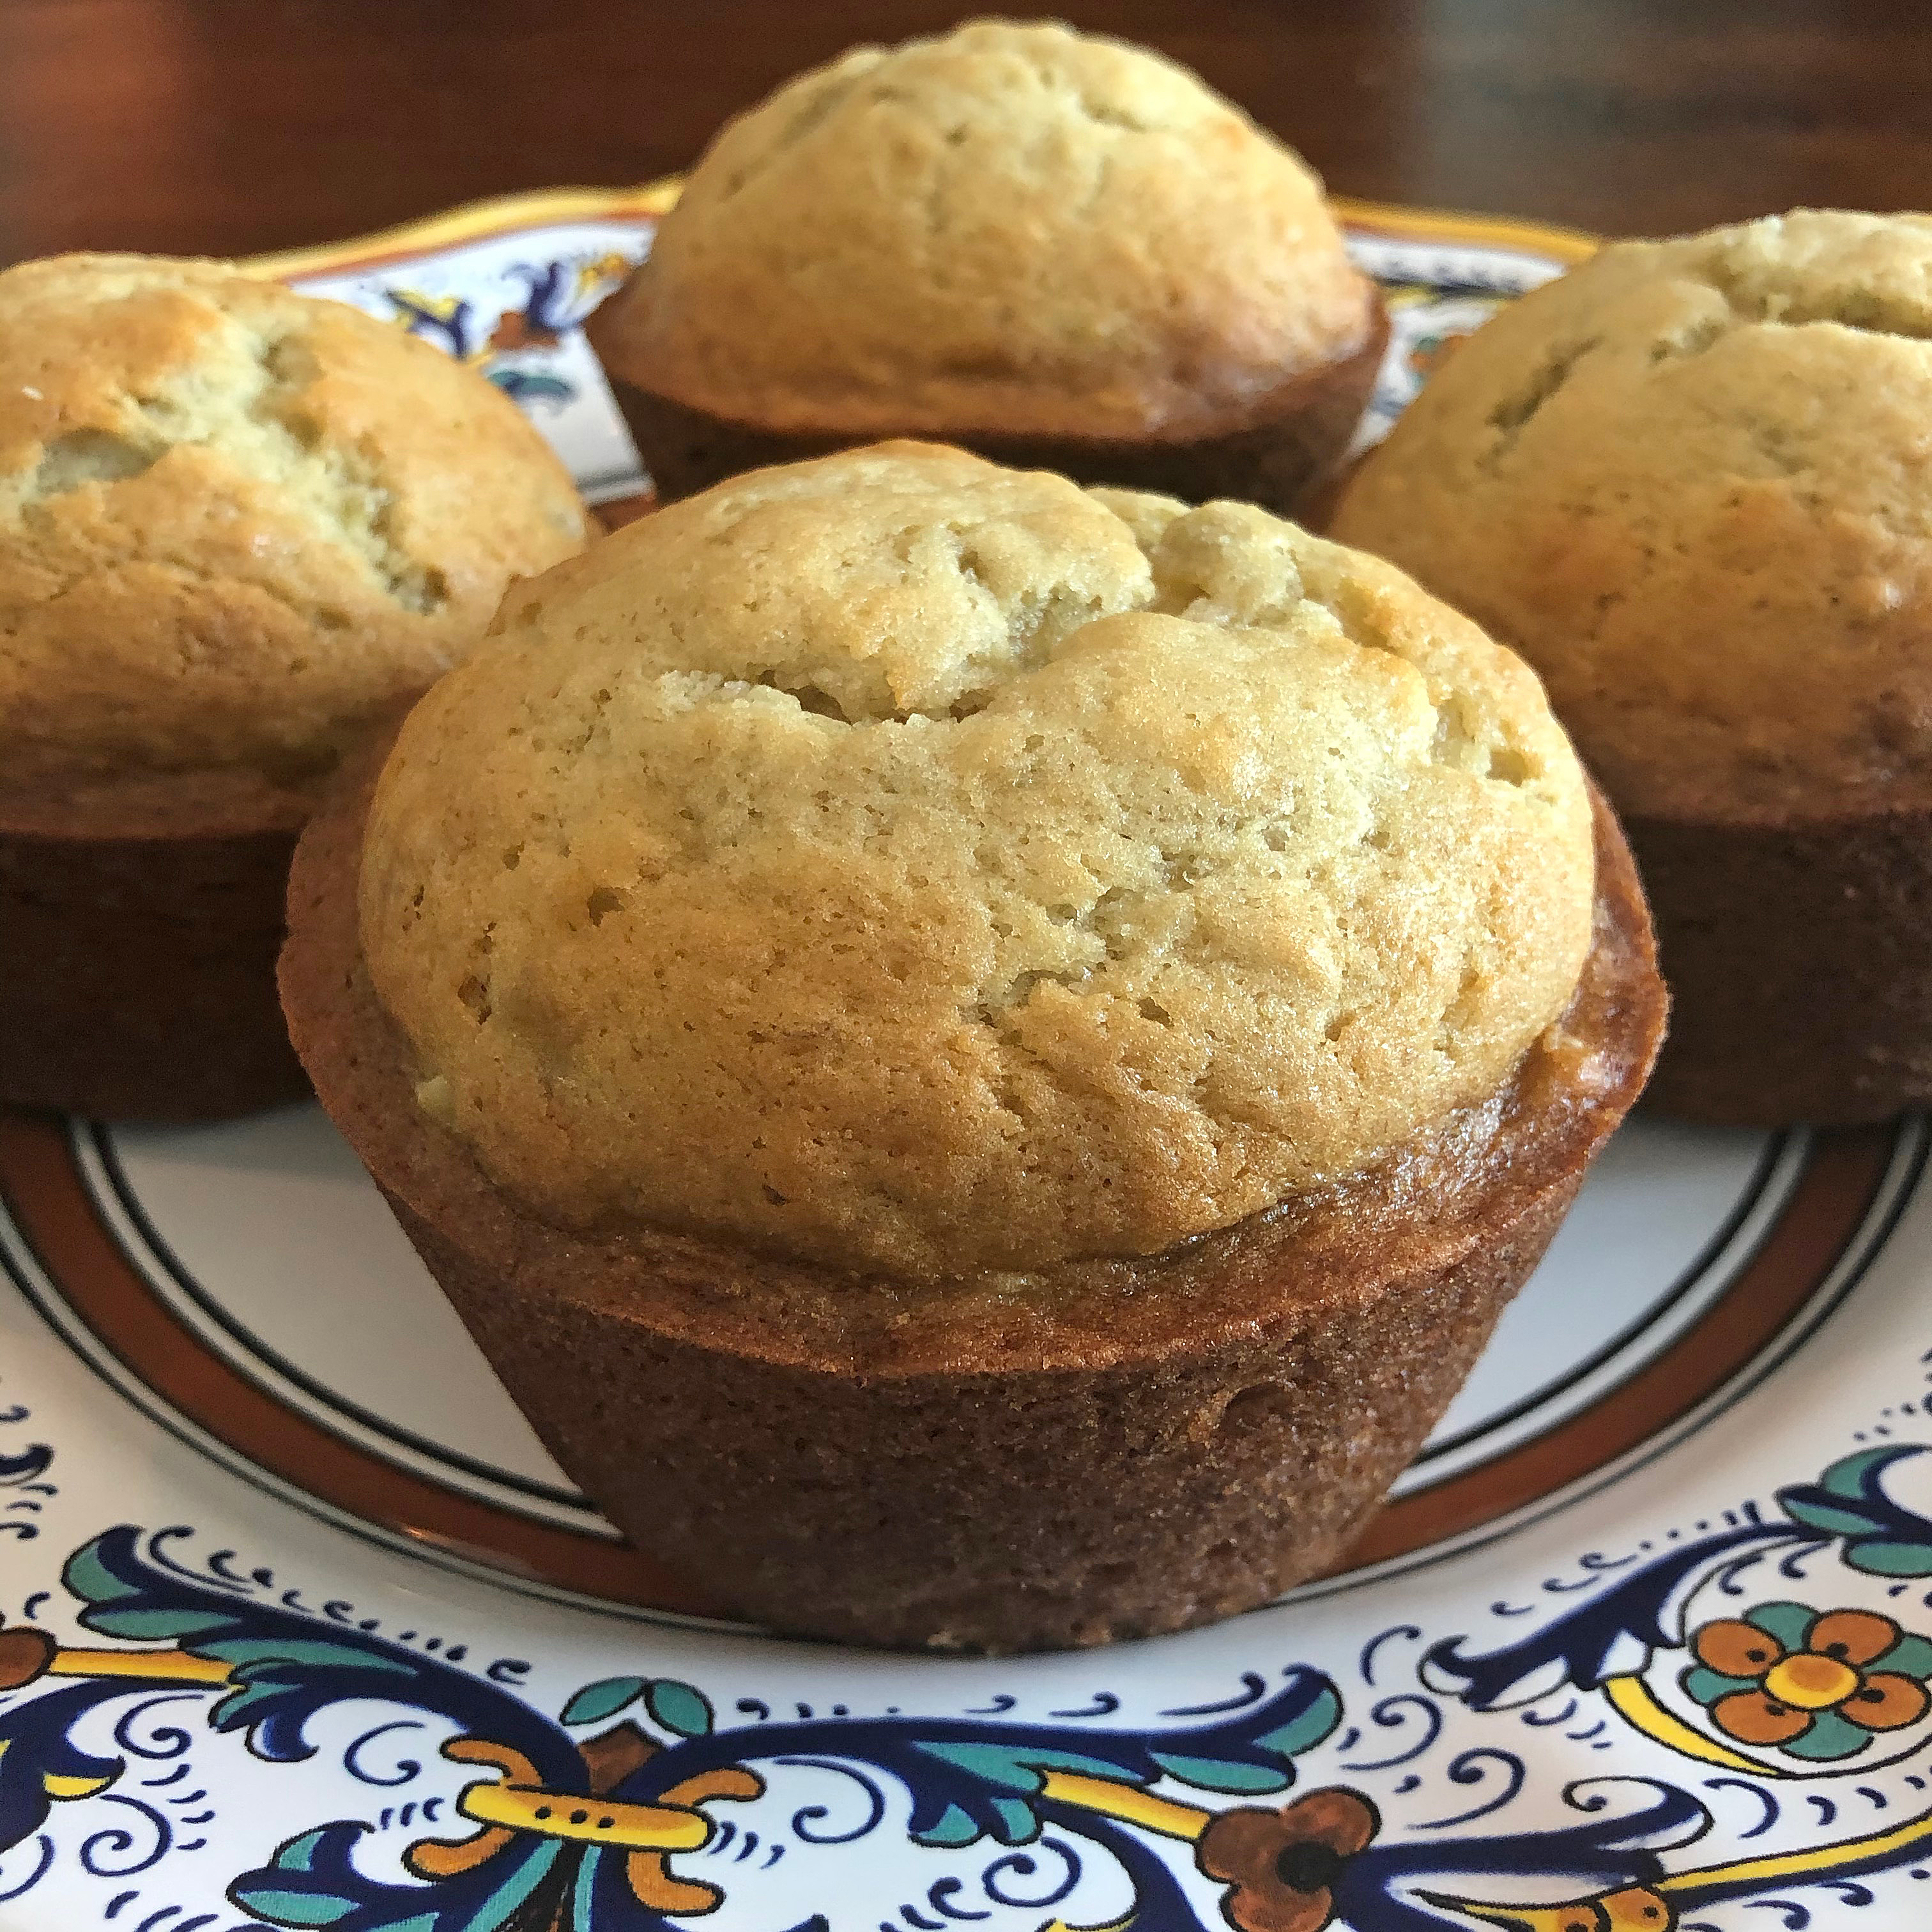 Breadwinners
Back in 2012 I posted this banana nut loaf cake recipe (which is really just banana bread, disguised with the “loaf” part). It has remained a family favorite to this day and I look forward to making muffins out of my Aunt’s recipe on our next go.
My friend Suzanne will be delighted to hear that Mrs. Copple’s banana bread recipe doesn’t call for nuts (shorthand for pecans, here in Texas). She and I continuously arm wrestle over whether banana bread should or should not have nuts and since I’m the fingers behind this post we know that “with nuts” wins. Yay me! But I will admit – this banana bread packs a great taste. Even if the nuts were forgotten! 🤠
Regardless of nuts and butter (or no nuts and margarine), I think we can agree we’re “breadwinners” when we enjoy a baked banana slice of home sweet home.
Foodie Tips
❤ You won’t see a bread picture in this post. Why? We decided to gift some of this sweetness to neighbors and thought muffins would be more portable than slices of bread. This recipe yielded 6 large (jumbo) muffins and 12 mini muffins (yielding 18 in total). For the large muffins you’ll cook about 25 minutes at 350°F; the minis were ready in 15 minutes.
❤ In addition to arm wrestling over nuts or no nuts, you can add butter vs. margarine to the list! We used butter in this recipe vs. margarine. Sorry, Mrs. Copple! During the 2020 COVID-19 lockdown all we stock is unsalted butter so that’s what we used. There are some culinary differences between butter and margarine that you might want to read more about in this post.
❤ I thought it interesting lemon juice was called for to prevent turning the bananas brown (the bananas wouldn’t be sitting out for a long period of time). But I’m not willing to risk a brown banana bread so in the lemon juice went!
❤ To serve, my favorite way to enjoy a bread or muffin is “toasty warm” with a smear of plain Philadelphia Whipped Cream Cheese on top! There’s nothing better!

i. Time
Total prep: About 40-75 minutes (depending on whether you make mini muffins or bread)
ii. Ingredients
1 stick | margarine or unsalted butter (my Grandmother “Nanny” always insisted on Falfurrias brand butter)
1 cup | sugar
2 | cage free eggs, at room temperature
1 teaspoon | baking soda
1 teaspoon | baking powder
1 teaspoon | salt
2 cups | flour, sifted
3 | bananas
a tad | fresh lemon juice

iii. What To Do
1. In a mixing bowl cream the margarine (or butter) and sugar together.
2. Add the room temperature eggs and beat well.
3. In a separate bowl add the baking soda, baking powder, and salt to the flour.
4. Mash the bananas and sprinkle them lightly with a squeeze or two of fresh lemon juice to keep them from turning brown.
5. Mix together the flour mixture and the creamed butter/sugar mixture.
6. With a spatula hand mix-in the bananas and your banana batter is ready!
7. Decide whether or not you’re making bread or muffins. Prepare your chosen baking pan (we used nonstick spray) and fill ¾ full.
8. Bake for 50-60 minutes for the bread; about 25 minutes for jumbo-sized muffins; or 15 minutes for the mini muffins… all until an inserted toothpick comes out clean.
Betty’s Son
Founder and “Nostalgic Food Blogger” of Betty’s Cook Nook

A Scan Of My Mom “Betty’s” Coveted Banana Bread Recipe (in her handwriting)
pimiento cheese
Posted: December 31, 2018 Filed under: appetizers, sandwiches, sides | Tags: cayenne pepper, cheddar cheese, cream cheese, green onions, mayonnaise, monterrey jack cheese, paprika, red bell pepper, yellow onion Leave a comment Pimiento Cheese: A Texan’s North Star
Whether you enjoy it as a side dish or a main course, there’s one recipe that’s an essential for the southern foodie – pimiento cheese!
Ironically my Mom “Betty’s” cookbook didn’t contain a pimiento cheese recipe… likely because making the stuff was a culinary instinct for my Texas born and bred Mom – the recipe was memorized.
I interviewed my family (Jennifer!) and friends and curated the recipe below which makes a nice staple for your kitchen or as a gift for friends. Whether you serve pimiento cheese from a china plate or at a tailgate, “P.C.” is one dish that’s an undisputed crowd pleaser.
Pimento vs. Pimiento?
Pretty much my entire adult foodie life I’ve been plagued with how pimiento is spelled. I’ve often heard it referred to as “pimento” (3 syllables) or “pimiento” (4 syllables). Pimiento appears to be the correct spelling according to the Southerners Bible, Southern Living, as well as the Merriam-Webster Dictionary. While either pronunciation will work, I prefer “pimiento” to “pimento.” Just pronounce it with confidence and don’t second guess the raised eyebrows you may receive. :)
I encourage you to explore the numerous ways to enjoy pimiento cheese including:
- Pimiento cheese-bacon cheeseburgers (score Bobby Flay’s recipe here)
- Pimiento cheese grits
- Pimiento cheese dip (see the bonus recipe below)
- Grilled pimiento cheese sandwiches
- Macaroni and pimiento cheese
- Pimiento cheese deviled eggs
- Pimiento cheese sausage balls
- Pimiento cheese ravioli
- Pimiento cheese schmeared on celery (my long-standing favorite)
Growing up my Mom would simply spread ¾ – ½ inch of the Texas gold between some sliced ButterKrust bread and that was that. Heaven!
Foodie Tips
❤ In a pinch for a few of the ingredients? There is an actual difference between pimientos and red bell peppers. So if you don’t use true pimientos, you can use a jar of roasted red bell peppers (drained and chopped) or red bell peppers, (roasted, seeded, and chopped). You can substitute white wine vinegar for the sherry vinegar.
❤ There are several alternate ingredients for making pimiento cheese including paprika or cayenne spices, yellow onion, finely chopped green onion tops – even toasted and chopped Texas pecans. Try your hand at finding the ones you like best!
❤ There are also several options to pair with your pimiento cheese – Triscuit crackers, naan, artisan breads, toasted breads, pita chips, vegetables… or as my Cousin Jennifer suggests “amply by spoon.”
i. Time
Total prep: Same day or longer… depending on your patience. And your palette.
ii. Ingredients
½ pound | cream cheese, softened
1 cup | mayonnaise
1 cup | goya brand jarred pimientos, chopped (see substitute above)
1 teaspoon | lea and perrin’s worcestershire sauce
1 teaspoon | sherry vinegar (see substitute above)
¼ teaspoon | cayenne pepper
½ teaspoon | kosher salt
½ pound | monterrey jack cheese, grated
¾ pound | sharp cheddar cheese, grated
handful | green onion tops, chopped (optional, but wildly suggested)
iii. What to do
0. Set out the cream cheese to soften (about 45 minutes to an hour).
1. In a medium-sized bowl stir the first seven ingredients with a spatula or spoon.
2. With a spatula, fold in the Monterrey and Cheddar cheeses and mix well. If you prefer a smoother (vs. chunkier) cheese you can continue to mash the cheese with a fork. If desired add the green onions inside the pimiento cheese and or sprinkle them on top for some color.
3. Transfer the cheese into storage/serving containers. Spreads easiest fresh; if you store it in the fridge until you’re ready to devour, you’ll likely want to let it rest, uncovered, until it’s creamy and pliable.
Cheers to the gold and red!
Betty’s Son
Founder and “Nostalgic Food Blogger” of Betty’s Cook Nook
*** BONUS RECIPE > PIMIENTO CHEESE DIP ***
My cousin Julie emailed me a recipe she said she saw in Southern Living for their spin on a melty Pimiento Cheese Dip. I couldn’t find the recipe online so this is extra special:
4 ounces | velveeta
¼ cup | whole milk
3 tablespoons | pimientos
½ teaspoon | paprika
½ teaspoon | fresh cracked black pepper
what to do:
1. Microwave the Velveeta for about 1 minute, stirring after 30 seconds. Microwave a few more seconds until the cheese is melted.
2. Whisk in the milk, pimentos, paprika, and pepper.
Serve while it’s warm with your favorite pairings (pita, celery, etc. per above).

Pimiento Cheese-Bacon Burgers > Can You Dig It ?

Southerners Share A Lot. Go On… Share This Recipe!
clam puffs
Posted: March 11, 2018 Filed under: appetizers | Tags: butter, clam juice, clams, cream cheese, eggs, flour, milk, pepper, salt, tobasco Leave a comment You had me at “cream puffs.” You lost me at “clam.”
The fact that anything made with clams has not crept its way into my foodie hall of fame is because I’m a selective (um, “picky”) seafood eater. So sometimes I miss out on the sea fun because I suspiciously stereotype and elevate food options to DEFCON 1 when shrimp, octopus, oysters and the like are on my radar. Basically if it’s cold and fishy, I’m likely out. Except for the highly rated ceviche sampler I had at Stephen Pyles‘ downtown Dallas hotspot that now is closed. Boo.
This recipe daunted me because of *clam* PLUS I had never made a puff before – cream or otherwise. Surprisingly these puffs were remarkably easy to make and I look forward to a little more puff magic to come. In the end I couldn’t help but notice how similar they were in size and shape to my childhood favorite Dunkin’ Munchkins. Glazed, powdered, filled or sprinkled, these sweet treats were born in the 1970s and are still alive and living life large today.
Foodie Tips
❤ When the recipe author Mary Stephenson (more about Mary below) wrote that these freeze beautifully she wasn’t kidding! We had leftover puffs and almost 2 months after they went into the freezer Joe enjoyed some when I was out of town for work and he said they were just as good as fresh. Shazam! Joe simply reheated them in our air fryer for 7 minutes at 400°F.
❤ Mary noted that you can substitute the clam with shrimp or crab. So you can enjoy “sea inspired puffs” 3 ways!
❤ I didn’t find clam broth at the store. But I did find clam juice which is apparently the same thing, so keep your eyes peeled for either.
❤ We halved this recipe. Sans hosting a party we would have been eating puffs for weeks!

i. Time
To prepare: About 20 minutes.
To bake: 35 minutes
To fill: About 20 minutes

ii. Ingredients
for the puffs:
1 cup | clam broth
1 cup | water
½ cup | butter (my grandmother insisted on Falfurrias)
1 cup | flour
5 | cage free eggs (4 for the puffs and 1 for the glaze)
1 teaspoon | more butter (to grease pan)
½ teaspoon | milk
for the filling:
3 6.5 ounce cans | minced clams, drained
8 ounces | cream cheese and chives (I only found chive and onion)
6-8 dashes | Tobasco brand red pepper sauce
½ teaspoon | fresh cracked pepper
1 teaspoon | Lawry’s seasoned salt
iii. What to do
1. In a medium-sized pot heat the clam broth/juice and water and bring to a boil. Add the ½ cup butter and let it melt – it won’t take long!
2. Stir in the flour all at once and stir constantly until the dough “leaves the pan” and forms a ball. Note: the dough isn’t literally going to leave/leap or otherwise hurl itself out of the pan – you’re just looking for when it begins to stick to itself and become doughy enough to form. :)

3. Remove the pan from heat and add 4 eggs, one at a time (you’ll reserve the last egg for the puff glaze.
4. Place 1 teaspoon butter on a cookie sheet and smear to coat the pan. Form the dough by hand into about 50 balls (100-120 puff balls if you’re making the full recipe in which case you’ll need more than 1 cookie sheet). When we formed the balls we improvised by transferring the readied flour into a Ziploc bag, cutting a small corner from the bag, and piping it onto the cookie sheet.
5. Preheat your oven to 400°F.

6. Make your egg-milk mixture by whisking together 1 egg and the milk. Brush the pre-baked puffs with the egg-milk mixture.
7. Bake the puffs at 400°F for 10 minutes. Reduce heat to 300°F and bake for 20-25 additional minutes.
8. While the puffs are baking let’s make the clam filling! In a medium bowl cream together the clams, cream cheese, tobasco, salt and pepper and set aside.
9. When the puffs are golden brown remove them from the oven and let them rest until they are cool to the fingers. Cut them in half with a knife and fill them with the clam filling (a little schmear with a knife will do just fine).
Yields 10-12 dozen as penned. Remember you can half this recipe!
Seafood Lover? I have a post coming soon with a great story about the Texas Coast that stems to my childhood. In the meantime check out the other Betty’s Cook Nook seafood recipes at right by clicking on yup – you guessed it – “seafood!”
Betty’s Son
Founder and “Nostalgic Food Blogger” of Betty’s Cook Nook
Who is “Mary Stephenson?”
We Kikers lived at 2927 Trailend Drive in San Antonio from the early 1960s until the mid 1980s. Mary was the Mother of the Stephenson family living next door to us.
Mary was a fabulous foodie friend of ours and you’ll see a few recipes from Mary’s kitchen here at Betty’s Cook Nook.
Our two families spent many shared dinners and laughs together so I was happy to find some of Mary’s recipes tucked in Mom’s cookbook since the Stephensons were a magnificent and memorable part of my wonder years.

A Scan of Mom’s Cream Puffs & Clam Recipe | Gifted and Penned by Mary
You didn’t think I’d close this post without some vintage Dunkin’ advertising, did you? Here we go!
![]()
spinach delight
Posted: February 4, 2018 Filed under: appetizers | Tags: butter, cream cheese, fritos, fritos scoops, garlic toast, herb dressing mix, spinach, tortilla chips Leave a comment
Debuting for Super Bowl 2018 along with Holy Guacamole, this Spinach Delight recipe proved just that – De. Light. Ful!
Growing up you could find me about as close to anything fashioned from spinach as you could my homework (think: Far Far Away). Now that I’m older I can see what all the fuss was about – this dish is creamy, savory, and the dressing-stuffing that tops this appetizer provides the perfect crisp to raise eyebrows and arms.
Foodie Tips
❤ Herb Dressing or Herb Stuffing? Joe and I discussed this one for a bit. I told him I believed my Mom “Betty” knew well the differences between dressing and stuffing and she clearly penned the recipe card below “dressing.” But when we went searching for the ingredients for this recipe all we could find was Pepperidge Farm Herb Stuffing.
You can read this post where I help debunk the differences between dressing and stuffing but I’m leaving this “dressing” in the ingredients list even though I think the Pepperidge Farm stuffing packaging caters to northerners, where their Connecticut headquarters is located. #ThisIsTexas So buy their stuffing but call it dressing. :) Heck, even Pepperidge Farm uses the terms interchangeably as you can see in their very own recipe!

❤ This dip pairs remarkably well with tortilla chips, Fritos or better yet Fritos Scoops which will lend you a helping hand fostering bigger globs of the green good stuff from dish to belly. We also enjoyed our delightful dip smeared atop some homemade garlic-rubbed toast (see the mouthwatering “triple play” pic below).
i. Time
To prepare: About 15 minutes.
To bake: 30 minutes.
To enjoy: Mere nanoseconds
ii. Ingredients
3 packages | frozen chopped spinach
1 stick | butter, softened (my Grandmother insisted on Falfurrias)
8 ounce package| cream cheese, softened
⅓ package | pepperidge farm herb dressing (see stuffing tip above)
to serve | your favorite chips or veggies (optional)
iii. What to do
0. Preheat your oven to 350°F.
1. While the oven’s preheating cook the spinach (boil it?) and drain well. Set aside.
2. Blend together half of the softened butter and all of the cream cheese. Add in the spinach and mix everything well. Place this mixture into a 2 quart baking dish.
3. Roll the dressing to fine crumbs and sprinkle it over the spinach mixture. Dot the top of the dressing with the remaining ½ stick of butter.
4. Bake at 350°F for 30 minutes or until lightly browned. Remove from oven and let rest about 5 minutes.
Serve warm with your chosen accessory (tortilla chips, Fritos, Fritos Scoops, garlic bread, etc.). Or just enjoy it with a spoon!
Betty’s Son
Founder and “Nostalgic Food Blogger” of Betty’s Cook Nook

Super Bowl Score: Shown here is my beloved “triple play” shot – Spinach Delight with hand-rubbed garlic bread, Lil’ Smokies resting in a BBQ and grape jellied sauce, and my homemade Queso and Fritos Scoops. It was hard to share. :)

A Scan Of Mom’s Recipe Card (Circa 1970s)
Who is Mrs. Ira Lieberman?
Well clearly she was the inspiration behind this recipe per the credit Mom included on the recipe card above.
I did some online researching and believe I found her. Janet “Casey” Liberman was married to Ira Lieberman and both lived in San Antonio where I grew up.
Sadly both Ira and Casey have passed. I send my thanks to them for this recipe.
king crab appetizer puffs
Posted: September 20, 2015 Filed under: appetizers, seafood | Tags: butter, crab, cream cheese, green onions, mayonnaise, monterey jack cheese, parsley, phyllo pastry sheets Leave a comment
Let’s Get Crabby
In my younger years I spent most summers visiting the Texas Coast at Port Aransas. My Dad loved to wade fish and my Mom loved to crab. Port A’s north and south jetties are where I learned to maneuver the giant granite blocks that extended into the sea. There were countless nooks and crannies where the sea met the granite boulders and this was the special place my Mom “Betty” loved to go crabbin’.
 Mom would bait her crab net with a small piece of chicken and lower it into the water and wait a bit. Moving very slow and being extra quiet we’d quickly raise the nets to see if we had caught a crab – two if we were lucky! Females went back into the water and the males we’d take back to our short-term home at Executive Keys to boil and create some crab delicacies.
foodie tips ~
❤ This yields about 3 dozen appetizers. You can half the ingredient quantities if you’re just having a snack. They are best consumed fresh but don’t reheat them in the microwave – only the oven, so they will be crispy!
❤ I couldn’t find King Crab at my local HEB so I substituted it with plain ol’ crab.
i. ingredients
1 package (6-8 ounces) | frozen crab, thawed
2 tablespoons | butter (my grandmother insisted on Falfurrias brand butter)
¼ cup | green onions, sliced
1 cup | fresh mushrooms, chopped
1 cup | monterey jack cheese, shredded
3 ounce package | cream cheese, softened
⅓ cup | mayonnaise
2 tablespoons | parsley, minced
¼ pound | phyllo pastry sheets
¼ cup | more melted butter
ii. what to do
0. Preheat oven to 350°F.
1. Drain and slice the crab. Melt 2 tablespoons of butter in a skillet. Add the onions and sauté them 1 minute. Add the mushrooms and sauté 1 minute longer. Combine the mushroom-onion mixture with the crab, cheeses, mayonnaise and parsley.
2. Spread phyllo sheets out in layers, two at a time (we did 3 layers because we love the crisp of phyllo). Cut each group of two into strips about 2 inches by 10 inches.

Look at the butter! Mmm – BUTTER!
3. Brush each phyllo strip with melted butter. Mmm … butter! Spoon a scant tablespoon of filling onto the end of the phyllo strip. Fold the pasty over the crab filling to form a triangle. Continue folding into triangles as you would a flag for the length of the strip. Seal the seam with a little more butter.
4. Place seam side down on a greased baking sheet. Bake for 30 minutes or until crisp and golden.
Serve these hot!
~ Patrick
Betty’s Son
Founder and “Nostalgic Food Blogger” of Betty’s Cook Nook

A Scan Of Mom’s “Crabetizer” Recipe

They kinda look like crabs already. Next time I’ll fashion these just right!
lemon cheese cake
Posted: July 9, 2015 Filed under: desserts | Tags: cream cheese, graham cracker crust, lemon pudding mix, lemon zest, milk, pecans, raspberry chipotle sauce Leave a comment An Easy Cheesy Cake Pie
I’m not sure of the technical definition for what distinguishes a pie from a cake but I’m pretty sure this would best be referred to as a pie. Oh, well – no matter what we call this it still tastes the same and it’s one of the easiest recipes I can think of. So if you’re in a hurry and you need to produce a cake-pie, I suggest you bookmark this recipe!
foodie tips ~
❤ Because lemon is a versatile flavor you can garnish your cake with some lemon zest, a few drizzles of some Fischer & Wieser Raspberry Chipotle Sauce or even a few chopped Texas pecans to liven up the party.
❤ If you like easy to make desserts, you should check out more of Mom’s recipes for Blueberry Cheese Pie and Easy Cheese Cake.
i. ingredients
8-ounce package | cream cheese, softened
1 package | instant lemon pudding mix
½ cup | milk
1 ½ cups | more milk
8 inch | graham cracker crust
to garnish | any of the items from the “foodie tips” section above
ii. what to do
0. Soften your cheese. Let your cream cheese sit on the counter for at least 30-45 minutes. I usually open the package to help this process speed-up a bit. If you rush this step your cream cheese may turn out lumpy and nobody likes lumpy cream cheese. :) Please note that I numbered this as step “0” because this step is so easy it really doesn’t deserve a number.
1. Blend things up. In a medium-size bowl blend the cream cheese and the ½ cup of milk. Add 1 ½ cups more milk and the pudding mix and beat as directed according to the pudding mix instructions.
2. Pour it up. Pour the cream cheese mixture into your crust and chill until set.
Serve cold
~ Patrick
Betty’s Son
Founder and “Nostalgic Food Blogger” of Betty’s Cook Nook

A scan of Mom’s original recipe

blueberry cheese pie
Posted: May 8, 2015 Filed under: desserts | Tags: blueberry pie filling, cherry pie filling, cream cheese, fresh fruit, lemon juice, pie crust, sweetened condensed milk Leave a comment Tastes Like Cheesecake … But It’s Really A Delicious CheeseFake™
This no-bake cheese pie recipe is super simple to make! There are just a few ingredients involved and a little bit of time in the fridge and voilà – you’re ready to send your tastebuds off on a fruity flavor adventure.
I’m ok with a cheesecake imposter recipe – especially when it means less time preparing and more time eating a delicious treat!
foodie tips ~
❤ One of my favorite foodie “secret weapons” are mini fillo cups. These bite-sized wonders are perfect for desserts and raclette. You can keep them in your freezer and they require no defrosting or baking! The instructions below assume we are making the mini cups version.
❤ The blueberry topping is good and I see cherry pie filling was listed below as an option. You can also top this pie with fresh fruit like strawberries, banana, kiwi – or all of your favorites!
❤ You can leave these in the fridge for a few hours but I wouldn’t suggest you leave them more than 4-6 hours; these present best fresh.

We’re turning four this weekend! Thanks to my Mom Betty and fellow Foodies who keep our passion alive!
i. ingredients
8 ounce package | cream cheese, softened
2 tablespoons | lemon juice
½ cup | sweetened condensed milk
9 inch | pie crust, baked then cooled (or the mini fillo cups ❤)
21 ounce can | blueberry pie filling (or cherry … or fresh fruit)
to serve | powdered sugar (optional)
ii. what to do
1. Soften It Up: Let the cream cheese soften before you jump to Step 2. This will ensure that you can get a really creamy cheese mixture. Just rest the cream cheese on your kitchen counter while you phone a family member, play fetch with the dogs, write a friend a letter … or whatever your heart desires.
 2. Mix It Up: Beat until smooth the cream cheese, the lemon juice and the condensed milk. (sidenote: I laughed out hard when I saw the recipe instructions originally said to “beat up” the ingredients. “Kitchen violence” is not tolerated here at Betty’s Cook Nook! LOL.)
3. Fill ‘Em Up: Fill your mini fillo cups (or your pie crust) with the cheese mixture. Leave a little bit of room for your fruit topping (Step 4). You can use a spoon to do this … or … one trick I like is to transfer the filling into a Ziploc bag, close it tight and snip a bit of one corner off with some scissors. You just made your own piping bag which makes filling the cups a snap.
4. Top ‘Em Up: Top the filled cups with your fruit filling or fresh fruit and chill thoroughly for an hour or two. If you don’t plan on serving these in a few hours you can always reserve the fruit until about an hour before you’re ready … and let the cheese-filled cups (sans fruit) chill ahead of time.
5. Serve ‘Em Up: Plate your pies. You can dust with some powdered sugar to create a pretty contrast on top of the fruit.
Serves: 8-12 folks, depending on how you make this dish (pie or mini cups).
~ Patrick
Betty’s Son
Founder and “Nostalgic Food Blogger” of Betty’s Cook Nook
Here’s a scan of Mom’s original recipe.
The handwriting isn’t Mom’s but it looks suspiciously like my Aunt Delores’ handwriting. Cousin Julie says she thinks it’s hers, so either way, I win!

holiday cake
Posted: December 25, 2014 Filed under: desserts | Tags: baking powder, butter, cherries, cream cheese, eggs, flour, milk, pecans, powdered sugar, sugar, vanilla Leave a comment A Christmas Spectacular
(Part III)
This holiday recipe is a continuation of the ultimate holiday meal which begins with this tomato bisque recipe, which you’ve gotta check out if you want your holiday meal to be complete. ;)
You’ll also be able to read a little more about how this recipe was selected for Betty’s Cook Nook plus learn about the photographer who took the picture of the 1970s Christmas family below.
foodie tips ~
♥ Butter instead of margarine? Call me hard-headed, but yes. Plus, I don’t like to anger Mother Nature.
♥ Green maraschino cherries? I had trouble finding them at my local HEB so I went red all the way. Below, when it calls for well-drained cherries, after draining them in a colander transfer them to a paper towel then blot them with a paper towel.
♥ I had lots more glaze leftover. You could easily cut the powdered sugar and milk quantities below in half unless you want more glaze than what’s pictured above.
i. ingredients
1 cup | falfurrias butter, softened (falfurrias is from Texas, y’all)
1 package (8 ounce) | philadelphia cream cheese, softened ahead of time
1 ½ cups | sugar
1 ½ teaspoons | vanilla extract
4 | cage free eggs
2 ¼ cups | cake flour, sifted and divided into 2 cups in one bowl and ¼ cup in another
1 ½ teaspoons | baking powder
¾ cup | red and or green maraschino cherries, well drained
1 cup | pecans, chopped and divided into halves (½ cup each)
1 ½ cups | powdered sugar, sifted
¼ cup | milk
to top | more maraschino cherries
ii. what to do
1. Make sure your butter is softened then preheat your oven to 325°F. Things are about to heat up!
2. Combine butter, cream cheese and sugar then cream together until light and fluffy. We used our tried and true KitchenAid mixer for the ultimate fluffy.
3. Stir in the vanilla. Add eggs one at a time, beating well with every addition.
4. In a medium bowl gently hand mix 2 cups flour and baking powder then gradually add to the creamed mixture.
5. Combine the remaining flour, cherries and ½ cup of the pecans and fold into the cake batter.
6. Sprinkle the remaining pecans into a greased 10-inch Bundt or tube pan; pour in the cake batter.
7. Bake for 1 hour or until cake tests done. Cool 5 minutes then remove from pan.
8. Combine powdered sugar and milk. Pour this glaze over the cake and garnish with cherries.
Here’s a scan of the original recipe! Note the missing Apple Cider recipe (how could they?!). No worries – I have a substitute recipe coming soon.

jojo’s spinach
Posted: November 21, 2013 Filed under: sides | Tags: cream cheese, mushroom soup, onion, onion rings, spinach Leave a comment
You’re Looking At Green Bean Casserole’s Kissin’ Cousin
Sadly, this recipe sat for many months lonely sandwiched amongst many other recipes hoping to be brought to life from Mom’s legacy cookbook.
On “lucky day” it was the chosen recipe because it sounded like the perfect side dish for fast approaching Thanksgiving. Boy, we were right! We loved the creamy-savory smash-up that reminded us of green bean casserole . . . but with spinach.
Popeye would be proud.
foodie tips ~
♥ By “mushroom soup” I’m 99.99% confident that “Campbell’s Cream of Mushroom Soup” was implied. If for some reason Cream of Mushroom soup makes your tummy twitch, try Campbell’s Golden Mushroom Soup.
♥ This dish makes a great Thanksgiving side and it’s a great way to get kids to eat their spinach (Winky, Winky – we all know kids will love the onion rings, just like me).
♥ I canNOT believe my Mom wrote “We like it best w/o onion rings.” The rings were my favorite part! The hips don’t lie. Push off, Popeye!
♥ We prepared the spinach in the microwave. For shame. And speed.
i. ingredients
1 | onion, sliced
2 10-ounce packages | frozen spinach, chopped
3-ounce package | cream cheese
½ can | mushroom soup
¼ can | fried onion rings
ii. what to do
0. Preheat oven to 350°F.
1. Sauté onion in a pan over medium heat then set aside.
2. Cook the spinach according to package instructions and drain well.
3. In a casserole dish combine the onion, spinach, cream cheese and soup.
4. Cover and bake for 15 minutes.
5. Remove casserole from oven, add onions on top and return everything to the oven to bake 10 minutes longer, uncovered.
6. Dish up and enjoy!
~ ~ ~
Who is “Jo-Jo?”
Jo-Jo and her husband Charles (Chizzy) Davis were our next door neighbors when I was a little kid. Sadly I don’t remember them very well. My brother Tim said they moved from the home they built at 2923 Trailend Drive a couple of miles away from us to Treasure Way in San Antonio. Who moved in to their former home? The Stephenson family! The Stephensons were our neighbors on Trailend until Mom and I moved out of the home shortly after Dad died.


