manicotti-cheese bake
Posted: June 5, 2023 Filed under: casseroles and one-dish meals | Tags: black pepper, green pepper, ground beef, italian herb seasoning, manicotti shells, mozzarella cheese, ricotta cheese, salt, sugar, tomato paste, water, white onion Leave a comment Simply Satisfying
As a self-proclaimed Italian foodie, I was leery about this recipe. It seemed far too basic from the looks of the recipe (below). But my love of pasta and red sauce drew me into the light. #CarolAnne
The end result? A delicious dinner! You can modify this to suit your preference. I read about options including adding chopped parsley, ground meat, or vegetables to the cheese mixture. Drooling!
Manicotti or Cannelloni? Yeah, I wasn’t sure of the difference, either. Manicotti tubes are ridged and typically thicker than their cannelloni friends, which are smooth and slightly thinner. Either way, you win with carbs!
My instinct says this recipe hails from circa 1980 based on the print quality and fonts used in the recipe. I’ll do some digging to see if I’m right and post an update. The original recipe scan is below. Enjoy!
Foodie Tips
❤ For an easy way to get the cheese inside the manicotti shells, pipe it in! Take a plastic sandwich bag and fill it with the cheese mixture. Snip off a corner of the bag with some scissors and you just made yourself a piping bag. After parboiling the pasta, insert the snipped end of the bag into the shell and squeeze/pipe until the shell is filled.
❤ We required more cheese and of course, preferred more sauce. You can double everything below (aside from the shells). For the shells, we made a couple extra just in case there were any unforeseen splits/cracks during parboiling. Any split/cracked shells make for fun snacking!
❤ If you’re in a pinch for time, you can use your own sauce. Dare I say use a jarred sauce! Joe makes a delicious red sauce that we try to keep on hand, but it usually winds up being devoured within a day or two.
i. Time
About an hour (all in)
ii. Ingredients
½ pound | ground beef
½ cup | white onion, minced
¼ cup | green pepper, chopped
⅔ cup | tomato paste
2 cups | water
1 ½ teaspoon | salt
½ teaspoon | fresh cracked black pepper
1 teaspoon | sugar
1 ½ teaspoon | italian seasoning
8-9 | manicotti shells
2 cups (1 pound) | ricotta cheese
1 cup (4 ounces) | mozzarella cheese, hand grated
to serve | more cheese and fresh basil on top
 iii. What To Do
1. Sauté meat, onion, and green pepper. Drain off the fat.
2. Add the tomato paste, water, salt, pepper, sugar, and the Italian seasoning. Simmer 15 minutes.
3. While the sauce is simmering, parboil the manicotti in salted water for 4 minutes. Drain and set the shells aside on a paper towel to rest.
4. Prepare the cheese mixture by combining the ricotta and mozzarella cheese in a medium bowl. Transfer into your piping bag (see recipe tip above).
5. Prepare an 8 inch (or a size appropriate for how much you’re making) baking dish by placing some of the sauce on the bottom. Now is a good time to preheat your oven to 350°F.
6. Begin filling one of the parboiled shells with the cheese mixture. Place the filled shell into the baking dish and continue until all shells are ready to go.
7. Cover the shells with the tomato sauce.
8. Bake at 350°F for 20-30 minutes, or until things are nice and bubbly. Just before serving top with more cheese and some fresh basil.
Servings: 4-6 (maybe more)
Betty’s Son
Founder and “Nostalgic Food Blogger” of Betty’s Cook Nook
An original scan of Mom’s recipe:

Who was Carol Anne?
Carol Anne (aka Heather O’ Rourke) was one of the most iconic childhood actors! You may remember her phrase “They’re here!
11/30/21Presidente Brandy
zucchini quiche
Posted: August 10, 2022 Filed under: breakfast, casseroles and one-dish meals | Tags: black pepper, butter, eggs, half and half, mozzarella cheese, mushrooms, pie crust, salt, swiss cheese, white onion, zucchini Leave a comment  Sheesh! Another Quiche?
You Betcha! My Mom “Betty” definitely loved quiche. This is the third quiche recipe here at Betty’s Cook Nook and yet the first one that is all vegetable as well as the first one that features zucchini.
Somehow I’m surprised with each and every quiche recipe – they seem to be wondrously unique in their own rightful way and yet super easy to make. I think you will enjoy this recipe!
Foodie Tips
❤ We initially debated over whether to use a frozen pie crust or a refrigerated pie crust. We went with a Pillsbury frozen crust because it was likely what was most common in the 1970s. Just like ready-to-cook tortillas weren’t readily available in the 1970s, 80s, 90s, and until the 2000s until recently, either.
❤ I’m duly noting that a 10-inch pie shell was not to be found at my local grocery. In a post-COVID era when product sizes are getting smaller while prices are growing larger we scored a 9-inch deep dish Pillsbury crust at H-E-B.
❤ If you truly love quiche click this link and scroll down for the full meal monty of my Mom’s recipes.
i. Time
Prep: About 20-25 minutes prep and 30 minutes for baking.

Late To The Party Pic: Mushrooms!
ii. Ingredients
9-10-inch | pie shell, frozen or fresh
3 tablespoons | butter (my grandmother insisted on falfurrias brand butter)
1 cup | white onions, chopped
1 cup | mushrooms, brushed clean, cut in half, and then sliced (I suggest white or baby bella ‘shrooms)
1 cup | zucchini, cut into half moons
1 cup | ½ and ½ cream
3 | cage-free or free-range (pasture raised) eggs
1 cup | swiss or mozzarella cheese, shredded
to taste | salt and pepper
iii. What To Do
1. Preheat your oven to 375°F.

2. Place the pie shell in the oven and bake for 3-4 minutes. Remove from the oven and prick the shell with a fork. Return to oven for 5 minutes more.
 3. While the pie shell is in its second bake… in a medium-sized sauté pan place the 3 tablespoons of butter and melt it over medium heat. Add the onions, mushrooms, and zucchini. Sauté for 5-7 minutes. Remove from heat and let rest. Tip: to drain, tilt the pan by placing the lid underneath and a crumbled-up paper towel in the opposite corner. Let the paper towel soak up the juices then discard the paper towel.
4. Transfer the drained sautéd veggie mixture into the pie shell.
 5. In a measuring cup or bowl, whisk the 3 eggs then stir-in the 1 cup 1/2 and 1/2 cream and 1 cup of your chosen cheese. Pour the egg-cheese-cream mixture over the veggies/pie shell.
 6. Bake for about 30-35 minutes or until an inserted knife comes out clean.
Yield: About 8-10 servings.
Betty’s Son
Founder and “Nostalgic Food Blogger” of Betty’s Cook Nook

A Scan Of Mom’s Original Zucchini Quiche Recipe
11/30/21
fondue
Posted: December 25, 2021 Filed under: casseroles and one-dish meals, meats poultry and fish | Tags: apple, beef tenderloin, black pepper, butter, capers, flour, french bread, garlic, horseradish, mushrooms, nutmeg, pear, salad oil, sauterne, sherry, swiss cheese, vinegar Leave a comment For The Love Of Fondue
Growing up the youngest of three boys meant I was the small, quiet one. The one who listened and watched to center stage from afar.
Older me tells younger me that’s AOK because it helped me make the most of the precious time I had with my parents. I was able to soak it all in and pick up on a few tips I still hold near and dear to this day… including a few memories like the joy of fondue.
I’m not sure the first time I had fondue but I was likely about the age of 12.
My family would gather around the spirited fondue pot to create our meal using individual spears, dipping things in hot oil or cheese and then a sauce or two that Mom would create. The simple things.
Little did I know back then but fondue was more than “just that.” Fondue marries food with the imagination and to me, there’s nothing better!
 A Christmas Story
This summer I stumbled upon a random search result for a vintage fondue pot that reminded me of the one my parents had. I knew what I had to do.
A few days later the electric fondue set arrived at my home and I set it aside for a special day when I would unveil the 1970s fondue pot. It sat in the dark since then as most of 2021 brought some challenging times caring for – and parting with – my secondary shadow in the form of my yellow Lab, Harley.
This Christmas Day I thought there was no better way to round out the year than by revving-up the fondue pot and reliving and sharing this foodie form with my family and here, with you.
If you’re not already a fondue fan, I hope you give fondue a try! It’s remarkably simple and will treat you to the joy of this dish with Swiss origins!
 Fon-dos and Don’ts
❤ Fon-do try these out: I’ve included a variety of my favorite recipes that caught my Mom’s eye below – cheese and beef fondue and a few sauce suggestions, including butter-browned mushrooms, caper butter, mustard, and a red sauce! Scans of the recipes from her cookbook are also below.
❤ This is a dish of variety! Fon-don’t just try one dip or item to be dipped – go for a range of flavor and put the power of the fondue pot to the fullest! For the cheese fondue you can try cubed pears or apples as an appetizer entry or a dessert dismount! I don’t have two pots but I’m only guessing that cooked beef fondue dipped into cheese fondue is a double fondue delight!
❤ Fon-do check out some of the vintage fondue pots I found strolling on Etsy. They’re hot so get yours before they’re gone!
 i. Time
Total prep: There’s no rush here in the land of fondue, but I’d allow at least 90 minutes – 2 hours for the whole shebang.
 ii. Ingredients + directions
cheese fondue:
to dunk | french bread, torn or cut into bite-size pieces
¾ pound (about 3 cups) | swiss cheese, cut into thin julienne strips
1 tablespoon | flour
1 clove | garlic, halved
1 ¼ cups | sauterne (a sweet french wine)
dash | fresh cracked black pepper
dash | nutmeg
3 tablespoons | dry sherry


cheese fondue directions: 1) I toasted up my bread a bit to give it a little crunch. Toasting the bread on a foil-lined pan for 5 minutes at 350°F should do the trick. 2) Toss the cheese with the flour to coat and set aside. 3) Rub the inside of the fondue cooker vigorously with the cut surface of the garlic clove. 4) Add the sauterne and warm it just until air bubbles start to rise. Don’t cover and do not let it boil. 5) With a wood or silicon spatula stir constantly from this step forward and in the same direction – a process known as “shear thinning” which helps the cheesy fondue become thinner. Add a handful of cheese strips and wait until the cheese has melted before tossing in another handful. Keep stirring! After all the cheese has been incorporated and the mixture is bubbling gently, stir in the pepper, nutmeg and the sherry. 6) Dunk spears of the cubed bread into the cheese, twirl and enjoy! If the cheese becomes too thick pour in a little warmed sauterne (or butter, if you are channeling my inner foodie).
 beef fondue:
4-5+ cups | salad oil, for cooking (vegetable, canola, corn, peanut, etc.)
1 ½ pounds | beef tenderloin, trimmed and cut into ¾ inch cubes
to serve | your chosen sauces/sidekicks (recipes below)
directions: 1) Pour the salad oil in the fondue pot to 2″ or no more than ½ full. 2) Heat to 425°F or until the oil slowly boils. 3) Spear a beef cube with your fondue fork and place it in the oil. 4) Rotate the beef so it’s evenly cooked to your desired doneness. It doesn’t take long! Dip the beef with your sauce and enjoy!
butter-browned mushrooms:
2 tablespoons | butter (my Grandmother “Nanny” insisted on Falfurrias)
2 cups | fresh mushrooms, sliced
directions: 1) Melt butter in a skillet over medium-high heat. 2) Add the mushrooms and cook, stirring occasionally, until evenly browned. Season with salt and better and serve alongside the beef fondue.
 caper butter:
½ cup | butter, softened
3 tablespoons | capers, with liquid
directions: 1) Place the butter and capers, with liquid, in a small mixing bowl. 2) Beat until light and fluffy. 3) Serve alongside the beef fondue.
mustard sauce:
bottle | dijon style hot mustard (we used french’s stone ground dijon mustard)
directions: Simply squeeze the mustard into a serving bowl and use it as a dipping sauce for the beef fondue. What could be easier?
red sauce:
¾ cup | catsup
2 tablespoons | vinegar
½ teaspoon | prepared horseradish
directions: Combine all the ingredients together in a small bowl and let chill and mingle for at least 30 minutes. You’ve just made a tangy dipping sauce for the beef fondue. I used leftovers on a homemade hamburger and it was great for french fry dipping!
From the simple to the savory and everything in between, I hope you have fun creating your own special fondue tastes and memories to last a lifetime!
Betty’s Son
Founder and “Nostalgic Food Blogger” of Betty’s Cook Nook
I’m still on the hunt for what publication these recipes came from (below). I recognize the font and some of the type treatments and I think this likely hails from the 1970s or possibly the 60s. The fabulous food of skiing!

A Scan Of Mom’s Fondue Recipes


A Scan Of The Insert Inside My Vintage Fondue Pot
sausage stroganoff finale
Posted: December 29, 2020 Filed under: casseroles and one-dish meals, meats poultry and fish | Tags: chili powder, egg noodles, green pepper, salt, sausage, sour cream, sugar, tomatoes, water, white onion Leave a comment Hit Me Baby One More Time
Ladies and gentlemen, fasten your seatbelts – we’re on for another taste bud adventure compliments of this sausage stroganoff recipe!
This isn’t the first time I’ve waxed on about stroganoff (it’s the fourth time to be precise) but it may be the last. Sadly I think this is the final stroganoff recipe in my Mom’s cookbook. As the last Betty’s Cook Nook meal of the year this dish marked the perfect culinary dismount to a wacky and wild 2020!
So What Makes This Recipe A Classic?
Well, a couple of things. For starters I’m 99% confident this recipe hails from an early 1980s Southern Living magazine clipping; I recognize the recipe’s font (see the original clipping below)!
Secondly I incorporated a hidden weapon ingredient which you can learn more about below: the Wendish noodle is a blast from the past and it has a special connection to this recipe and the people of Texas. Incoming story below!
Tip: If you just prefer the recipe please fast-scroll to the Foodie Tips section below. If you want to enjoy a random family story about early Texas in the 1800s, please grab your favorite beverage and read on!
A Little Bit About Dime Box
It all started harmlessly with a random pic my Cousin Alison texted of a likely relative “Adolph Hannes” who surely lived in the greater Dime Box, Texas area. Dime Box is the birthplace of my Maternal Grandmother “Nanny” who was ironically also one of my bestest of friends when I was a kid. Dime Box isn’t a big city – in fact even today it’s an unincorporated community of about 1,100 residents. But for the European immigrants who claimed it as home, they found Dime Box a small but magnificent place that rests on the eastern Texas prairie offering big sky views and wide open spaces that could cultivate new beginnings.
 After a few online queries I learned Adolph’s picture was from a 1961 book “Texas Wends – Their First Half Century,” authored by Lillie Moerbe Caldwell.
Texas Wends tells the magnificent story of how in 1854 the Wendish people of Lusatia (east Germany and southern Poland) fled to Texas in search of religious and political freedom. After 3 months at sea on the Ben Nevis clipper ship they disembarked in the port city of Galveston and ventured by wagon and foot to Serbin, Texas which is just a few minutes drive from Dime Box and 69 miles from where I live today. The story of the Wends is wild and wondrous and sadly 1 in 8 of the 588 crammed ship voyagers lost their lives on their journey to Texas. I had hoped to connect the Wends to my nuclear family (was I Wendish?) but after receiving the book I quickly combed through the Ben Nevis’ ship manifest only to find no surnames that I recognized. Regardless, Adolph’s picture proved my family was friends of the Wends!
There on page 80 of Texas Wends was a picture of Adolph Hannes that became a remarkable key to a chapter in my life that has connected the past with the present! Adolph shared a surname with my grandmother “Nanny’s” husband Harry Hannes and there in the pic Adolph was enjoying a “dram” with his friend Henry Kruemcke. I quickly and luckily discovered a hardbound copy of the book on eBay and it’s now in my library. I did some Ancestry.com research and discovered that Adolph is my Grand Uncle! #MicDrop
 Into The Car We Went
Soon after geeking out on our family lineage Cousin Alison and I decided to travel to Dime Box and nearby Serbin to inspect a few things. We visited the Hannes-Old Dime Box cemetery where we saw several headstones bearing our family’s surnames (Hannes and Hejtmancik). It was surreal being in the very origin of our Texas roots! A 20-minute ride from Dime Box landed us just outside Giddings in Serbin. We visited the Texas Wendish Heritage Museum, its next door historic painted St. Paul Church and while taking in the historic sights we learned about black wedding dresses, the art of decorating Wendish Easter Eggs and low and behold we scored the glorious egg noodles that are made on site and that I used in this recipe!
We’ve made two trips back thus far and are planning a third. We’ll return to the Dime Box Heritage Society Museum where we gratefully discovered family photos and artifacts with ease. And of course no trip would be complete without paying our respects at the Heritage Museum where I plan to reunite the Texas Wends book to the Memorial Library of its author, Lillie Moerbe Caldwell.
So there you have it – how a little noodle has great big ties to this recipe and newly-discovered great chapters of my family history! I never underestimate the power of food.
Foodie Tips
❤ The Wendish noodles are about 3 inches in length and have an al dente (“to the tooth”) texture that I love. No soggy noodles here! Don’t live near Serbin, Texas? No worries – you can score your noodles online!
❤ I cooked the Wendish noodles separately according to the package instructions then poured the stroganoff on top to serve. On my next go of this recipe I think I’ll add the uncooked noodles and let them simmer in the stroganoff per the original recipe instructions below – they will likely absorb more of the tasty stroganoff flavor.
❤ Fan of the stroganoff? Luckily there are a few more you can try out here on Betty’s Cook Nook. Click and scroll down!
i. Time
Total prep: About 45-60 minutes.
 ii. Ingredients
1 pound | bulk pork sausage
1 cup | white onion, finely chopped
1 cup | green pepper, finely chopped
16 ounce can | diced organic canned tomatoes (Kirkland)
8 ounces | sour cream
1 cup | water
1 tablespoon | sugar
2 teaspoons | kosher salt
2 teaspoons | chili powder
8 ounces | egg noodles (Wendish noodles if you can)
 iii. What To Do
1. In a skillet over medium heat combine sausage, onion and green pepper and stir until the sausage is brown and the onion is tender. Drain off the pan drippings.

 2. In a separate bowl combine the tomatoes, sour cream, water, sugar and seasonings. Stir this mixture into the sausage mixture.
 3. Gently stir in the noodles. Cover and simmer about 30 minutes or until the noodles are tender. Stir occasionally.
Yield: 4-6 servings
Betty’s Son
Founder and “Nostalgic Food Blogger” of Betty’s Cook Nook

A Scan Of Mom’s Original Stroganoff Recipe Clipping
One more time: This video may not qualify as an antique or vintage… but it’s certainly retro!
playboy chili
Posted: September 26, 2020 Filed under: casseroles and one-dish meals, meats poultry and fish | Tags: bay leaf, beef stock, black pepper, cayenne, cheddar cheese, chili powder, corn bread, crackers, cumin, flour, fritos, garlic, green bell pepper, green onions, ground beef, olive oil, oregano, paprika, pinto beans, red pepper flakes, salt, sour cream, sugar, white onion Leave a comment Playboy Magazine: I Read It For The Recipes
In a bygone era when I was far too young to know what Playboy Magazine was, someone in the family scored this chili recipe. Mom hand wrote the original recipe (the scan is below) so the magazine owner must have dictated it to her. I nominate my Dad or my older brother Tim.
So after returning home after a long September Saturday of shopping for new Halloween graveyard additions, Joe and I decided that despite it being 90 degrees there was no better way to kick-off fall in Texas than with a bowl of chili. So into Mom’s cookbook my fingers strolled until they landed on this ol’ recipe. There’s no telling when this chili was last made but I can tell from the yellowed, stained paper that this recipe was used more than a few times.
While this Playboy Chili recipe isn’t my tried, true and award-winning Kiker’s Kicker Pot Licker Chili, it packed a lotta punch.
Foodie Tips
❤ Some people just see a chili recipe. I see a recipe that’s a glorious gateway to the belly! You can put chili on more than just a spoon – try it on nachos, chili baked potatoes or what’s better than chili and eggs? Not much! I can picture my Dad enjoying chili and eggs right this very minute with eyes as wide as dinner plates and a smile bigger than Texas.
If you decide to make chili baked potatoes (I wildly recommend), don’t just microwave the potato – that’s far too easy. Take a delicious tip from this blue cheese bacon potato recipe – slather the potatoes with shortening, wrap ’em in foil, and bake ’em in the oven for about an hour. The end result? The softest, most delicious baked potato you’re likely to encounter! After all a baked potato is just that – otherwise we should call them nuked potatoes!

Over The Lips… Past The Gums… Watch Out Belly Here It Comes!
❤ Important Lesson: Not since I learned why bagged grated cheese is inferior to freshly grated cheese (goodbye, wood pulp) have I realized that when making chili, plain ol’ ground beef is inferior to coarse ground beef. Why? I find that the typical ground beef often breaks down into more of a grainy mush than a hearty, bold consistency which is a chunky must when beef is the featured ingredient like when in a bowl of chili. Sadly my local grocery stores were out of coarse ground chili beef, so I resorted to the mundane. Note: You can ask your butcher to prepare it fresh for you.
❤ The typical sidekicks for the Kiker family bowl of chili include shredded cheddar cheese, Nabisco saltine crackers, corn bread, Fritos, sour cream and chopped green onions (to name a few).

Let’s Spice Things Up
i. Time
Total prep: About 90 minutes.
ii. Ingredients
2 pounds | coarse ground chili beef
½ cup (or less) | olive oil
1 cup | white onion, minced (Mom would likely chop or dice)
1 tablespoon | fresh garlic, minced (I used 5 cloves)
1 large | green bell pepper, minced (or chopped/diced)
1 large | bay leaf (I used 2)
1 teaspoon | oregano
3 tablespoons | chili powder
1 teaspoon | cumin
¼ teaspoon | cayenne
½ teaspoon | fresh cracked black pepper
1 teaspoon (or to taste) | kosher salt
1 tablespoon | paprika
½ teaspoon | red pepper flakes (aka crushed red pepper)
3 tablespoons | flour
1 ½ quart | beef stock
2 teaspoons | sugar
¼ cup (about 10) | cracker crumbs
1 cup | pinto beans, drained
to serve | your favorite sidekicks (see suggested ideas above)

My Favorite Part… The Bay Leaves
iii. What To Do
1. In a large pot over medium-high heat, sauté the meat in the olive oil.
2. Add the onions, garlic, green pepper, bay leaves, oregano, chili powder, cumin, cayenne pepper, pepper, kosher salt, paprika, and red pepper flakes. Whew!
3. Stir things well and sauté, covered, about 5 minutes.
4. Stir in the flour; blend well. Add the stock and bring to a boil. Reduce heat and simmer uncovered for 1 hour.
Note: I noticed at this stage the chili was a little too oily for my liking which is why I think you can totally dial back on the olive oil (noted above).
5. Stir in the sugar, cracker crumbs and the drained beans. Simmer 10 minutes longer.
6. Serve with your favorite sides/toppings.
Leftovers store well in the fridge or they may be frozen for impromptu meals when that cold front blows in and you’re in a flurry for some chili.
Betty’s Son
Founder and “Nostalgic Food Blogger” of Betty’s Cook Nook

A Scan Of Mom’s Playboy Chili Recipe
Ever since watching the 1989 hit When Harry Met Sally I can’t see the word “paprika” without thinking of the funny paprikash scene. “Paprikash” is a popular Hungarian paprika chicken dish. Enjoy the clip!

Another View Of Le Chili Potato
helen corbitt’s quiche lorraine
Posted: May 19, 2019 Filed under: breakfast, casseroles and one-dish meals | Tags: bacon, dry mustard, eggs, ham, light cream, nutmeg, onion, pie crust, swiss cheese Leave a comment Champagne & Lorraine
When I first met this recipe’s name I presumed Helen Corbitt was one of my Mom’s dear friends. Like many of the old recipes that found their way into my Mom’s cookbook they were often penned with a name giving a clue linking us back to the the recipe’s origin. A few curious clicks later I stumbled upon this Texas Monthly article from December 1999 (the turn of our century) that revealed who Helen was – her connection to Texas and to food. With culinary ties to the University of Texas, the Houston Country Club, Joske’s Department Store, the Driskill Hotel, and Neiman Marcus, Helen’s craft touched the hearts of many. While she may not have loved Texas from the start, the people of our great state eventually won her heart. So we can tip our hat to her for staying here and pioneering the way for better days. Helen earned the title “Tastemaker of the Century,” undoubtedly an honor for any foodie who loves cuisine and sharing it with others.
I know my Mom “Betty” loved quiche because I’ve found a handful of eggy recipes in her cookbook. I love how simple quiche is to prepare and share… and how changing 1 or 2 ingredients can magically transform the taste.
Let’s enjoy a slice of the good life and raise a toast to our “forefoodies”
~ Cling Cling / Cheers! 🍾 🍾 🍾 🍾 🍾

Foodie Tips
❤ “Light cream” always trips me up. I look for it at the grocery store and often shake my fist at the sky when I cannot find it. Sometimes called “coffee cream” or “table cream,” light cream is a tad bit higher in fat than half-and-half. So what. Who cares?
❤ While I slightly overbaked the crust, the quiche itself turned out great! Try using a silicon pie crust shield to help prevent your dough from burning. I shudder to think what my quiche would have looked like without it. #charcoal? :)

❤ I hope to become an “aficionado” at the meat counter soon. When I read “thin sliced” ham I guessed it was a thickness of 2. On the next go of this recipe I’ll try a 1.
❤ My Mom loved quiche. And if you’re still reading this post I’m guessing you do, too! Check out this recipe where I wax on about the origins of quiche and its relationship to my hometown, San Antonio.

i. Time
Total prep: About 40 minutes.
ii. Ingredients
8 inch | pie crust
4 slices | bacon, crisped and chopped
4 | thin slices of onion, sautéed
8 | paper thin slices of ham, shredded
8 | paper thin slices of swiss cheese, sliced
3 | cage free eggs
¼ teaspoon | dry mustard
1 cup | light cream, heated
a dash | nutmeg

iii. What to do
1. Prepare the pie crust according to the instructions. Mom wrote hers was baked at 450°F for about 10 minutes.
2. Sprinkle the bacon and onion over the pie crust. Add ½ of the ham then top with 4 slices of the cheese. Wait – we’re not done! This is Texas! Repeat the layering again – add the rest of the ham and the last 4 slices of cheese.
3. Beat the egg and mustard. Add the heated light cream and continue beating. Pour the egg mixture over the layers of ham and cheese. Let things “stand” for 10 minutes. Is your stomach growling yet?
4. Sprinkle a tiny bit of nutmeg on top of the quiche then bake it at 350°F until this custard is set (about 15-20 minutes).

Serves: One to a few, depending on your ability to resist deliciousness.
Betty’s Son
Founder and “Nostalgic Food Blogger” of Betty’s Cook Nook
 In Case You Missed It…
Honored in 1999 as “Tastemaker of the Century” by Texas Monthly Magazine, Helen Corbitt may not have loved Texas as much as those who were born here but she became enchanted with the unique blend of Texans and their love for food. If the stories I’ve read are true (and I bet they are), Helen had a lot to do with the culinary cultivation of our state introducing our fore-parents to artichokes, raspberries, soufflés, Texas Caviar, and surprising creations limited only by the stars.
I don’t know if my Mom, Betty, knew Helen. But I know they shared the love of great food… so Helen is as much a family member as one can wish for.
With the love of food, all things are possible. ###

A Scan Of Mom’s Quiche Lorraine Recipe
kim’s loaded cauliflower casserole
Posted: February 25, 2019 Filed under: casseroles and one-dish meals, sides | Tags: bacon, cauliflower, cheddar cheese, chives, mayonnaise, sour cream Leave a comment Cauliflower Power
This recipe comes to Betty’s Cook Nook via my Niece Kimberly.
Halloween 2018 proved to be the perfect time for Kim and her fiancé Chris to come for a visit. They were both on the keto diet, being just two months before their wedding date. Kim raved about this dish and was so excited to make and share it with us.
After tasting her loaded cauliflower casserole creation, we understood why – we could each easily devour the entire casserole! This dish reminded me so much of loaded mashed potatoes, but it’s low in carbs, the hallmark of the ketogenic diet. And it only calls for six ingredients!
I’m parking this recipe here at my Mom “Betty’s” Cook Nook because it’s a family favorite and Mom would wholeheartedly approve! Plus, now I know where to turn whenever I get a hankering for bacon, cheese, sour cream, and mayo delight.
i. Time
Total prep: About 45 minutes.
ii. Ingredients
6-8 strips | bacon, cooked and crumbled
1 large head (about 6 cups) | cauliflower, cut up into bite-sized pieces
2 cups | sharp cheddar cheese, grated
6 tablespoons | fresh chives, chopped
½ cup | mayonnaise
½ cup | sour cream

Ladies And Gentlemen – Start Your Engines! CHEESE!
iii. What to do
1. Cook your bacon as you like (skillet or oven). Drain off the grease and set the bacon aside to cool.
2. Add the cauliflower into a large pot, fill it with water, and bring it to a boil over medium-high heat. Reduce the heat and simmer uncovered for 8-10 minutes. Drain the cauliflower and set it aside to cool.
3. Preheat your oven to 425°F. Now’s a good time to crumble your bacon.

4. Combine 1 cup of cheddar cheese, ½ of the crumbled bacon, ½ of the chives, all the mayonnaise, sour cream, and the cauliflower. Mix well.

5. Transfer the mixture into a casserole dish and sprinkle the rest of the cheese and bacon on top.
6. Place the casserole into the oven and bake it for 15-20 minutes, until the cheese is melted.
7. Remove from the oven, sprinkle the reminder of the chives on top and serve.
Serves: One to a few, depending on your ability to resist deliciousness.
Betty’s Son
Founder and “Nostalgic Food Blogger” of Betty’s Cook Nook

Kimberly ❤ Forever Loved

chicken divan
Posted: September 30, 2018 Filed under: casseroles and one-dish meals, meats poultry and fish | Tags: bread crumbs, broccoli, butter, cheddar cheese, chicken, cream of mushroom soup, curry powder, gruyere cheese, lemon juice, mayonnaise, parmesan cheese, pepper, salt, sour cream, white wine Leave a comment Divine Divan
This delicious recipe comes to my kitchen via my awesome Cousin Julie’s kitchen. Julie had the best taste in many things – art, decorating, food, and Cousins!
My Cousin Jennifer said Chicken Divan was a Sunday staple that they enjoyed quite regularly. So if you want to help create a few cherished family memories, chicken divan may be a wonderfully tasty starting place!
While the original recipe is not vintage per se it comes to our bellies via Paula Dean, so you know it’s gotta be good.
I hope you try this dish that’s been known as a classic American casserole since the 1960s. In fact, the dish has origins back much earlier to its birthplace as the signature dish of New York City’s Chatham Hotel.
“In English, the word “divan” came to mean sofa, from the council chamber’s benches. In France it meant a meeting place or great hall. It was this meaning that attracted the notice of the owners of the New York restaurant as they searched for a name that would imply continental elegance.” ~ GlutenSugarDairyFree.com
Foodie Tips
❤ Pull up a chair and let’s talk cheese. I try to refrain from buying bagged shredded cheese. For years I used it but as my hunger for knowing more about food intensified I realized I preferred freshly grated cheese vs. bagged cheese. I found it melted better and on closer inspection discovered bagged cheese has a coating on it that prevents clumping. Some posts I read said this dusty white coating was actually cellulose, which is made from wood pulp. I’m out.

❤ Is Parmesan Cheese the same thing as Parmigiano-Reggiano Cheese? You might be surprised after reading this article! And this one, too. Hint: No shaker cheese for this recipe!
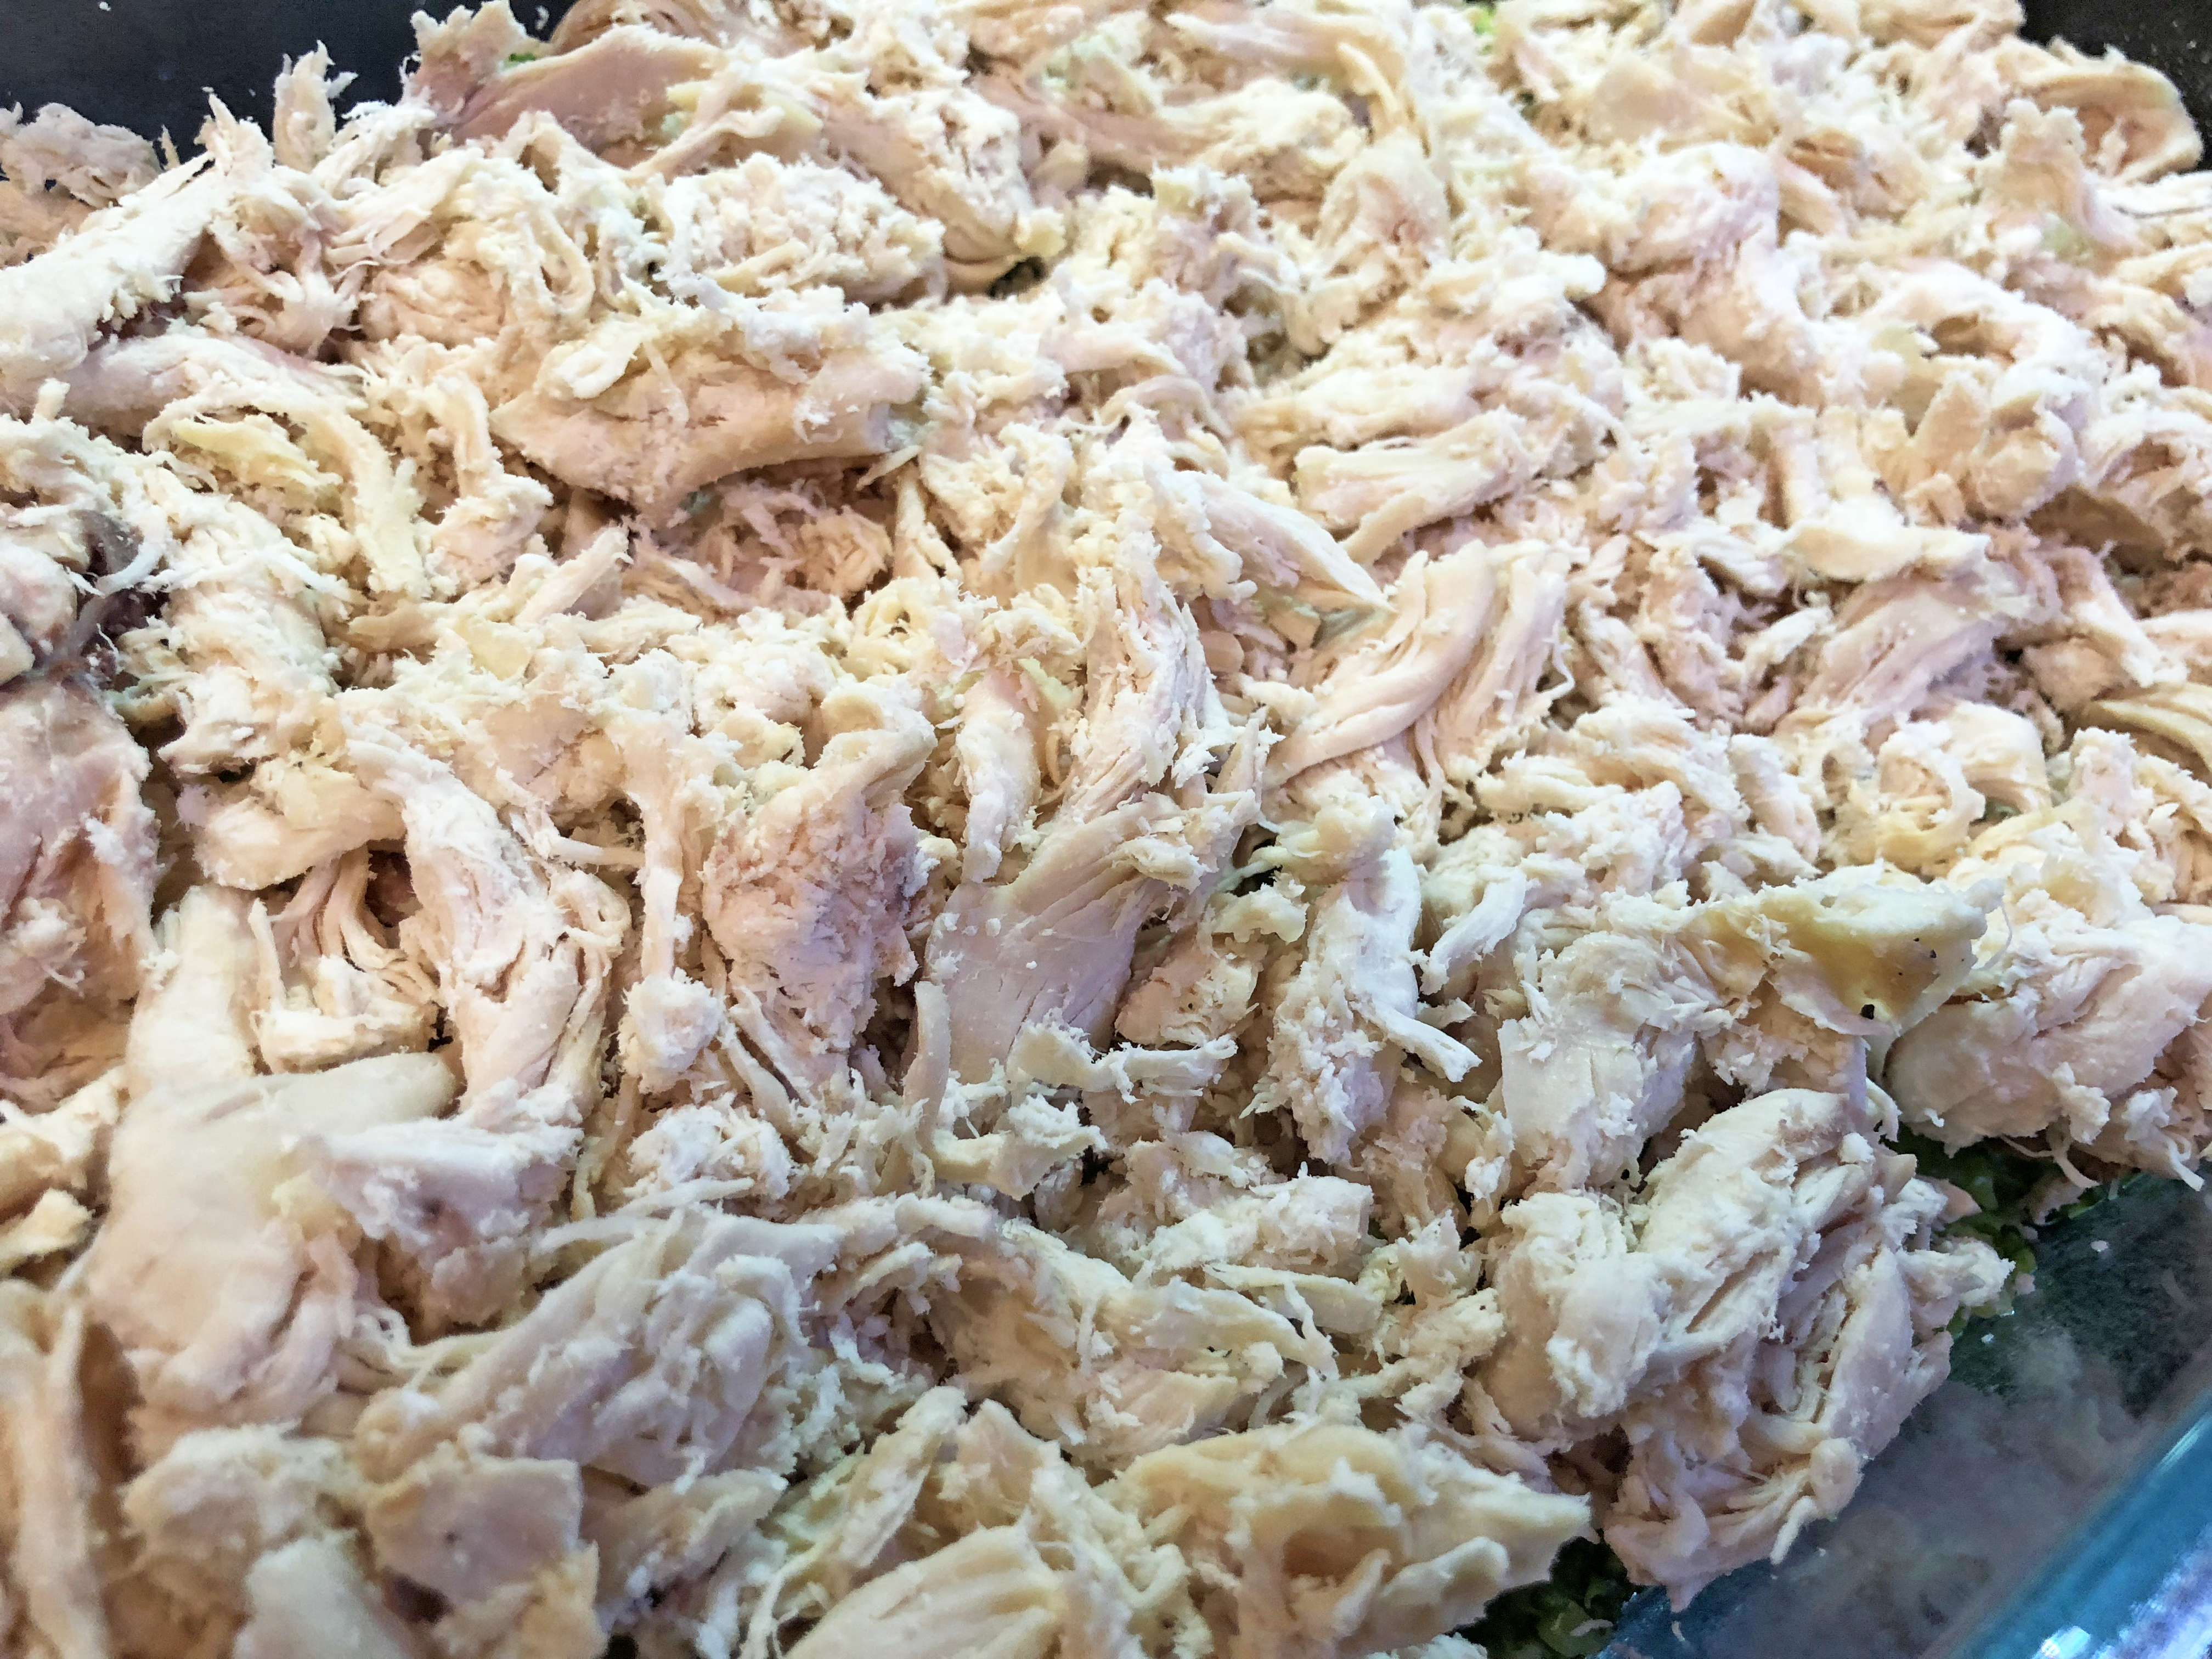
❤ In a flurry to get this dish made? We used shredded chicken from our grocery and it shaved some serious time time off of the food prep clock.
i. Time
Total prep: About an hour.
ii. Ingredients
2 10-ounce packages | frozen broccoli, chopped
6 cups | shredded chicken, cooked
2 10¾-ounce cans | condensed cream of mushroom soup
1 cup | mayonnaise
1 cup | sour cream
1 cup | sharp cheddar cheese, grated
1 tablespoon | fresh lemon juice
1 teaspoon | curry powder
to taste | kosher salt
to taste | fresh cracked black pepper
½ cup | dry white wine
½ cup | parmesan cheese, freshly grated
½ cup | soft bread crumbs
2 tablespoons | unsalted butter, melted (my Grandmother “Nanny” insisted on Falfurrias)
1-2 handfuls | gruyere or more sharp cheddar cheese, grated (optional and highly suggested)
iii. What to do
0. Preheat your oven to 350°F.
1. Remove the outer wrappers from the boxes of broccoli. Open one end of each box and microwave on full power for 2 minutes, or until thawed. Drain the broccoli into a strainer and add the shredded chicken and let rest.
2. In a medium-sized bowl, add the soup, mayonnaise, sour cream, cheddar, lemon juice, curry powder, salt and pepper to taste, and the wine. Whisk everything together to make a sauce. Transfer the broccoli-chicken mixture to the bowl with the sauce and gently mix things well using a spatula.

3. Place the mixture into an 11-inch x 7-inch casserole dish that’s been sprayed with vegetable oil cooking spray. Pat the Divan mixture down evenly and smooth with a spatula.
4. In a small bowl combine the parmesan, bread crumbs and butter and sprinkle this over the top of the Divan mixture.

5. Bake for about 30 to 45 minutes until bubbly. If desired, about halfway through baking remove from oven, top with cheese, and return to bake until toasty. Remove from oven let rest and serve!
Pairs well with a salad – enjoy!
Betty’s Son
Founder and “Nostalgic Food Blogger” of Betty’s Cook Nook

macaroni chicken salad
Posted: July 9, 2017 Filed under: appetizers, casseroles and one-dish meals, salads | Tags: celery, chicken, eggs, green peas, green pepper, macaroni and cheese dinner, mayonnaise, onion, radish, salad dressing Leave a comment
take an old friend for a new spin
Mmm MMM! I love me some macaroni and cheese!
In college I could eat an entire box of the stuff in one sitting. I still can. I’d stir in a little sour cream just to make things creamier, as if that was a missing thing.
This recipe takes the tried and true mac ‘n cheese staple and dresses it up with a bit of protein and some veggie bits to make a special dish that will tickle the tastebuds.
foodie tips
❤ I’m sure the folks at Kraft would love to know that in my entire life I don’t recall if I’ve ever had any other boxed mac and cheese but theirs. There’s something to be said for a loyal stomach! I’ve made mac and cheese from scratch a few times – here’s one of my favorites if you want to enjoy hatch-chicken mac ‘n cheese. It’s out of this world.

Could it be evil lives inside peppers? On my next slice I’ll definitely have an *extra* knife handy. Just in case.
❤ My dear friend Heather 1,000% percent loathes bell peppers. I don’t quite get her hatred for the lil’ green things. She said the flavor is wretched and it makes her burp.
I went online and discovered there is a following a folks who are convinced that “pepper faces” are evil. Hmm… they could be onto something. This one’s for you, Heather!
If by chance you fall into the “no-thank-you” green pepper camp, try substituting a can of Hatch peppers – fresh if you can. The smoky heat will warm your heart. And I know Heather loves hatch peppers so all should be good there.
❤ House divided: Joe and I argued whether this dish was better hot or cold. Since I’m the one writing the blog post, I kindly suggest you try it warm first; then chill any leftovers and see if you like the chilled version. Note: There won’t be any leftovers! :) Looks like I win again!
i. ingredients
1 package | macaroni and cheese dinner
1 cup | cooked chicken, diced
3 | hard-boiled cage free eggs, chopped
½ cup | green pepper, chopped
½ cup | green peas, cooked
¼ cup | celery, chopped
¼ cup | radishes, sliced
3 tablespoons | onion, chopped
⅓ cup | salad dressing or mayonnaise
ii. what to do
1. Make your mac ‘n cheese dinner according to the package directions. Please don’t overcook it! Soggy pasta is right up there with wet blankets and warm beer. No thank you!
2. Transfer the mac ‘n cheese to a large bowl and combine in the next seven ingredients.
3. Stir in the salad dressing and toss gently. Consume immediately or chill, if you must. :)
Yields 6-8 servings according to the original recipe… or 1-2 servings, if you enjoy bountiful mounds of food, like me.
Betty’s Son
Founder and “Nostalgic Food Blogger” of Betty’s Cook Nook

A scan of Mom’s macaroni-chicken salad recipe
At 5 cents a servings I’ll eat $2 worth, please. It’s the least I can do! The least.
Here in the 2nd commercial a wife is really bummed her husband is coming home for lunch. Sheesh! Maybe he should check the Mac n’ Cheese to make sure it’s not generously sprinkled with Rat Kill!
Here we see the Mom’s family is just too busy to stop to eat dinner together. Sounds like it’s 15 minutes for dinner to be ready… and 20 minutes of spankings for all! And there’s plenty more servings of spankings to go ’round!
quiche lorraine
Posted: December 4, 2016 Filed under: appetizers, breakfast, casseroles and one-dish meals, The Best Of The Best Recipes | Tags: bacon, cayenne pepper, cheddar cheese, cream, eggs, evaporated milk, gruyere cheese, half and half, ham, nutmeg, pie crust, salt, white pepper Leave a comment
Quiche Masterpiece
I love when I get a little history lesson along with a recipe. It’s like two treats in one! Found along with this recipe my Mom clipped from The San Antonio Express-News in 1970 the article tells an interesting story about this recipe’s creator, Ester MacMillan.
Ester helped introduce quiche to foodies near and far after it arrived at the 1968 World’s Fair dubbed “HemisFair” that was held in San Antonio. What a sight that must have been when the Tower of the Americas – an observation tower more than 600 feet tall complete with a spinning 360° top – debuted at the expo! You can read more about Ester and her story about the origin of quiche via the original recipe scan I scored from my Mom’s cookbook below. 
As a child I remember my Mom, “Betty,” talking about Quiche Lorraine and a few decades later (ahem, just a few) this was the first time I made it. I absolutely loved it! I found the recipe extremely forgiving, meaning you can adapt it to your liking by adjusting the ingredients you introduce into the custard.
Perfect for a brunch-time gathering or a couch-side treat this recipe scored a well-deserved spot in “The Best Of The Best Recipes” category (at right) … as well as my heart.
I’ve discovered more than one quiche recipe in Mom’s cookbook so I’ll be trying other versions soon and will share them here at Betty’s Cook Nook.
foodie tips
❤ “Blind baking.” I had never heard of it before until my friend and colleague Suzanne told me about it when I commented that I longed for a crispier quiche crust. Essentially all you do is pre-bake the crust a few minutes before filling it; doing so will help give it more “fluff.” I’ll give blind baking a try on the next making of this dish. And there will be a next time.
❤ I may have “accidentally” used a teeny bit more meat than the recipe suggests. In fact, Ester called for bacon or ham. A lover of both, I used bacon and ham. #Carnivore. This recipe presumes you will follow suit and use both. I scored some peppered ham at my local HEB and I loved the extra peppery kick.
❤ After reading the recipe below if you want to learn more about NIOSA and score some of the festival’s recipes, click this link and enjoy!

i. ingredients
9 inch | pie crust
¼ pound | bacon or ham (or both)
1 ½ cup | gruyere or aged cheddar, grated (I used gruyere)
5 | cage free eggs
1 cup | cream, half and half or undiluted evaporated milk
½ teaspoon | salt
dash | white pepper
dash | nutmeg, grated
1 teaspoon | dried onion
dash | cayenne pepper
ii. what to do
0. Preheat your oven to 400°F. That was easy, right?
1. Line a 9-inch pie pan or fluted quiche pan with pie crust. If you choose, blind bake the doughy crust (per above) and set aside.
2. Cook until crisp the bacon – and or – lightly brown the ham. Set the dynamic duo aside to cool off a bit.
3. Place your grated cheese (yum, cheese!) in the bottom of your pastry-lined pie pan. Over that, sprinkle your meats.
4. In a medium-sized bowl beat the eggs. Add the cream and the four seasonings and beat a little longer until everything is well-mingled. Pour this egg mixture over the cheese-meat medley.
5. Bake for about 30 minutes or until crust is golden and custard is set. Remove from oven and cool a bit to lukewarm and serve.
Yield: About 8 servings. Enjoy!
Betty’s Son
Founder and “Nostalgic Food Blogger” of Betty’s Cook Nook


A scan of Mom’s recipe for Quiche Lorraine. Click to read the interesting story!
Watch this interesting video series about HemisFair 1968! I learned much about my hometown city!

