beef strogenaugh
Posted: October 5, 2023 Filed under: meats poultry and fish | Tags: beef, black pepper, butter, flour, garlic, green pepper, heavy cream, mushrooms, red wine vinegar, rice, salt, sour cream, tobasco, white onion, wine vinegar, worcestershire sauce Leave a comment A Beefy Blast From The Past
I had seen the Betty Crocker’s Beef & Potatoes Recipe booklet in Mom’s cookbook and often just skipped past it. I typically try and find the more authentic family recipes that have been handwritten or shared by a friend.
Little did I know when I went to catalog more of Mom’s recipes I’d find a handwritten recipe inside the front page. The reversed hot pink handwriting was basically staring at me – it was staining the paper from inside the front of the booklet (pic below). While my eyes missed the penmanship for years, I would later recognize instantly it belonged to my Grandmother “Nanny.” Score!
 I had just stumbled onto two recipes undoubtedly Mom/”Nanny” shared with her Daughter/”Betty” – one for Beef Strogenaugh and one for Spanish Shrimp. I instantly recall eating Nanny’s Beef Strogenaugh as a kid and was excited I now had recipes from my maternal Grandmother. This is a plea to have your grandmothers write their favorites down now!
Sous Chef Note: I was confused by the spelling of strogenaugh but my Grandmother’s Dad was from the “old country” of Moravia (now known as the Czech Republic). She grew up speaking Czech and undoubtedly retained some of the European spellings like “strogenaugh.” I chose to leave it spelled this way to honor how she penned it. It’s the fifth strogenaugh recipe to date from Mom’s culinary legacy so I know my ancestors loved the stuff as much as I ❤ chips and queso.
Foodie Tips
❤ “Heavy beef?” This one had me stumped and I reread Nanny’s handwriting several times to try and make sure I was reading it correctly. Online research proved this is actually a real thing – a heavy beef typically has less marbling and it may be less tender as it’s made from older cattle. You can read more about heavy beef here.
❤ I was only familiar with bottled liquid Lea & Perrins Worcestershire sauce. I found in Nanny’s Spanish Shrimp recipe a sidenote calling for “David Wade Worcestershire powder.” Powder? I had never heard of such a thing! After a few clicks, I was surprised to find it still for sale online and quickly ordered a bag of it so I could stay true to how Nanny prepared this dish.
Unfamiliar with David Wade, I was surprised to learn he was from my second hometown of Dallas and he was regarded as the “Rembrandt of the Kitchen.” Mr. Wade was known as a food demonstrator (not a chef), had a nationally syndicated cooking show, and is the author of several cookbooks. Make sure and check out David Wade’s website – I learned a lot about Worcester and Worcestershire and the 5th basic taste – umami – which Worcestershire sauce brings with its distinctive, savory taste.
 ❤ Sous Chef’s Pro Tip: Not sure how to pronounce Worcestershire sauce? No worries! Just say “wash your sister sauce” and nobody will likely challenge you.
i. Time
30-45 minutes
 ii. Ingredients
½ pound (2 sticks) | falfurrias brand butter, melted (Nanny insisted on Falfurrias)
2 pounds | heavy beef, cut into 1 to 1 ½ inch cubes
1 button | garlic
¼ teaspoon | salt
generous amount | fresh cracked black pepper
2-3 drops | tobasco (someone didn’t like spice as much as me!)
1 medium | white onion
½ cup | green pepper, chopped
1 tablespoon | wine vinegar (we used red)
1 cup | mushrooms, sliced
1 cup | heavy cream
2 cups | sour cream
1 tablespoon | worcester (worcestershire) power (see tip above)
1 tablespoon | flour (optional, if sauce is too thin)
to serve | rice, prepared
iii. What To Do
1. Start your rice. While in my younger years, I feasted on Minute Instant White Rice the “new” me has a rice cooker and I prefer rice prepared in this method. Arborio, jasmine, and basmati rice are my top 3 go-to’s.
2. Melt the butter in a medium-sized pan over medium heat.
 3. Add the beef, onion, green pepper and garlic and cook it in the butter until lightly brown.
4. Add the salt, black pepper and Worcestershire powder. Stir.
5. Add the tobasco and red wine vinegar. Keep stirring and cook for about 1 minute.
6. Add the mushrooms, reduce the heat, and cook 4-5 minutes.
7. Add the heavy cream and sour cream. Stir well.
8. Cover the pan with a lid and simmer for about 5-10 minutes or until done, stirring often.
9. Serve on top of the rice and enjoy!
Servings: 4-6 (maybe more)
Betty’s Son
Founder and “Nostalgic Food Blogger” of Betty’s Cook Nook

A Scan Of My Grandmother “Nanny’s” Recipe – Bonus Spanish Shrimp Recipe Shown

11/30/21Presidente Brandy
apple cream coffee cake
Posted: September 25, 2022 Filed under: breakfast, desserts | Tags: apple, baking powder, baking soda, cinnamon, eggs, flour, margarine, salt, sour cream, sugar, walnuts Leave a comment
The Taste Of Fall
As we round out the year my senses automatically turn to fall.
There’s no better way to celebrate crisp fall mornings than with a slice of warm, cinnamony coffee cake. Walnuts, sliced apples, and sour cream will make this a memorable way to start the day.
I can see why my Mom, “Betty”, tucked this recipe in her cookbook – it’s definitely a keeper!
Foodie Tips
❤ If you follow this blog you’ll know I have an utter appreciation for butter. My grandmother “Nanny” insisted on Falfurrias brand butter, which you will see on many of the recipes here at Betty’s Cook Nook. I opted to use margarine for this recipe despite my “bold for butter” instinct. You can read more about some of the differences between margarine and butter in this WebMD article.
❤ You’ll likely want to have some melted butter (or margarine) at the ready. Drizzling some on top of the warm coffee cake just before serving is highly recommended!
i. Time
Prep: About 25 minutes prep and 40 minutes for baking.
 ii. Ingredients
½ cup | walnuts, chopped
2 teaspoons | cinnamon
1 ½ cups | sugar, reserved into ½ cup and 1 cup
½ cup | margarine, softened
2 | eggs (pasture raised a plus)
2 cups | flour
1 teaspoon | baking powder
½ teaspoon | salt
1 teaspoon | baking soda
1 cup | sour cream
1 large | apple, cored, pared, and thinly sliced (I went with granny smith)
iii. What To Do
1. In bowl #1: In a small/medium bowl mix walnuts, cinnamon, and ½ cup sugar. Set aside.
2. In bowl #2: In a medium/large bowl sift the 2 cups of flour. Next add the baking powder, salt and baking soda. Resift everything together.
3. In bowl #3: In a medium/large bowl or KitchenAid bowl cream together until fluffy the margarine and the remaining 1 cup of sugar. Beat in the eggs one at a time until everything is well blended.
4. Into bowl #3: In alternating batches beat well after each addition add some of the sifted dry ingredients to the creamed margarine-sugar mixture, then add some of the sour cream. Keep alternating the batches ending with the dry ingredients.
5. Preheat your oven to 375°F.
6. Grease a cake pan and set it aside.
7. Prepare your apple: coring, paring, and thinly slicing it. I realized while I was preparing this blog post I forgot to remove the apple skin and in all honesty, I didn’t mind the peel at all. On my next “go” of this recipe, I’ll try paring as it will likely result in a softer cake.

8. Spread half of the batter from step 4 into the prepared cake pan. Top the batter with the apples and half of the walnut mixture. Add the remaining batter on top and sprinkle with the remaining walnut mixture.
 9. Bake at 375°F for about 40 minutes, or until the coffee cake is done. Remove from oven to cool a bit. I enjoy this best warm but I tried leftovers from the fridge, which did not disappoint.

Yield: About 12 servings.
Betty’s Son
Founder and “Nostalgic Food Blogger” of Betty’s Cook Nook

A Scan Of Mom’s Original Coffee Cake Recipe
11/30/21
pumpkin cheesecake
Posted: October 30, 2021 Filed under: desserts | Tags: butter, cinnamon, cloves, cream cheese, eggs, ginger, graham crackers, pumpkin, sour cream, sugar, vanilla Leave a comment Let’s Break For Cheesecake
With all the pumpkin proliferation that erupts at the tail end of summer this is a recipe that might stand out from the orangey crowd.
I was a little leery about baking a sour cream topping but I was reminded that folks in these parts don’t mess around with sour cream. Go on – feel the force – the sour cream worked and made a nice topping for the cheesecake.
I don’t recall eating cheesecake until the 80s, when I dove fork first into a Sara Lee cheesecake. With origins to the 1940s Sara Lee cheesecake had been my north star for what a cheesecake should be. Nowadays baking a homemade cheesecake is simply worth the extra love.
Foodie Tips
❤ The amount of graham crackers caused some intense discussion in our household. We netted out that “18 double graham crackers” actually meant 18 sheets of 4-up crackers, which is 72 total crackers not 36. I guess in the golden days a single cracker was assumed to be a 2-up cracker whereas today it would likely be considered 2 separate crackers.
❤ Make sure your spring form pan is well seated and sealed. Mine leaked a little bit in the oven which I solved by placing a pan underneath to catch any drips. After a few minutes baking the cake had set and all was good!
❤ You definitely do not want to over bake your cheesecake. Over baking will likely form cracks through and on the top resulting in a dry vs. moist end result. I’m reminded that the creamiest cheesecake I ever had was the one we water bathed in our oven. To do so we just wrapped the bottom of the springform pan with foil and placed it in a small pan of water while it cooked. The extra moisture will treat you to an amazingly moist cheesecake. I’ll try this method on the next go of this recipe!
i. Time
Prep: About 1.5 hours, including 30 minutes for prep and 1 hour for baking. Most people prefer their cheesecake chilled, so cooling it in the fridge for a few hours or overnight is recommended!
ii. Ingredients
18 sheets (72 total) | graham crackers, crushed and divided
1 cup (2 sticks) | butter, melted (my Grandmother “Nanny” insisted on Falfurrias)
3 (8 ounce) packages | cream cheese
1 ½ cups | sugar
4 | cage free eggs, separated and beaten
15 ounce can | pumpkin
2 teaspoons | ground cinnamon
1 teaspoon | ground ginger
½ teaspoon | ground cloves
for the topping:
1 pint (16 ounces) | sour cream
4 tablespoons | sugar
1 teaspoon | vanilla
iii. What To Do
1. Preheat your oven to 375°F.
 2. Crush the graham crackers in a bowl by hand or you can place them in a Ziploc bag, seal, and crush with a rolling pin or simply by hand. Mix the butter into the crumbs and press it into the bottom of a spring form pan. Reserve enough of the crumbs to cover the top in step 8 below.
 3. Cream together the cream cheese, sugar, beaten egg yolks (not the whites yet!), the pumpkin and the 3 spices.
4. Hand fold-in the egg whites.
5. Pour everything into the spring form pan and bake for ~25 minutes at 375°F. I was using my gas oven and needed to add an additional 10-15 minutes for the cake to set.
 6. When done remove the cheesecake from the oven and let it cool a bit. We’re not done with the oven yet – increase the temperature to 475°F.
 7. While the cake is cooling lets make our topping by hand-stirring together the sour cream, sugar and vanilla. Pour this mixture on top of the cheese cake and return it to the oven to bake for 5 minutes at 475°F.
 8. Remove the cheesecake from the oven, sprinkle on the remaining (reserved) buttery graham cracker crumbs from above and let it cool. I let my cheesecake rest on the bottom of the springform pan insert and chilled it in the fridge for a few hours until we were ready to cut it into slices and enjoy it!

Yield: About 8-16 slices, depending on how hungry you are.
Betty’s Son
Founder and “Nostalgic Food Blogger” of Betty’s Cook Nook

A Scan Of Mom’s Pumpkin Cheesecake Recipe
11/30/21
really good tortilla soup
Posted: March 5, 2021 Filed under: appetizers, soups | Tags: beef broth, cheddar cheese, cheese, chicken breast, chicken broth, chicken thighs, cilantro, corn, fritos, fritos scoops, garlic, green bell pepper, green onions, jalapeño, olive oil, onion, sour cream, tomatoes, tortilla chips, white onion Leave a comment A Soup For The Soul
Flashback back January 2009 my dear Cousin Julie – also a fiery foodie – emailed the family this recipe for tortilla soup. Like some of my emails I filed the recipe with good intentions but it sadly got lost in my mess of an email “organization” system. Almost 10 years later I was researching old emails we sent each other and knew what I had to do. Share this with you!
As a lover of tortilla soup I posted the soup I’ve been making since the 1990s here at Betty’s Cook Nook. I wasn’t confident my time-tested soup could be unseated as my favorite and well, I was right. However, there was one magical thing about this recipe that I plan to incorporate into my own – specifically adding chicken thighs which definitely provided more flavor than its nearby neighbor, the boneless chicken breast.
Foodie Tips
❤ To make the soup very rich and hearty, Cousin Julie suggested adding a small can of refried beans and a small can of pinto beans. She noted – don’t use black beans as a substitute for either of these! If the soup turns out too spicy (is this possible?), serve it with sour cream as it will counteract the heat. More lime juice can be added at the table.
❤ Cousin Julie reminded us that she was not a fan of spicy foods and you will see that somewhat reflected in the recipe below. I, on the other hand, look for many opportunities to dial up the heat. The good news is I’ve never had a bad tortilla soup and these recipes can be adjusted in many ways to arrive at your very own favorite bowl.
❤ Looking to spice up your life? We can’t help but love our new custom fit Vertical Spice Racks that help us make the most of kitchen organization… and our cabinet space! Thanks to Joe for finding these!

i. Time
Total prep: About 90 minutes.
ii. Ingredients
the soup ingredients
1 medium | onion, chopped
1 | bell pepper, chopped
2-3 | cloves garlic, minced or pressed
1 tablespoon | olive oil
1 large box | chicken broth
1 large box | beef broth
1 large | chicken breast
2 (or more) | chicken thighs
1 large can | diced tomatoes (or fresh if you have them)
1 can | Rotel tomatoes and green chilies, diced – use mild flavor
1 can or 1 bag (frozen) | whole kernel corn (I used Trader Joe’s frozen roasted corn)
1 small can | tomato paste (or sauce, if you prefer)
1 teaspoon | ground cumin
1 teaspoon | chili powder
1 teaspoon | oregano
1 teaspoon | salt
2 teaspoons | worcestershire sauce
juice | from 1 large lime
 the toppings
1-2 | jalapeño peppers, sliced (deseeded or not!)
cheddar cheese | fresh grated by hand, if you can
dollop or two | sour cream
avocado | sliced or cubed
fresh cilantro | chopped
green onions | chopped
tortilla chips (or fritos or fritos scoops)
iii. What To Do
1. Let’s Get Cookin’
Sauté the onion, bell pepper and garlic in the olive oil until tender. Add the broths and chicken breast and thighs and cook for 20 minutes over medium heat until the meats are tender. This night marked the debut of our new Calphalon Space Saving 8 quart Nonstick Pot which worked wonders! and left plenty of room for the makin’.
 2. Let’s Get Choppin’
Remove the meats from the soup and chop them up. Return to the broth. Add all the remaining soup ingredients and simmer for at least 1 hour, preferably longer if you have the time.
3. Serve It Up
Spoon the soup into bowls and top with your chosen toppings (suggestions above)!

Let me know what you think about this tortilla soup!
Betty’s Son
Founder and “Nostalgic Food Blogger” of Betty’s Cook Nook
sausage stroganoff finale
Posted: December 29, 2020 Filed under: casseroles and one-dish meals, meats poultry and fish | Tags: chili powder, egg noodles, green pepper, salt, sausage, sour cream, sugar, tomatoes, water, white onion Leave a comment Hit Me Baby One More Time
Ladies and gentlemen, fasten your seatbelts – we’re on for another taste bud adventure compliments of this sausage stroganoff recipe!
This isn’t the first time I’ve waxed on about stroganoff (it’s the fourth time to be precise) but it may be the last. Sadly I think this is the final stroganoff recipe in my Mom’s cookbook. As the last Betty’s Cook Nook meal of the year this dish marked the perfect culinary dismount to a wacky and wild 2020!
So What Makes This Recipe A Classic?
Well, a couple of things. For starters I’m 99% confident this recipe hails from an early 1980s Southern Living magazine clipping; I recognize the recipe’s font (see the original clipping below)!
Secondly I incorporated a hidden weapon ingredient which you can learn more about below: the Wendish noodle is a blast from the past and it has a special connection to this recipe and the people of Texas. Incoming story below!
Tip: If you just prefer the recipe please fast-scroll to the Foodie Tips section below. If you want to enjoy a random family story about early Texas in the 1800s, please grab your favorite beverage and read on!
A Little Bit About Dime Box
It all started harmlessly with a random pic my Cousin Alison texted of a likely relative “Adolph Hannes” who surely lived in the greater Dime Box, Texas area. Dime Box is the birthplace of my Maternal Grandmother “Nanny” who was ironically also one of my bestest of friends when I was a kid. Dime Box isn’t a big city – in fact even today it’s an unincorporated community of about 1,100 residents. But for the European immigrants who claimed it as home, they found Dime Box a small but magnificent place that rests on the eastern Texas prairie offering big sky views and wide open spaces that could cultivate new beginnings.
 After a few online queries I learned Adolph’s picture was from a 1961 book “Texas Wends – Their First Half Century,” authored by Lillie Moerbe Caldwell.
Texas Wends tells the magnificent story of how in 1854 the Wendish people of Lusatia (east Germany and southern Poland) fled to Texas in search of religious and political freedom. After 3 months at sea on the Ben Nevis clipper ship they disembarked in the port city of Galveston and ventured by wagon and foot to Serbin, Texas which is just a few minutes drive from Dime Box and 69 miles from where I live today. The story of the Wends is wild and wondrous and sadly 1 in 8 of the 588 crammed ship voyagers lost their lives on their journey to Texas. I had hoped to connect the Wends to my nuclear family (was I Wendish?) but after receiving the book I quickly combed through the Ben Nevis’ ship manifest only to find no surnames that I recognized. Regardless, Adolph’s picture proved my family was friends of the Wends!
There on page 80 of Texas Wends was a picture of Adolph Hannes that became a remarkable key to a chapter in my life that has connected the past with the present! Adolph shared a surname with my grandmother “Nanny’s” husband Harry Hannes and there in the pic Adolph was enjoying a “dram” with his friend Henry Kruemcke. I quickly and luckily discovered a hardbound copy of the book on eBay and it’s now in my library. I did some Ancestry.com research and discovered that Adolph is my Grand Uncle! #MicDrop
 Into The Car We Went
Soon after geeking out on our family lineage Cousin Alison and I decided to travel to Dime Box and nearby Serbin to inspect a few things. We visited the Hannes-Old Dime Box cemetery where we saw several headstones bearing our family’s surnames (Hannes and Hejtmancik). It was surreal being in the very origin of our Texas roots! A 20-minute ride from Dime Box landed us just outside Giddings in Serbin. We visited the Texas Wendish Heritage Museum, its next door historic painted St. Paul Church and while taking in the historic sights we learned about black wedding dresses, the art of decorating Wendish Easter Eggs and low and behold we scored the glorious egg noodles that are made on site and that I used in this recipe!
We’ve made two trips back thus far and are planning a third. We’ll return to the Dime Box Heritage Society Museum where we gratefully discovered family photos and artifacts with ease. And of course no trip would be complete without paying our respects at the Heritage Museum where I plan to reunite the Texas Wends book to the Memorial Library of its author, Lillie Moerbe Caldwell.
So there you have it – how a little noodle has great big ties to this recipe and newly-discovered great chapters of my family history! I never underestimate the power of food.
Foodie Tips
❤ The Wendish noodles are about 3 inches in length and have an al dente (“to the tooth”) texture that I love. No soggy noodles here! Don’t live near Serbin, Texas? No worries – you can score your noodles online!
❤ I cooked the Wendish noodles separately according to the package instructions then poured the stroganoff on top to serve. On my next go of this recipe I think I’ll add the uncooked noodles and let them simmer in the stroganoff per the original recipe instructions below – they will likely absorb more of the tasty stroganoff flavor.
❤ Fan of the stroganoff? Luckily there are a few more you can try out here on Betty’s Cook Nook. Click and scroll down!
i. Time
Total prep: About 45-60 minutes.
 ii. Ingredients
1 pound | bulk pork sausage
1 cup | white onion, finely chopped
1 cup | green pepper, finely chopped
16 ounce can | diced organic canned tomatoes (Kirkland)
8 ounces | sour cream
1 cup | water
1 tablespoon | sugar
2 teaspoons | kosher salt
2 teaspoons | chili powder
8 ounces | egg noodles (Wendish noodles if you can)
 iii. What To Do
1. In a skillet over medium heat combine sausage, onion and green pepper and stir until the sausage is brown and the onion is tender. Drain off the pan drippings.

 2. In a separate bowl combine the tomatoes, sour cream, water, sugar and seasonings. Stir this mixture into the sausage mixture.
 3. Gently stir in the noodles. Cover and simmer about 30 minutes or until the noodles are tender. Stir occasionally.
Yield: 4-6 servings
Betty’s Son
Founder and “Nostalgic Food Blogger” of Betty’s Cook Nook

A Scan Of Mom’s Original Stroganoff Recipe Clipping
One more time: This video may not qualify as an antique or vintage… but it’s certainly retro!
playboy chili
Posted: September 26, 2020 Filed under: casseroles and one-dish meals, meats poultry and fish | Tags: bay leaf, beef stock, black pepper, cayenne, cheddar cheese, chili powder, corn bread, crackers, cumin, flour, fritos, garlic, green bell pepper, green onions, ground beef, olive oil, oregano, paprika, pinto beans, red pepper flakes, salt, sour cream, sugar, white onion Leave a comment Playboy Magazine: I Read It For The Recipes
In a bygone era when I was far too young to know what Playboy Magazine was, someone in the family scored this chili recipe. Mom hand wrote the original recipe (the scan is below) so the magazine owner must have dictated it to her. I nominate my Dad or my older brother Tim.
So after returning home after a long September Saturday of shopping for new Halloween graveyard additions, Joe and I decided that despite it being 90 degrees there was no better way to kick-off fall in Texas than with a bowl of chili. So into Mom’s cookbook my fingers strolled until they landed on this ol’ recipe. There’s no telling when this chili was last made but I can tell from the yellowed, stained paper that this recipe was used more than a few times.
While this Playboy Chili recipe isn’t my tried, true and award-winning Kiker’s Kicker Pot Licker Chili, it packed a lotta punch.
Foodie Tips
❤ Some people just see a chili recipe. I see a recipe that’s a glorious gateway to the belly! You can put chili on more than just a spoon – try it on nachos, chili baked potatoes or what’s better than chili and eggs? Not much! I can picture my Dad enjoying chili and eggs right this very minute with eyes as wide as dinner plates and a smile bigger than Texas.
If you decide to make chili baked potatoes (I wildly recommend), don’t just microwave the potato – that’s far too easy. Take a delicious tip from this blue cheese bacon potato recipe – slather the potatoes with shortening, wrap ’em in foil, and bake ’em in the oven for about an hour. The end result? The softest, most delicious baked potato you’re likely to encounter! After all a baked potato is just that – otherwise we should call them nuked potatoes!

Over The Lips… Past The Gums… Watch Out Belly Here It Comes!
❤ Important Lesson: Not since I learned why bagged grated cheese is inferior to freshly grated cheese (goodbye, wood pulp) have I realized that when making chili, plain ol’ ground beef is inferior to coarse ground beef. Why? I find that the typical ground beef often breaks down into more of a grainy mush than a hearty, bold consistency which is a chunky must when beef is the featured ingredient like when in a bowl of chili. Sadly my local grocery stores were out of coarse ground chili beef, so I resorted to the mundane. Note: You can ask your butcher to prepare it fresh for you.
❤ The typical sidekicks for the Kiker family bowl of chili include shredded cheddar cheese, Nabisco saltine crackers, corn bread, Fritos, sour cream and chopped green onions (to name a few).

Let’s Spice Things Up
i. Time
Total prep: About 90 minutes.
ii. Ingredients
2 pounds | coarse ground chili beef
½ cup (or less) | olive oil
1 cup | white onion, minced (Mom would likely chop or dice)
1 tablespoon | fresh garlic, minced (I used 5 cloves)
1 large | green bell pepper, minced (or chopped/diced)
1 large | bay leaf (I used 2)
1 teaspoon | oregano
3 tablespoons | chili powder
1 teaspoon | cumin
¼ teaspoon | cayenne
½ teaspoon | fresh cracked black pepper
1 teaspoon (or to taste) | kosher salt
1 tablespoon | paprika
½ teaspoon | red pepper flakes (aka crushed red pepper)
3 tablespoons | flour
1 ½ quart | beef stock
2 teaspoons | sugar
¼ cup (about 10) | cracker crumbs
1 cup | pinto beans, drained
to serve | your favorite sidekicks (see suggested ideas above)

My Favorite Part… The Bay Leaves
iii. What To Do
1. In a large pot over medium-high heat, sauté the meat in the olive oil.
2. Add the onions, garlic, green pepper, bay leaves, oregano, chili powder, cumin, cayenne pepper, pepper, kosher salt, paprika, and red pepper flakes. Whew!
3. Stir things well and sauté, covered, about 5 minutes.
4. Stir in the flour; blend well. Add the stock and bring to a boil. Reduce heat and simmer uncovered for 1 hour.
Note: I noticed at this stage the chili was a little too oily for my liking which is why I think you can totally dial back on the olive oil (noted above).
5. Stir in the sugar, cracker crumbs and the drained beans. Simmer 10 minutes longer.
6. Serve with your favorite sides/toppings.
Leftovers store well in the fridge or they may be frozen for impromptu meals when that cold front blows in and you’re in a flurry for some chili.
Betty’s Son
Founder and “Nostalgic Food Blogger” of Betty’s Cook Nook

A Scan Of Mom’s Playboy Chili Recipe
Ever since watching the 1989 hit When Harry Met Sally I can’t see the word “paprika” without thinking of the funny paprikash scene. “Paprikash” is a popular Hungarian paprika chicken dish. Enjoy the clip!

Another View Of Le Chili Potato
sour cream apple pie
Posted: October 31, 2019 Filed under: desserts, The Best Of The Best Recipes | Tags: apples, butter, cinnamon, egg, flour, nutmeg, pie crust, salt, sour cream, sugar, vanilla Leave a comment
The Apple Pie Of My Eye
Hubba! Hubba! One bite into this apple pie sent me back on a flavor adventure into my childhood – a time when apple rocked my world.
My fondest apple memories weren’t necessarily of the fruit itself, but its fruit-inspired kissin’ Cousin – Jolly Rancher Apple Candy. Awe shucks – my eyes would grow wide with these little suckers and my fingers could barely fumble fast enough to frantically tear off the plastic wrapper so I could get down to business.

It Doesn’t Appear That Jolly Rancher Made Any Apple-Inspired Print Ads Back In The Day…
So I Modified A Fire Stix Ad To Represent!
Several years ago my tongue stumbled upon my first Caramel Apple Pop and these have since become my go-to candy for Halloween trick-or-treaters. These taste like a green apple Jolly Rancher that’s been dipped in rich, lux caramel. Boy howdy! These are way easier to enjoy and I don’t have to be reminded that when it comes to my ability to handmake a caramel apple on a stick I ought to just phone a friend for help (you can read all about that hilarious foodie fail here)!
Back To Pie Basics
This recipe – like others – unassumingly sat tucked away in my Mom’s cookbook. Then this October fall rushed in. This is when Texas temperatures drop into the 90s and we reach for blankets and sweaters to keep us alive. October is a time of year when the eyes and the appetite often turn to the wonderfully warm and woodsy flavors of fall. And sitting right in the middle of it all is the fall apple.
Enjoy the mash-up of apple graced with the south’s favorite sidekick – good ol’ sour cream! Topped with a cinnamon-sugar crumb topping, the remarkable taste is probably one of the earliest sweet ‘n sour ‘n tarty foods I can remember.
Sour cream apple pie – you’re welcome in my stomach any time!
Foodie Tips
❤ I may not be an apple connoisseur but I do recognize all apples are not created equal when it’s time to bake them. Avoid the ones that get “mushy” – nobody wants those in their pie! I got lucky and picked a granny smith apple which proved to be the perfect pucker-upper for the sour cream pairing! Here’s some southern wisdom about selecting baking apples.
❤ I have a gas oven and it browned my pie a little more than I would have preferred. I used a silicon pie crust shield which will help prevent the edges of your crust from burning.
i. Time
Total prep: About 75 minutes
ii. Ingredients
for the pie:
1 | pie crust
2 tablespoons | flour
⅛ teaspoon | salt
¾ cup | sugar
1 | cage free egg
1 cup | sour cream
1 teaspoon | vanilla
¼ teaspoon | nutmeg
2 cups | apples, diced (I enjoyed this with the peel on)
for the crumb topping:
⅓ cup | sugar
⅓ cup | flour
1 teaspoon | cinnamon
¼ cup | unsalted butter, melted (tip: my Grandmother “Nanny” insisted on Falfurrias brand butter)
iii. What to do
0. Preheat your oven to 400°F. Meanwhile…
1. Line a 9-inch pie pan with the pastry.
2. In a medium-sized bowl sift together the flour, salt, and sugar.
3. Add the egg, sour cream, vanilla, and nutmeg to the flour mixture. Beat everything into a smooth, thin batter.
4. Stir in the diced apples and coat well.

5. Pour your apple batter into the pastry-lined pie pan.
6. Bake at 400°F for 15 minutes then lower temperature to 350°F and bake for 30 minutes – be careful not to over-bake!
7. Remove the pie from the oven and let it rest while we make our crumb topping.
8. Coarsely mix the four topping ingredients together in a small bowl and sprinkle them over the top of the pie. Lumpy crumbs are good here – there’s no need to pulverize the topping.

9. Raise the oven to 400°F and return the pie to bake 10 minutes to brown.
10. Remove the pie and let it rest. Warm or cold this pie is delicious!

Yield: 8-12 slices of tasty pie
Betty’s Son
Founder and “Nostalgic Food Blogger” of Betty’s Cook Nook

A Scan Of My Mom “Betty’s” Original Sour Cream Apple Pie Recipe
prune cake
Posted: August 25, 2019 Filed under: desserts | Tags: allspice, butter, buttermilk, cinnamon, cloves, eggs, flour, nutmeg, pecans, prunes, salad oil, salt, soda, sour cream, sugar, vanilla Leave a comment
Thanks To Prunes, The Wait Is Over
If you’ve made it this far into the recipe then you’re obviously open to prunes. I mean hey, they have a bad rap for being associated with senior folks… and for giving the gift of, ahem, “regularity.”
Regardless of prunes’ affiliation with the trots at least 4 generations of my family have loved knocks at bathroom humor even before it was vogue. So I’m not sure why it took me 8 years after recovering Mom’s cookbook to dive into this recipe just because of the word “prune;” I should have been drawn to it!
So in 2000 even though the FDA changed the name of prunes to “dried plums” which boosted sales I say bring on the prunes! They taste great no matter what they’re called and who doesn’t like a little regularity? Plus, it seems that California may have returned to their prune-y roots, making me want to just call this “prune-plumb cake” just to ensure I have all “loose ends” covered (pun intended).
A Prune By Any Other Name…
I smiled when I saw this came from the Fredericksburg cookbook of our family friend “Lela.” Fredericksburg, Texas holds a special place in the hearts of Texans and it’s where Texas-German charm and heritage runs as thick as our state’s love for silky queso. I had a gut instinct this cake had historical origins to our European roots and I was right! Whether it goes by spice cake, election cake or muster cake, this is a delightfully decadent and dense cake that tastes like a warm slice of sweet Christmas drizzled with butter.
What’s different about this cake is the twist of incorporating Texas pecans and vanilla, and commingling them with the fruity smash-up taste of prunes in both the cake and the icing! I think you’ll agree this cake will disappear in a jiffy!
I saw in a recent McCormick video (below): “It’s the recipes we pass on to the next generation that are the reason there’s really no flavor like home.” And I hope this recipe becomes a, ahem, “regular favorite” that hails from Fredericksburg, to Lela, to my Mom, to me, and now to you!
Foodie Tips
❤ You can enjoy prune cake tabletop warm or cold from the fridge… but my favorite is when it’s just a bit warmed from the toaster oven or the microwave.
❤ 9″ x 13″ loaf pan? This threw me because I thought loaf pans were almost as tall as they were wide. A 9″ x 13″ pan is what I call a sheet cake pan. I’m wondering if I could make a couple of 5″ x 9″ loaf pan cakes out of this!
❤ Prunes’ super power? Fiber, sorbitol, and polyphenols. They act as antioxidants and help keep a clean house.
i. Time
Total prep: 1-2 hours (includes cooling the cake)

ii. Ingredients
for the cake:
3 | cage free eggs, well beaten
1 ½ cups | sugar
1 cup | salad oil
1 teaspoon | soda
1 cup | buttermilk
1 teaspoon | cinnamon
1 teaspoon | ground cloves
1 teaspoon | allspice
1 teaspoon | nutmeg
1 cup | mashed prunes, cooked
1 cup | pecans, chopped
2 cups | flour
1 teaspoon | baking power
for the icing:
2 tablespoons | butter (my Grandmother insisted on “Falfurrias” brand butter)
1 cup | sugar
2 | cage free eggs
½ cup | sour cream
1 cup | chopped prunes
1 cup | more chopped pecans
1 teaspoon | vanilla
a pinch | salt
iii. What to do
1. In a medium bowl beat the eggs and add the sugar. Beat everything together.

Now Forming: A Blowout
2. In a measuring cup add the soda into the buttermilk, making sure to leave plenty of room as the soda will cause carbon dioxide bubbles to form, so use a larger measuring cup to prevent a “blowout,” (shown).
3. Add the salad oil, the buttermilk mixture and the the rest of the cake ingredients and mix well.
4. Bake everything in your choice of a greased 9″ x 13″ cake pan or three greased 8-inch cake pans at 350°F for about 25 minutes. When done remove the cake from the oven and let it cool on a cooling rack, if you have one.

5. After the cake has cooled a bit you can jumpstart your icing! Cream the butter and sugar and add the eggs. Mix with the remaining icing ingredients, transfer into a medium pan and cook over medium-low or medium heat until thick. Spread on cooled cake.
Serves: About 20 (sheet cake style)
Betty’s Son
Founder and “Nostalgic Food Blogger” of Betty’s Cook Nook

A Scan Of Mom’s Prune Cake Recipe
Who is Lela?
When I was growing up Lela Swinny lived at 3006 Northridge in San Antonio just 2 doors around the corner from my family’s home at 2927 Trailend.
The Swinny family was a delightful bunch of folks and my family spent almost as much time at their house as our own so naturally “fooding” was a part of the times our two families shared.
![]() Mom’s dear friend “Lela” taught me many things ~ the joy of laughing, how to swim in their awesome pool, and how to cook a memorable breakfast treat called “Egg In A Nest,” which is also posted here at Betty’s Cook Nook.
Mom’s dear friend “Lela” taught me many things ~ the joy of laughing, how to swim in their awesome pool, and how to cook a memorable breakfast treat called “Egg In A Nest,” which is also posted here at Betty’s Cook Nook.
True family fact: Back in the 1970s Lela was throwing out an old desk that caught my Mom’s eye. A coat of red paint later and it was a cornerstone in my brother Tim’s red white and blue bedroom (it was around the time of our Country’s Bicentennial celebration so red white and blue was hot). In the 1990s I painted the desk black and it’s the desk where I author this blog to this day, proving that Lela is still with us, heart and soul!
You’ll find a picture of Lela and me in the “old family photos” tab and you can search for her by name to connect with more of her spirited recipes.
Cheers to two great friends – Mom and Lela!
kim’s loaded cauliflower casserole
Posted: February 25, 2019 Filed under: casseroles and one-dish meals, sides | Tags: bacon, cauliflower, cheddar cheese, chives, mayonnaise, sour cream Leave a comment Cauliflower Power
This recipe comes to Betty’s Cook Nook via my Niece Kimberly.
Halloween 2018 proved to be the perfect time for Kim and her fiancé Chris to come for a visit. They were both on the keto diet, being just two months before their wedding date. Kim raved about this dish and was so excited to make and share it with us.
After tasting her loaded cauliflower casserole creation, we understood why – we could each easily devour the entire casserole! This dish reminded me so much of loaded mashed potatoes, but it’s low in carbs, the hallmark of the ketogenic diet. And it only calls for six ingredients!
I’m parking this recipe here at my Mom “Betty’s” Cook Nook because it’s a family favorite and Mom would wholeheartedly approve! Plus, now I know where to turn whenever I get a hankering for bacon, cheese, sour cream, and mayo delight.
i. Time
Total prep: About 45 minutes.
ii. Ingredients
6-8 strips | bacon, cooked and crumbled
1 large head (about 6 cups) | cauliflower, cut up into bite-sized pieces
2 cups | sharp cheddar cheese, grated
6 tablespoons | fresh chives, chopped
½ cup | mayonnaise
½ cup | sour cream

Ladies And Gentlemen – Start Your Engines! CHEESE!
iii. What to do
1. Cook your bacon as you like (skillet or oven). Drain off the grease and set the bacon aside to cool.
2. Add the cauliflower into a large pot, fill it with water, and bring it to a boil over medium-high heat. Reduce the heat and simmer uncovered for 8-10 minutes. Drain the cauliflower and set it aside to cool.
3. Preheat your oven to 425°F. Now’s a good time to crumble your bacon.

4. Combine 1 cup of cheddar cheese, ½ of the crumbled bacon, ½ of the chives, all the mayonnaise, sour cream, and the cauliflower. Mix well.

5. Transfer the mixture into a casserole dish and sprinkle the rest of the cheese and bacon on top.
6. Place the casserole into the oven and bake it for 15-20 minutes, until the cheese is melted.
7. Remove from the oven, sprinkle the reminder of the chives on top and serve.
Serves: One to a few, depending on your ability to resist deliciousness.
Betty’s Son
Founder and “Nostalgic Food Blogger” of Betty’s Cook Nook

Kimberly ❤ Forever Loved

chicken divan
Posted: September 30, 2018 Filed under: casseroles and one-dish meals, meats poultry and fish | Tags: bread crumbs, broccoli, butter, cheddar cheese, chicken, cream of mushroom soup, curry powder, gruyere cheese, lemon juice, mayonnaise, parmesan cheese, pepper, salt, sour cream, white wine Leave a comment Divine Divan
This delicious recipe comes to my kitchen via my awesome Cousin Julie’s kitchen. Julie had the best taste in many things – art, decorating, food, and Cousins!
My Cousin Jennifer said Chicken Divan was a Sunday staple that they enjoyed quite regularly. So if you want to help create a few cherished family memories, chicken divan may be a wonderfully tasty starting place!
While the original recipe is not vintage per se it comes to our bellies via Paula Dean, so you know it’s gotta be good.
I hope you try this dish that’s been known as a classic American casserole since the 1960s. In fact, the dish has origins back much earlier to its birthplace as the signature dish of New York City’s Chatham Hotel.
“In English, the word “divan” came to mean sofa, from the council chamber’s benches. In France it meant a meeting place or great hall. It was this meaning that attracted the notice of the owners of the New York restaurant as they searched for a name that would imply continental elegance.” ~ GlutenSugarDairyFree.com
Foodie Tips
❤ Pull up a chair and let’s talk cheese. I try to refrain from buying bagged shredded cheese. For years I used it but as my hunger for knowing more about food intensified I realized I preferred freshly grated cheese vs. bagged cheese. I found it melted better and on closer inspection discovered bagged cheese has a coating on it that prevents clumping. Some posts I read said this dusty white coating was actually cellulose, which is made from wood pulp. I’m out.

❤ Is Parmesan Cheese the same thing as Parmigiano-Reggiano Cheese? You might be surprised after reading this article! And this one, too. Hint: No shaker cheese for this recipe!
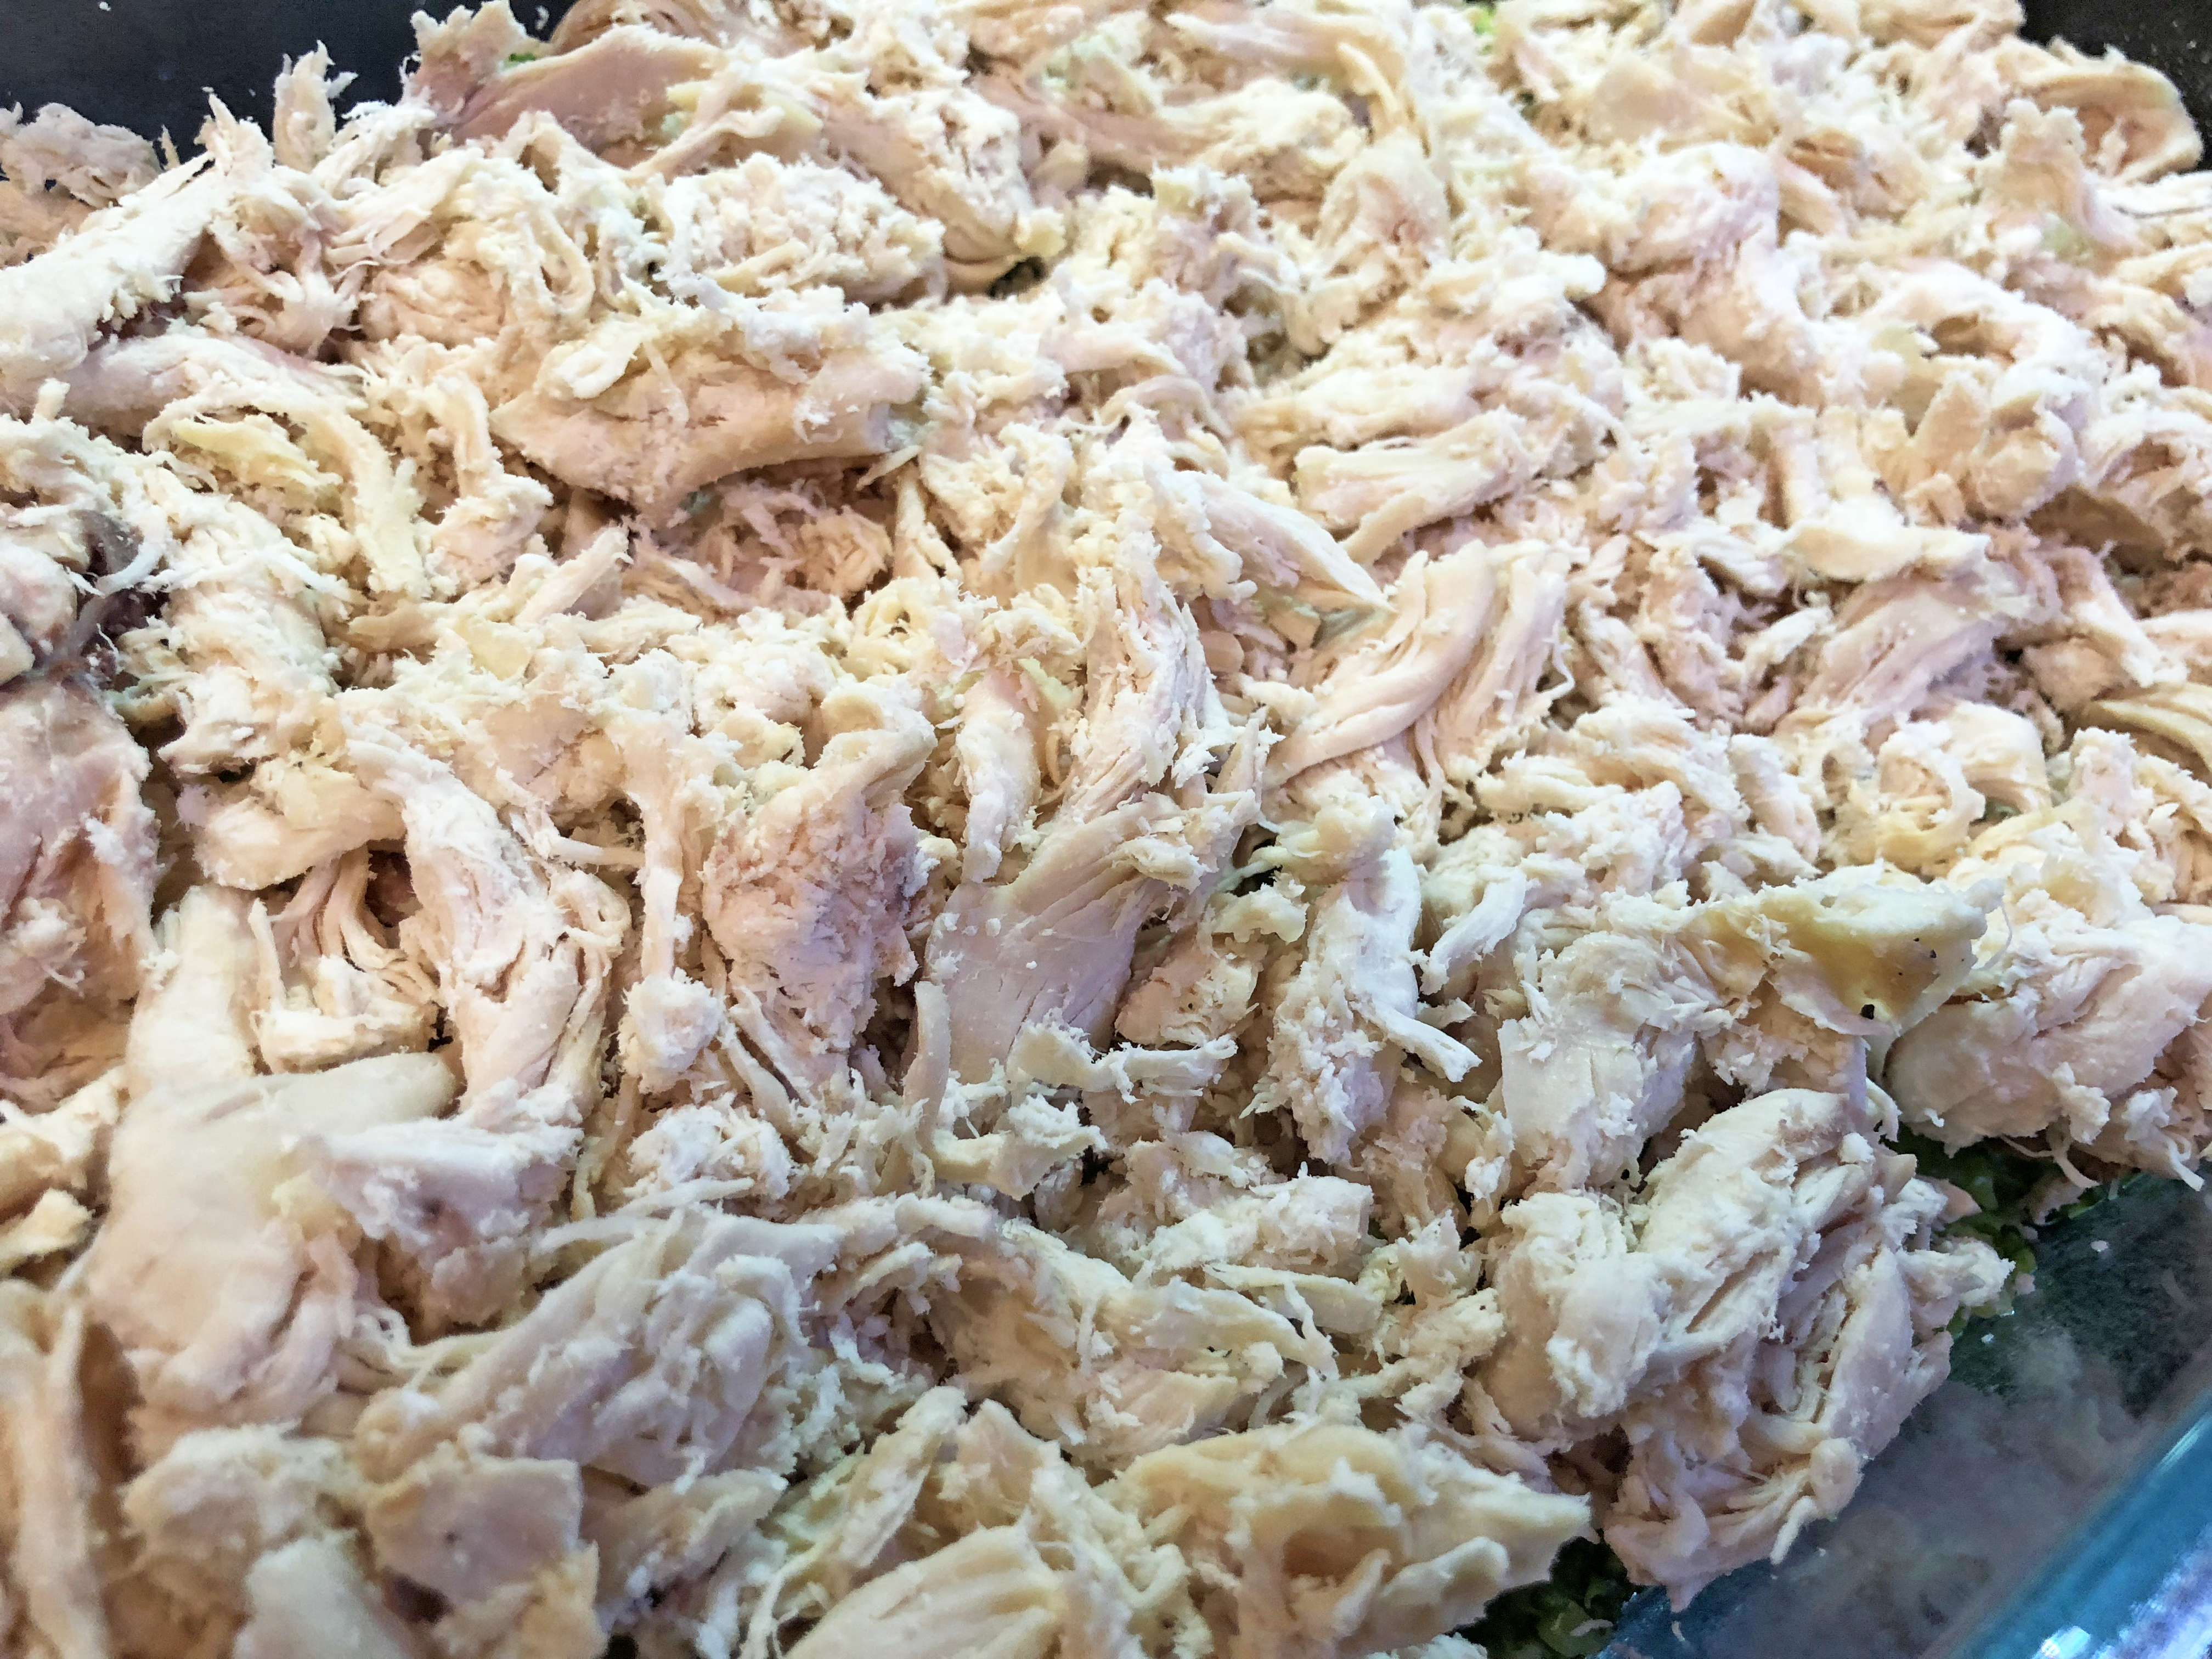
❤ In a flurry to get this dish made? We used shredded chicken from our grocery and it shaved some serious time time off of the food prep clock.
i. Time
Total prep: About an hour.
ii. Ingredients
2 10-ounce packages | frozen broccoli, chopped
6 cups | shredded chicken, cooked
2 10¾-ounce cans | condensed cream of mushroom soup
1 cup | mayonnaise
1 cup | sour cream
1 cup | sharp cheddar cheese, grated
1 tablespoon | fresh lemon juice
1 teaspoon | curry powder
to taste | kosher salt
to taste | fresh cracked black pepper
½ cup | dry white wine
½ cup | parmesan cheese, freshly grated
½ cup | soft bread crumbs
2 tablespoons | unsalted butter, melted (my Grandmother “Nanny” insisted on Falfurrias)
1-2 handfuls | gruyere or more sharp cheddar cheese, grated (optional and highly suggested)
iii. What to do
0. Preheat your oven to 350°F.
1. Remove the outer wrappers from the boxes of broccoli. Open one end of each box and microwave on full power for 2 minutes, or until thawed. Drain the broccoli into a strainer and add the shredded chicken and let rest.
2. In a medium-sized bowl, add the soup, mayonnaise, sour cream, cheddar, lemon juice, curry powder, salt and pepper to taste, and the wine. Whisk everything together to make a sauce. Transfer the broccoli-chicken mixture to the bowl with the sauce and gently mix things well using a spatula.

3. Place the mixture into an 11-inch x 7-inch casserole dish that’s been sprayed with vegetable oil cooking spray. Pat the Divan mixture down evenly and smooth with a spatula.
4. In a small bowl combine the parmesan, bread crumbs and butter and sprinkle this over the top of the Divan mixture.

5. Bake for about 30 to 45 minutes until bubbly. If desired, about halfway through baking remove from oven, top with cheese, and return to bake until toasty. Remove from oven let rest and serve!
Pairs well with a salad – enjoy!
Betty’s Son
Founder and “Nostalgic Food Blogger” of Betty’s Cook Nook


