nutmeg cake
Posted: December 31, 2023 Filed under: desserts | Tags: baking powder, baking soda, brown sugar, butter, buttermilk, coconut, eggs, flour, light cream, nutmeg, salt, sugar Leave a comment The Spice Of Life
Whether it’s sprinkled on top of your favorite wintertime drink, added to pies or cakes, or found in the form of a fancy sports move, nutmeg makes pretty much any time a special time.
Known for its warm, nutty, earthy, and slightly sweet taste, nutmeg is often found palling around with its familiar besties, cinnamon, clove, pumpkin pie spice, and allspice. Folks often say nutmeg “smells like Christmas,” and it’s not surprising that quite a few of my Mom “Betty’s” recipes call for this ingredient. From fondue to meatballs, quiche, and sweets, you can find nutmeg recipes with the ingredient search area at right (in desktop view).
Foodie Tips
❤ Buttermilk is fermented milk and if you don’t have buttermilk you can substitute it with sour milk. Sour milk? This term always throws me but if you’re in a pinch you can make “soured” milk – this article and video are quite surprising!
❤ No light cream on hand? You can substitute with a mixture of equal parts milk and heavy cream. Other options.
❤ What does nutmeg have to do with sports? My culinary skills outweigh my sports skills and this article helped me connect the two.
i. Time
About an hour
ii. Ingredients
for the cake:
½ cup | butter (my Grandmother “Nanny” insisted on Falfurrias brand butter)
1 ⅓ cups | sugar
3 | eggs
2 cups | sifted all-purpose flour
1 teaspoon | baking powder
1 teaspoon | baking soda
2 teaspoons | nutmeg
½ teaspoon | salt
1 cup | buttermilk or sour milk
for the topping:
6 tablespoons | more butter
¼ cup | light cream (Coffee mate “Original” flavor works great)
1 cup | brown sugar
½ cup | flaked coconut

3 Out Of 3 Elves Agree Nutmeg Cake Makes The Holidays Bright
iii. What To Do
1. In a mixing bowl or KitchenAid, cream together the butter and sugar until they are light and fluffy.
2. Add the eggs one at a time, beating well after each addition.
3. In a separate bowl sift together the flour, baking powder, baking soda, nutmeg, and salt. Add this to the creamed mixture with buttermilk, beating well after each addition.
4. Now is a good time to preheat your oven to 375°F.
5. Turn the batter into a greased and floured 13 x 9 x 2-inch baking pan.
6. Bake at 375°F for 25 minutes or until done.
7. Let’s make the topping. In a medium pan combine the 6 tablespoons butter, the light cream and brown sugar. Place over medium-high heat and bring it to a boil.
8. Pour the mixture over the nutmeg cake. Top with the flaked coconut and return the cake to the oven to bake for 5 minutes.
This is delicious served warm!
Yield: 8-12+ Servings, depending on size of your appetite and your willingness to share
Betty’s Son
Founder and “Nostalgic Food Blogger” of Betty’s Cook Nook

An Original Scan Of Mom’s Nutmeg Cake Recipe | Better Homes And Gardens, March 1969
Time Warp: Click on the vintage advertisements below from the 1930s – 1960s… all incorporating nutmeg!


11/30/21Presidente Brandy
beef strogenaugh
Posted: October 5, 2023 Filed under: meats poultry and fish | Tags: beef, black pepper, butter, flour, garlic, green pepper, heavy cream, mushrooms, red wine vinegar, rice, salt, sour cream, tobasco, white onion, wine vinegar, worcestershire sauce Leave a comment A Beefy Blast From The Past
I had seen the Betty Crocker’s Beef & Potatoes Recipe booklet in Mom’s cookbook and often just skipped past it. I typically try and find the more authentic family recipes that have been handwritten or shared by a friend.
Little did I know when I went to catalog more of Mom’s recipes I’d find a handwritten recipe inside the front page. The reversed hot pink handwriting was basically staring at me – it was staining the paper from inside the front of the booklet (pic below). While my eyes missed the penmanship for years, I would later recognize instantly it belonged to my Grandmother “Nanny.” Score!
 I had just stumbled onto two recipes undoubtedly Mom/”Nanny” shared with her Daughter/”Betty” – one for Beef Strogenaugh and one for Spanish Shrimp. I instantly recall eating Nanny’s Beef Strogenaugh as a kid and was excited I now had recipes from my maternal Grandmother. This is a plea to have your grandmothers write their favorites down now!
Sous Chef Note: I was confused by the spelling of strogenaugh but my Grandmother’s Dad was from the “old country” of Moravia (now known as the Czech Republic). She grew up speaking Czech and undoubtedly retained some of the European spellings like “strogenaugh.” I chose to leave it spelled this way to honor how she penned it. It’s the fifth strogenaugh recipe to date from Mom’s culinary legacy so I know my ancestors loved the stuff as much as I ❤ chips and queso.
Foodie Tips
❤ “Heavy beef?” This one had me stumped and I reread Nanny’s handwriting several times to try and make sure I was reading it correctly. Online research proved this is actually a real thing – a heavy beef typically has less marbling and it may be less tender as it’s made from older cattle. You can read more about heavy beef here.
❤ I was only familiar with bottled liquid Lea & Perrins Worcestershire sauce. I found in Nanny’s Spanish Shrimp recipe a sidenote calling for “David Wade Worcestershire powder.” Powder? I had never heard of such a thing! After a few clicks, I was surprised to find it still for sale online and quickly ordered a bag of it so I could stay true to how Nanny prepared this dish.
Unfamiliar with David Wade, I was surprised to learn he was from my second hometown of Dallas and he was regarded as the “Rembrandt of the Kitchen.” Mr. Wade was known as a food demonstrator (not a chef), had a nationally syndicated cooking show, and is the author of several cookbooks. Make sure and check out David Wade’s website – I learned a lot about Worcester and Worcestershire and the 5th basic taste – umami – which Worcestershire sauce brings with its distinctive, savory taste.
 ❤ Sous Chef’s Pro Tip: Not sure how to pronounce Worcestershire sauce? No worries! Just say “wash your sister sauce” and nobody will likely challenge you.
i. Time
30-45 minutes
 ii. Ingredients
½ pound (2 sticks) | falfurrias brand butter, melted (Nanny insisted on Falfurrias)
2 pounds | heavy beef, cut into 1 to 1 ½ inch cubes
1 button | garlic
¼ teaspoon | salt
generous amount | fresh cracked black pepper
2-3 drops | tobasco (someone didn’t like spice as much as me!)
1 medium | white onion
½ cup | green pepper, chopped
1 tablespoon | wine vinegar (we used red)
1 cup | mushrooms, sliced
1 cup | heavy cream
2 cups | sour cream
1 tablespoon | worcester (worcestershire) power (see tip above)
1 tablespoon | flour (optional, if sauce is too thin)
to serve | rice, prepared
iii. What To Do
1. Start your rice. While in my younger years, I feasted on Minute Instant White Rice the “new” me has a rice cooker and I prefer rice prepared in this method. Arborio, jasmine, and basmati rice are my top 3 go-to’s.
2. Melt the butter in a medium-sized pan over medium heat.
 3. Add the beef, onion, green pepper and garlic and cook it in the butter until lightly brown.
4. Add the salt, black pepper and Worcestershire powder. Stir.
5. Add the tobasco and red wine vinegar. Keep stirring and cook for about 1 minute.
6. Add the mushrooms, reduce the heat, and cook 4-5 minutes.
7. Add the heavy cream and sour cream. Stir well.
8. Cover the pan with a lid and simmer for about 5-10 minutes or until done, stirring often.
9. Serve on top of the rice and enjoy!
Servings: 4-6 (maybe more)
Betty’s Son
Founder and “Nostalgic Food Blogger” of Betty’s Cook Nook

A Scan Of My Grandmother “Nanny’s” Recipe – Bonus Spanish Shrimp Recipe Shown

11/30/21Presidente Brandy
apple cream coffee cake
Posted: September 25, 2022 Filed under: breakfast, desserts | Tags: apple, baking powder, baking soda, cinnamon, eggs, flour, margarine, salt, sour cream, sugar, walnuts Leave a comment
The Taste Of Fall
As we round out the year my senses automatically turn to fall.
There’s no better way to celebrate crisp fall mornings than with a slice of warm, cinnamony coffee cake. Walnuts, sliced apples, and sour cream will make this a memorable way to start the day.
I can see why my Mom, “Betty”, tucked this recipe in her cookbook – it’s definitely a keeper!
Foodie Tips
❤ If you follow this blog you’ll know I have an utter appreciation for butter. My grandmother “Nanny” insisted on Falfurrias brand butter, which you will see on many of the recipes here at Betty’s Cook Nook. I opted to use margarine for this recipe despite my “bold for butter” instinct. You can read more about some of the differences between margarine and butter in this WebMD article.
❤ You’ll likely want to have some melted butter (or margarine) at the ready. Drizzling some on top of the warm coffee cake just before serving is highly recommended!
i. Time
Prep: About 25 minutes prep and 40 minutes for baking.
 ii. Ingredients
½ cup | walnuts, chopped
2 teaspoons | cinnamon
1 ½ cups | sugar, reserved into ½ cup and 1 cup
½ cup | margarine, softened
2 | eggs (pasture raised a plus)
2 cups | flour
1 teaspoon | baking powder
½ teaspoon | salt
1 teaspoon | baking soda
1 cup | sour cream
1 large | apple, cored, pared, and thinly sliced (I went with granny smith)
iii. What To Do
1. In bowl #1: In a small/medium bowl mix walnuts, cinnamon, and ½ cup sugar. Set aside.
2. In bowl #2: In a medium/large bowl sift the 2 cups of flour. Next add the baking powder, salt and baking soda. Resift everything together.
3. In bowl #3: In a medium/large bowl or KitchenAid bowl cream together until fluffy the margarine and the remaining 1 cup of sugar. Beat in the eggs one at a time until everything is well blended.
4. Into bowl #3: In alternating batches beat well after each addition add some of the sifted dry ingredients to the creamed margarine-sugar mixture, then add some of the sour cream. Keep alternating the batches ending with the dry ingredients.
5. Preheat your oven to 375°F.
6. Grease a cake pan and set it aside.
7. Prepare your apple: coring, paring, and thinly slicing it. I realized while I was preparing this blog post I forgot to remove the apple skin and in all honesty, I didn’t mind the peel at all. On my next “go” of this recipe, I’ll try paring as it will likely result in a softer cake.

8. Spread half of the batter from step 4 into the prepared cake pan. Top the batter with the apples and half of the walnut mixture. Add the remaining batter on top and sprinkle with the remaining walnut mixture.
 9. Bake at 375°F for about 40 minutes, or until the coffee cake is done. Remove from oven to cool a bit. I enjoy this best warm but I tried leftovers from the fridge, which did not disappoint.

Yield: About 12 servings.
Betty’s Son
Founder and “Nostalgic Food Blogger” of Betty’s Cook Nook

A Scan Of Mom’s Original Coffee Cake Recipe
11/30/21
peachy blueberry cobbler
Posted: June 29, 2022 Filed under: desserts, The Best Of The Best Recipes | Tags: baking powder, blueberries, butter, flour, ice cream, milk, peaches, salt, sugar Leave a comment  A Summertime Flavor Sensation
When I was a kid, if I heard the word “cobbler” I knew there was likely going to be an extra-special treat coming my way!
After a trip to Dime Box, Texas in the 70s, our San Antonio garden was graced with dewberry plants that were given to us by a family member who had them growing on their farm. What’s a dewberry? Dewberries are very similar to blackberries and they are a favorite berry for many Texans. One of my favorite dessert memories of all time was when my Mom, “Betty,” made dewberry cobbler with he fruit coming from our very own garden!
We liked this peachy blueberry cobbler because it wasn’t overly sweet and it sure tastes great for summertime meals. This recipe is super-easy to make and if you have a kid or two handy they could even join-in on the fun. As Joe said, “this is definitely a recipe worth sharing!” So here it is from us to you!
This recipe hails from a July 1980 Southern Living magazine from a special “Summer Glows With Peaches” section devoted to great culinary ways to create with peaches. You can see the original recipe scan below and you’re getting extra peach recipes to boot!
 Foodie Tips
❤ You can easily adapt this recipe by using your favorite fruits. Pineapple, strawberries, blackberries, raspberries, etc. would all make a tasty cobbler.
❤ If peaches and blueberries are in season I suggest using fresh. You can also substitute frozen berries that have been thawed, rinsed, and drained.
i. Time
Prep: About 75 minutes, including 15 minutes for prep and 1 hour for baking.
ii. Ingredients
1 cup | sugar
1 cup | all-purpose flour
2 teaspoons | baking powder
1 teaspoon | salt
1 cup | milk
⅓ cup | butter, melted (my grandmother insisted on falfurrias brand butter)
3 medium | peaches, peeled, sliced and lightly sugared
⅔ cup | fresh or frozen blueberries
to serve | Bluebell vanilla ice cream (optional but recommended!)
 iii. What To Do
1. Preheat your oven to 350°F.
2. Prepare the peaches, sprinkle with sugar and set aside.
3. Combine the dry ingredients (sugar, flour, baking powder and salt) in a medium-sized mixing bowl.
4. Combine the milk and melted butter and pour over the dry ingredients. Mix everything until it’s smooth.
5. Pour the batter into a greased 12″ x 8″ x 2″ glass baking dish.

6. Spread the sliced peaches evenly over the top of the batter and then top with the blueberries.
7. Bake for 50-60 minutes or until the batter rises through the fruit and the top is golden brown.

8. Serve your Peachy Blueberry Cobbler warm and top with ice cream, if preferred.

Yield: About 8-10 servings.
Betty’s Son
Founder and “Nostalgic Food Blogger” of Betty’s Cook Nook

A Scan Of Mom’s Original Peachy Blueberry Cobbler Recipe
11/30/21
fondue
Posted: December 25, 2021 Filed under: casseroles and one-dish meals, meats poultry and fish | Tags: apple, beef tenderloin, black pepper, butter, capers, flour, french bread, garlic, horseradish, mushrooms, nutmeg, pear, salad oil, sauterne, sherry, swiss cheese, vinegar Leave a comment For The Love Of Fondue
Growing up the youngest of three boys meant I was the small, quiet one. The one who listened and watched to center stage from afar.
Older me tells younger me that’s AOK because it helped me make the most of the precious time I had with my parents. I was able to soak it all in and pick up on a few tips I still hold near and dear to this day… including a few memories like the joy of fondue.
I’m not sure the first time I had fondue but I was likely about the age of 12.
My family would gather around the spirited fondue pot to create our meal using individual spears, dipping things in hot oil or cheese and then a sauce or two that Mom would create. The simple things.
Little did I know back then but fondue was more than “just that.” Fondue marries food with the imagination and to me, there’s nothing better!
 A Christmas Story
This summer I stumbled upon a random search result for a vintage fondue pot that reminded me of the one my parents had. I knew what I had to do.
A few days later the electric fondue set arrived at my home and I set it aside for a special day when I would unveil the 1970s fondue pot. It sat in the dark since then as most of 2021 brought some challenging times caring for – and parting with – my secondary shadow in the form of my yellow Lab, Harley.
This Christmas Day I thought there was no better way to round out the year than by revving-up the fondue pot and reliving and sharing this foodie form with my family and here, with you.
If you’re not already a fondue fan, I hope you give fondue a try! It’s remarkably simple and will treat you to the joy of this dish with Swiss origins!
 Fon-dos and Don’ts
❤ Fon-do try these out: I’ve included a variety of my favorite recipes that caught my Mom’s eye below – cheese and beef fondue and a few sauce suggestions, including butter-browned mushrooms, caper butter, mustard, and a red sauce! Scans of the recipes from her cookbook are also below.
❤ This is a dish of variety! Fon-don’t just try one dip or item to be dipped – go for a range of flavor and put the power of the fondue pot to the fullest! For the cheese fondue you can try cubed pears or apples as an appetizer entry or a dessert dismount! I don’t have two pots but I’m only guessing that cooked beef fondue dipped into cheese fondue is a double fondue delight!
❤ Fon-do check out some of the vintage fondue pots I found strolling on Etsy. They’re hot so get yours before they’re gone!
 i. Time
Total prep: There’s no rush here in the land of fondue, but I’d allow at least 90 minutes – 2 hours for the whole shebang.
 ii. Ingredients + directions
cheese fondue:
to dunk | french bread, torn or cut into bite-size pieces
¾ pound (about 3 cups) | swiss cheese, cut into thin julienne strips
1 tablespoon | flour
1 clove | garlic, halved
1 ¼ cups | sauterne (a sweet french wine)
dash | fresh cracked black pepper
dash | nutmeg
3 tablespoons | dry sherry


cheese fondue directions: 1) I toasted up my bread a bit to give it a little crunch. Toasting the bread on a foil-lined pan for 5 minutes at 350°F should do the trick. 2) Toss the cheese with the flour to coat and set aside. 3) Rub the inside of the fondue cooker vigorously with the cut surface of the garlic clove. 4) Add the sauterne and warm it just until air bubbles start to rise. Don’t cover and do not let it boil. 5) With a wood or silicon spatula stir constantly from this step forward and in the same direction – a process known as “shear thinning” which helps the cheesy fondue become thinner. Add a handful of cheese strips and wait until the cheese has melted before tossing in another handful. Keep stirring! After all the cheese has been incorporated and the mixture is bubbling gently, stir in the pepper, nutmeg and the sherry. 6) Dunk spears of the cubed bread into the cheese, twirl and enjoy! If the cheese becomes too thick pour in a little warmed sauterne (or butter, if you are channeling my inner foodie).
 beef fondue:
4-5+ cups | salad oil, for cooking (vegetable, canola, corn, peanut, etc.)
1 ½ pounds | beef tenderloin, trimmed and cut into ¾ inch cubes
to serve | your chosen sauces/sidekicks (recipes below)
directions: 1) Pour the salad oil in the fondue pot to 2″ or no more than ½ full. 2) Heat to 425°F or until the oil slowly boils. 3) Spear a beef cube with your fondue fork and place it in the oil. 4) Rotate the beef so it’s evenly cooked to your desired doneness. It doesn’t take long! Dip the beef with your sauce and enjoy!
butter-browned mushrooms:
2 tablespoons | butter (my Grandmother “Nanny” insisted on Falfurrias)
2 cups | fresh mushrooms, sliced
directions: 1) Melt butter in a skillet over medium-high heat. 2) Add the mushrooms and cook, stirring occasionally, until evenly browned. Season with salt and better and serve alongside the beef fondue.
 caper butter:
½ cup | butter, softened
3 tablespoons | capers, with liquid
directions: 1) Place the butter and capers, with liquid, in a small mixing bowl. 2) Beat until light and fluffy. 3) Serve alongside the beef fondue.
mustard sauce:
bottle | dijon style hot mustard (we used french’s stone ground dijon mustard)
directions: Simply squeeze the mustard into a serving bowl and use it as a dipping sauce for the beef fondue. What could be easier?
red sauce:
¾ cup | catsup
2 tablespoons | vinegar
½ teaspoon | prepared horseradish
directions: Combine all the ingredients together in a small bowl and let chill and mingle for at least 30 minutes. You’ve just made a tangy dipping sauce for the beef fondue. I used leftovers on a homemade hamburger and it was great for french fry dipping!
From the simple to the savory and everything in between, I hope you have fun creating your own special fondue tastes and memories to last a lifetime!
Betty’s Son
Founder and “Nostalgic Food Blogger” of Betty’s Cook Nook
I’m still on the hunt for what publication these recipes came from (below). I recognize the font and some of the type treatments and I think this likely hails from the 1970s or possibly the 60s. The fabulous food of skiing!

A Scan Of Mom’s Fondue Recipes


A Scan Of The Insert Inside My Vintage Fondue Pot
peanut butter slice-and-bake cookies
Posted: September 30, 2021 Filed under: desserts | Tags: baking soda, corn syrup, flour, milk, peanut butter, salt, shortening, sugar Leave a comment The Cookies With A Twist
This recipe hails from the August 1982 issue of Southern Living, so it’s been patiently waiting in Mom’s cookbook for almost 40 years. I had seen the recipe many times flipping through my Mom’s cookbook, but “slice and bake” never really motivated me to explore more… until I later had a hankering for peanut butter and then I found myself headed to the store to get some fresh milk.
This recipe was surprising for a couple of reasons: 1) “Slice and bake.” The bake part threw me because you *don’t* bake these in your oven – you nuke them in your microwave! Making cookies in the microwave is a new one for me but not surprising given that the microwave was a rage making its debut in most American kitchens in the late 1970s. 2) The end result tasted like a homemade nutter butter cookie which was one of my favorites growing up in the 70s and 80s. Enjoy some vintage nutter butter memories below!
I was quite leery that these cookies would turn out great, but boy they sure did, and after the final schmear of peanut butter tucked between two homemade cookies I was thinking I had just made a fresh homemade home run nutter butter cookie sandwich!
Foodie Tips
❤ You can reduce the recipe ingredients by half; we were on a diet that week but it didn’t stop me from diving in! We wrapped and stored some of the remaining dough in the fridge for a couple of days and it lasted just fine.
❤ If you’re in a hurry to dive in you can chill the “baked” cookies in your fridge ~10 minutes to reduce the on counter cooling time. I did this and the end result was surprisingly crunchy.
❤ I laughed when I saw instructions to manually turn the cookies. We are lucky to live in a time when the microwave does the turning for us! I was also curious if these might do well in an air fryer and will try that on the next adventure with this recipe.
i. Time
Total prep: About 3.5 hours, including a 2-3 hour chill timeout in the fridge.
ii. Ingredients
1 ¾ cups | all-purpose flour
½ cup | sugar
½ teaspoon | baking soda
¼ teaspoon | salt
½ cup | shortening
¾ cup (or more) | creamy peanut butter, divided
¼ cup | light corn syrup
1 tablespoon | milk
 iii. What To Do
1. In a medium-sized bowl combine the flour, sugar, baking soda, and salt. With a pastry cutter (or if you don’t have one try a KitchenAid stand mixer) cut in the shortening and ½ cup of the peanut butter until the mixture resembles a coarse meal. Stir in the corn syrup and the milk.
 2. Shape the dough into a long roll, about 2 inches in diameter. Wrap the roll in waxed paper and chill it in the fridge 2 to 3 hours, or until firm.
 3. Unwrap the roll and cut the dough into ¼ inch slices. Place 6 slices at a time on a wax paper-lined plate, arranging them in a ring.
4. Microwave the slices at medium heat (50% power) for 2 to 4 minutes or until the cookies are dry on the surface. If you don’t have a rotating microwave dish, manually rotate the dish at 1-minute intervals to promote “even baking.”
5. Slide/transfer the wax paper with the cookies from the oven onto your kitchen counter and let them cool for 2 minutes. Remove the cookies from the wax paper and place them on a wire rack to completely cool. Repeat the procedure with the remaining dough.
 6. Here’s the magical part: spread half the cookies with a schmear of peanut butter. I was generous with my schmear! Top with a remaining cookie slice on each to form your cookie sandwich.
Yield: About 2 dozen.
Betty’s Son
Founder and “Nostalgic Food Blogger” of Betty’s Cook Nook
Let’s have a peek at some vintage ads:


A Scan Of Mom’s Original Slice And Bake Cookie Recipe Clipping
texas kolaches
Posted: October 6, 2020 Filed under: breakfast, desserts | Tags: apricots, butter, egg yolks, eggs, flour, milk, salt, shortening, sugar, water, yeast Leave a comment  Where Old Meets New
In the golden days of past my Mom “Betty” subscribed to Southern Living magazine and to this day, so do I.
In SL’s most recent September 2020 issue they gave claim to the seven “Cooks of the Year” for their culinary innovations. I, too, love innovators for without them we’d be eating the same thing day after day… (fancy some porridge and toast?). But I will continue the foodie fight to honor those in the rear view mirror – the ones who fed our bellies when we were kids. Our Mothers, Grandmothers, and best of all – the ones likely before we can remember. These are the true culinary geniuses who made mealtime a favorite time without the aid of modern kitchen contraptions like microwaves, silicon utensils, immersion blenders, air fryers, and bluetooth ovens (I’m guilty of owning all these items)!
The Missing Piece
With more than 200 recipes here at BettysCookNook.com, the Southern Living kolache recipe fills a missing puzzle piece in my Mom’s culinary legacy; Mom’s kolache filling recipes (below) had been in her cookbook without their much needed pastry crust recipe until now! And since kolaches hold a near and dear place in the heart of Texans right up there with queso, big hair, and cowboy boots you have plenty of recipe ideas thanks to my Mom’s 3 filling recipes below – apricot, prune, and cottage cheese. In addition, there’s a streusel recipe to top things off!
Thanks to Southern Living Magazine I’m gratefully able to connect the past with the present. I hope you try and enjoy this recipe! Thank you, Lydia Faust, for sharing a slice of the great days with the rest of us! #HatsOff
While I usually veer off the I-35 interstate in the city of West, Texas for some of the world famous savory Czech Stop kolaches (bless you, jalapeño, sausage and cheese) let’s not forget their sweet kolache friends! I didn’t make all 3 fillings but the apricot filling was my first pick and it was dy-no-mite! I’d suggest starting with that one first.
This is a recipe for those with a little kitchen grit. I found kolaches much easier to make than homemade tamales (which had me sore for 2 days) or puffy tacos (Joe does most of that work) and you’ll have plenty of leftovers to share with friends and family. I’ll never bat an eye at how much these cost as I found hand making these to be a labor of pure love.
Foodie Tips
❤ This kolache recipe made 53 of the yeasty delights and ironically Mom’s apricot filling recipe filled them all to the last scoop!
❤ It’s customary for the kolaches to touch while baking; they often come out of the oven square-ish. I had giant stainless baking sheet pans so my kolaches came out round. Despite the tweaked shape they tasted the same!
❤ To form the hole we wrapped a spice jar with saran wrap to prevent the dough from sticking and pressed away (shown).
❤ I remember growing-up my Mom’s friend “Miss Joyce” called some savory pigs in a blankey “koblasniky.” Turns out she wasn’t kidding – the sweet treats are kolaches and the savory friends koblasniky. I was happy to confirm in this article. My Moravian ancestors would be proud I stand corrected! Here in Texas folks just refer to anything wrapped in the billowy dough kolaches and we all know what’s involved.

i. Time
Total prep: Your entire morning. (includes 60 minutes for baking)
ii. Ingredients
for the kolache pastry:
1 ½ tablespoons | active dry yeast
½ cup | warm water (105°F – 115°F)
¼ cup | unsalted butter (my Grandmother “Nanny” insisted on Falfurrias)
¼ cup | vegetable shortening (Crisco)
1 ½ cups | lukewarm whole milk (100°F – 105°F)
6 cups | all-purpose flour, divided, plus more for the prep surface
¾ cup | evaporated milk
⅓ cup | granulated sugar
1 tablespoon | kosher salt
2 large | cage free eggs
1 large | cage free egg yolk
5 tablespoons (or more) | unsalted butter, melted
for the apricot filling:
1 pound | dried apricots
¾ cup | granulated sugar
3 tablespoons | unsalted butter
for the streusel:
½ cup | granulated sugar
½ cup | flour
½ cup | butter, melted
iii. What To Do
1. Sprinkle the yeast over warm water and stir to combine. Set aside. Place the butter and shortening in a large microwavable bowl, and microwave on high until melted, about 1 minute. Stir well to combine. Whisk in the lukewarm whole milk and yeast mixture.
2. Transfer the mixture to the bowl of a stand mixer fitted with a whisk attachment. Sift 3 cups of the flour over mixture. Add the evaporated milk, sugar, salt, eggs, and egg yolk. Beat on medium speed until smooth, about 1 minute. Remove the whisk attachment and replace it with a dough hook. Gradually add the remaining 3 cups flour; beat on medium speed until dough is smooth, about 2 minutes. Let the dough sit at room temperature for 5 minutes; then beat it on medium-high speed until the dough is elastic and very smooth, about 10 minutes.
 3. Brush the top of dough with 1 tablespoon of the melted butter. Cover the bowl with plastic wrap and let the dough rise until it has doubled in size, about 1 hour. Punch the dough down and cover it again and let the dough rise until doubled, about 30 more minutes.

4. Generously flour a work surface. Gently roll dough out to a 1-inch-thick rectangle (about 18 x 14 inches). Using a 2-inch round cutter, cut out circles, and place them 1 inch apart on parchment paper-lined baking sheets. Brush the tops with 2 tablespoons of the melted butter. Let rise in a warm place until almost doubled in bulk, about 20 minutes.


 5. While the dough rises, let’s make the apricot kolache filling. Prepare the apricots according to the package directions (I boiled mine in water for about 10 minutes then drained the water). Add the sugar and butter. I used an immersion blender to get things soft but I was careful not to over process it; you still want it a bit thick (not like apple sauce) and a few chunks here and there are OK. Set the filling aside.
6. Let’s continue on by making the posypka (streusel topping): Use a pastry cutter (suggested) or your fingers to combine the sugar, flour, and butter to form a crumbly texture. Store this in the refrigerator until ready to use.
7. Back to the kolaches! Make one small indentation in the center of each dough circle (see tip above or you can use your fingers), and fill each with about 1 tablespoon of the filling. Sprinkle each kolache with 1 to 2 teaspoons of the posypka. Let the kolaches rise until they’ve doubled in size, 20 to 30 minutes.

8. Preheat your oven to 350°F. Position racks in top third and lower third of oven. Bake the kolaches until golden brown, about 20 minutes, rotating baking sheets between top and bottom racks halfway through the baking time. Remove from oven. Brush the kolaches with the remaining 2 tablespoons melted butter and transfer them to wire racks. Cool completely, about 30 minutes.

You may be tired by this point so sit back and enjoy a few bites of the sweet life!
Betty’s Son
Founder and “Nostalgic Food Blogger” of Betty’s Cook Nook

A Scan Of Mom’s Original Apricot Kolache Filling Recipe

A Scan Of Mom’s Prune Kolache Filling Recipe

A Scan Of Mom’s Cottage Cheese Kolache Filling Recipe

A Scan Of Mom’s Streusel Topping Recipe
playboy chili
Posted: September 26, 2020 Filed under: casseroles and one-dish meals, meats poultry and fish | Tags: bay leaf, beef stock, black pepper, cayenne, cheddar cheese, chili powder, corn bread, crackers, cumin, flour, fritos, garlic, green bell pepper, green onions, ground beef, olive oil, oregano, paprika, pinto beans, red pepper flakes, salt, sour cream, sugar, white onion Leave a comment Playboy Magazine: I Read It For The Recipes
In a bygone era when I was far too young to know what Playboy Magazine was, someone in the family scored this chili recipe. Mom hand wrote the original recipe (the scan is below) so the magazine owner must have dictated it to her. I nominate my Dad or my older brother Tim.
So after returning home after a long September Saturday of shopping for new Halloween graveyard additions, Joe and I decided that despite it being 90 degrees there was no better way to kick-off fall in Texas than with a bowl of chili. So into Mom’s cookbook my fingers strolled until they landed on this ol’ recipe. There’s no telling when this chili was last made but I can tell from the yellowed, stained paper that this recipe was used more than a few times.
While this Playboy Chili recipe isn’t my tried, true and award-winning Kiker’s Kicker Pot Licker Chili, it packed a lotta punch.
Foodie Tips
❤ Some people just see a chili recipe. I see a recipe that’s a glorious gateway to the belly! You can put chili on more than just a spoon – try it on nachos, chili baked potatoes or what’s better than chili and eggs? Not much! I can picture my Dad enjoying chili and eggs right this very minute with eyes as wide as dinner plates and a smile bigger than Texas.
If you decide to make chili baked potatoes (I wildly recommend), don’t just microwave the potato – that’s far too easy. Take a delicious tip from this blue cheese bacon potato recipe – slather the potatoes with shortening, wrap ’em in foil, and bake ’em in the oven for about an hour. The end result? The softest, most delicious baked potato you’re likely to encounter! After all a baked potato is just that – otherwise we should call them nuked potatoes!

Over The Lips… Past The Gums… Watch Out Belly Here It Comes!
❤ Important Lesson: Not since I learned why bagged grated cheese is inferior to freshly grated cheese (goodbye, wood pulp) have I realized that when making chili, plain ol’ ground beef is inferior to coarse ground beef. Why? I find that the typical ground beef often breaks down into more of a grainy mush than a hearty, bold consistency which is a chunky must when beef is the featured ingredient like when in a bowl of chili. Sadly my local grocery stores were out of coarse ground chili beef, so I resorted to the mundane. Note: You can ask your butcher to prepare it fresh for you.
❤ The typical sidekicks for the Kiker family bowl of chili include shredded cheddar cheese, Nabisco saltine crackers, corn bread, Fritos, sour cream and chopped green onions (to name a few).

Let’s Spice Things Up
i. Time
Total prep: About 90 minutes.
ii. Ingredients
2 pounds | coarse ground chili beef
½ cup (or less) | olive oil
1 cup | white onion, minced (Mom would likely chop or dice)
1 tablespoon | fresh garlic, minced (I used 5 cloves)
1 large | green bell pepper, minced (or chopped/diced)
1 large | bay leaf (I used 2)
1 teaspoon | oregano
3 tablespoons | chili powder
1 teaspoon | cumin
¼ teaspoon | cayenne
½ teaspoon | fresh cracked black pepper
1 teaspoon (or to taste) | kosher salt
1 tablespoon | paprika
½ teaspoon | red pepper flakes (aka crushed red pepper)
3 tablespoons | flour
1 ½ quart | beef stock
2 teaspoons | sugar
¼ cup (about 10) | cracker crumbs
1 cup | pinto beans, drained
to serve | your favorite sidekicks (see suggested ideas above)

My Favorite Part… The Bay Leaves
iii. What To Do
1. In a large pot over medium-high heat, sauté the meat in the olive oil.
2. Add the onions, garlic, green pepper, bay leaves, oregano, chili powder, cumin, cayenne pepper, pepper, kosher salt, paprika, and red pepper flakes. Whew!
3. Stir things well and sauté, covered, about 5 minutes.
4. Stir in the flour; blend well. Add the stock and bring to a boil. Reduce heat and simmer uncovered for 1 hour.
Note: I noticed at this stage the chili was a little too oily for my liking which is why I think you can totally dial back on the olive oil (noted above).
5. Stir in the sugar, cracker crumbs and the drained beans. Simmer 10 minutes longer.
6. Serve with your favorite sides/toppings.
Leftovers store well in the fridge or they may be frozen for impromptu meals when that cold front blows in and you’re in a flurry for some chili.
Betty’s Son
Founder and “Nostalgic Food Blogger” of Betty’s Cook Nook

A Scan Of Mom’s Playboy Chili Recipe
Ever since watching the 1989 hit When Harry Met Sally I can’t see the word “paprika” without thinking of the funny paprikash scene. “Paprikash” is a popular Hungarian paprika chicken dish. Enjoy the clip!

Another View Of Le Chili Potato
mrs. copple’s banana bread
Posted: April 20, 2020 Filed under: breakfast, desserts | Tags: baking powder, baking soda, banana, butter, cream cheese, eggs, flour, lemon juice, salt, sugar 6 Comments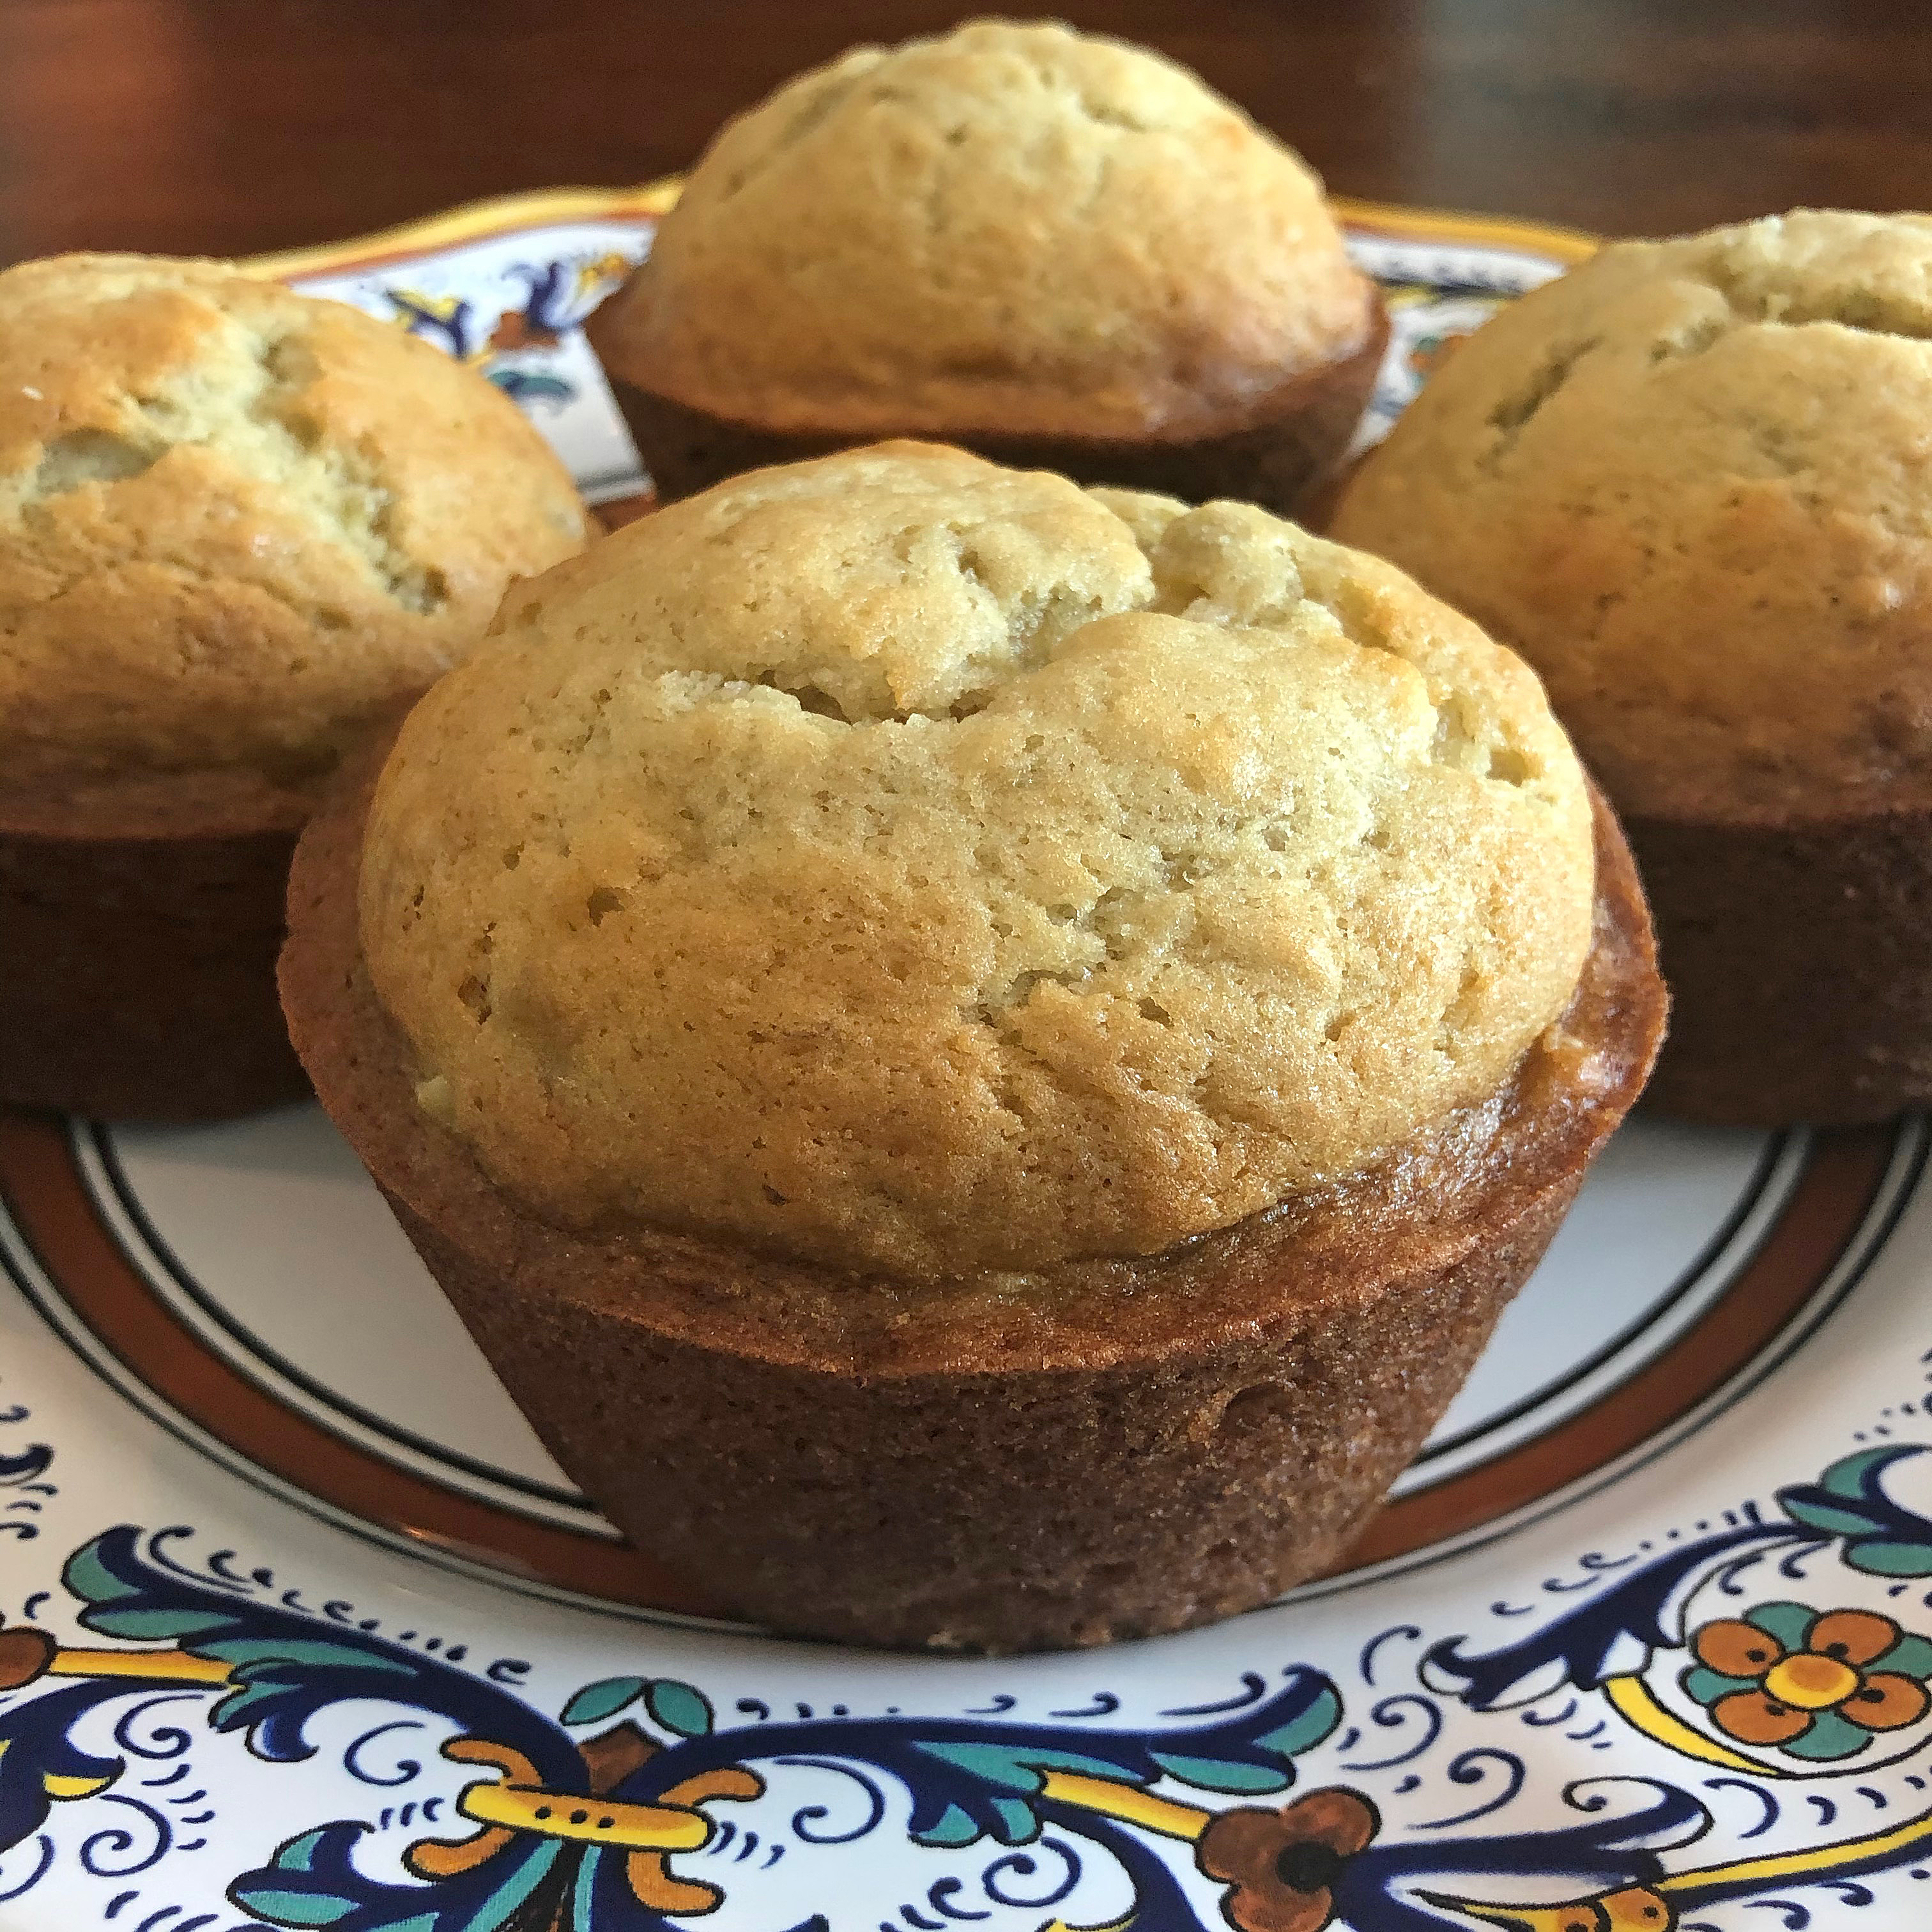 Breadwinners
Back in 2012 I posted this banana nut loaf cake recipe (which is really just banana bread, disguised with the “loaf” part). It has remained a family favorite to this day and I look forward to making muffins out of my Aunt’s recipe on our next go.
My friend Suzanne will be delighted to hear that Mrs. Copple’s banana bread recipe doesn’t call for nuts (shorthand for pecans, here in Texas). She and I continuously arm wrestle over whether banana bread should or should not have nuts and since I’m the fingers behind this post we know that “with nuts” wins. Yay me! But I will admit – this banana bread packs a great taste. Even if the nuts were forgotten! 🤠
Regardless of nuts and butter (or no nuts and margarine), I think we can agree we’re “breadwinners” when we enjoy a baked banana slice of home sweet home.
Foodie Tips
❤ You won’t see a bread picture in this post. Why? We decided to gift some of this sweetness to neighbors and thought muffins would be more portable than slices of bread. This recipe yielded 6 large (jumbo) muffins and 12 mini muffins (yielding 18 in total). For the large muffins you’ll cook about 25 minutes at 350°F; the minis were ready in 15 minutes.
❤ In addition to arm wrestling over nuts or no nuts, you can add butter vs. margarine to the list! We used butter in this recipe vs. margarine. Sorry, Mrs. Copple! During the 2020 COVID-19 lockdown all we stock is unsalted butter so that’s what we used. There are some culinary differences between butter and margarine that you might want to read more about in this post.
❤ I thought it interesting lemon juice was called for to prevent turning the bananas brown (the bananas wouldn’t be sitting out for a long period of time). But I’m not willing to risk a brown banana bread so in the lemon juice went!
❤ To serve, my favorite way to enjoy a bread or muffin is “toasty warm” with a smear of plain Philadelphia Whipped Cream Cheese on top! There’s nothing better!

i. Time
Total prep: About 40-75 minutes (depending on whether you make mini muffins or bread)
ii. Ingredients
1 stick | margarine or unsalted butter (my Grandmother “Nanny” always insisted on Falfurrias brand butter)
1 cup | sugar
2 | cage free eggs, at room temperature
1 teaspoon | baking soda
1 teaspoon | baking powder
1 teaspoon | salt
2 cups | flour, sifted
3 | bananas
a tad | fresh lemon juice

iii. What To Do
1. In a mixing bowl cream the margarine (or butter) and sugar together.
2. Add the room temperature eggs and beat well.
3. In a separate bowl add the baking soda, baking powder, and salt to the flour.
4. Mash the bananas and sprinkle them lightly with a squeeze or two of fresh lemon juice to keep them from turning brown.
5. Mix together the flour mixture and the creamed butter/sugar mixture.
6. With a spatula hand mix-in the bananas and your banana batter is ready!
7. Decide whether or not you’re making bread or muffins. Prepare your chosen baking pan (we used nonstick spray) and fill ¾ full.
8. Bake for 50-60 minutes for the bread; about 25 minutes for jumbo-sized muffins; or 15 minutes for the mini muffins… all until an inserted toothpick comes out clean.
Betty’s Son
Founder and “Nostalgic Food Blogger” of Betty’s Cook Nook

A Scan Of My Mom “Betty’s” Coveted Banana Bread Recipe (in her handwriting)
spinach crepes with ham sauce
Posted: February 9, 2020 Filed under: breakfast, sauces | Tags: baking powder, butter, dijon mustard, eggs, flour, green onions, half and half, ham, milk, nutmeg, onion, salt, spinach, swiss cheese, water Leave a comment Crepes Of Great
Whether they’re sweet or savory, crepes have always intrigued and intimidated me.
I’m always afraid I can’t keep them in tact (no crepe skills) which is likely why only recently I found the encouragement to make them later in life. Thanks to this recipe my partner Joe showed me firsthand that crepes are actually doable without a fancy crepe pan or cooking classes!
Crepes originate from Western France and they are celebrated every February 2nd during e jour des crêpes or “the day of the crepe.”
Growing up I don’t remember eating these crepes with ham sauce but I do remember dreaming about every kid’s treasured hammy story “Green Eggs and Ham.” You can enjoy a video short of that below.
This recipe hails from my Cousin Julie’s kitchen and I’m pegging it at circa 1970s or 80s. Julie wrote the recipe on her special stationery to my Mom “Betty,” and I’ve included a scan of the original below!
Foodie Tips
❤ If you’re fast-tracking this recipe while the crepe batter is chilling in the fridge you can continue on to prepare the filling and ham sauce. Or you can enjoy a mimosa and some conversation with your friends and family while the party crescendoes.
❤ Depending on the size of your pour you may have some leftover crepes. You can refrigerate them to enjoy a day or two later or… we froze a few of ours by placing a sheet of waxed paper between each crepe then placing the stack in an air tight, freezer-safe bag.
i. Time
Total prep: About 90-120 minutes (including 1 hour for the crepe batter to chill)
ii. Ingredients
for the crepes:
1 cup | flour, sifted
½ teaspoon | baking powder
¼ – ½ teaspoon | salt
2 | cage free eggs
1 cup | milk
¼ teaspoon | nutmeg
for the filling:
1 cup | onion, chopped
2 tablespoons | unsalted butter (give Falfurrias brand a try per my Grandmother “Nanny”)
10 ounce package | frozen spinach, thawed
1 cup | swiss cheese, diced
2 teaspoons | dijon mustard
¼ teaspoon | salt
¼ teaspoon | nutmeg
for the ham sauce:
2 tablespoons | Mmmmmore unsalted butter
2 tablespoons | flour
¼ teaspoon | salt
1 cup | milk
½ cup | half and half
2 teaspoons | dijon mustard
1 ½ cups (about ½ pound) | ham, cooked and diced
to garnish | green onions, chopped (optional)
iii. What To Do
Prepare The Crepes: 1) Combine by hand the flour, baking powder, and salt in a medium-sized bowl and set aside. 2) In a separate bowl beat the eggs and milk together then add to the flour mixture. 3) Refrigerate 1 hour or overnight, if you’re preparing this ahead of time. 4) Over medium-low heat (we used gas) melt some butter in a flat pan or crepe pan. 5) Pour 3 tablespoons of the batter all at once into the heated pan and let it sit a few seconds. Carefully rotate, flip and cool a bit more on the second side. Transfer the crepe onto a plate until ready to use. Continue cooking and stacking until you’ll all out of batter, making about 12 crepes. If you’re lucky the crepes will turn out something like this:

Prepare The Filling: 1) In a larger pan over medium-high heat, sauté the onion in butter. 2) Add the spinach and cook until the moisture evaporates. 3) Stir in the swiss cheese, mustard, salt and nutmeg. 4) Preheat your oven to 350°F. 5) Fill the crepes using ¼ cup of the filling for each, roll ’em up, and arrange them in a lightly buttered casserole dish. You can place them in a chafing dish if you’re serving right away.

Prepare The Ham Sauce: 1) In your crepe pan, melt butter and stir in the flour and salt. 2) Add the milk, half and half and the mustard. 3) Cook, stirring constantly until thickened. 4) Fold in the diced ham and heat until warm. 5) Pour the ham sauce over the crepes and “warm up the whole business at once in the oven” as Julie wrote below, about 10-15 minutes or heat in the chafing dish (per above).
We sprinkled some chopped green onions on top to serve (optional).
Enjoy!
Betty’s Son
Founder and “Nostalgic Food Blogger” of Betty’s Cook Nook


Who is “Julie Mueller”
Julie is more than my 1st Cousin; she has been like my 2nd Mom. Julie had a heart bigger than Texas and I can still hear her signature “infectious” laugh which would instantly brighten any room.
Julie was known for having the impeccable skill of a master entertainer and with that the tastiest of foods were always to be enjoyed by all! I always thought of Julie as my very own Martha Stewart as she was crafty well beyond the kitchen across mediums like needlepoint, painting, furniture restoration and being a wonderful decorator and story teller. Whether by design or accident, Julie taught me to never underestimate the loving power and influence of a Cousin!
You’ll find several of Julie’s recipes, photos, and stories here at Betty’s Cook Nook. Her memory lives on in those who knew her and I’m happy to share some of her favorite foods with you.

